If you think professional plumbers can get the job right for you, think again!
When it comes to your own home, no one is going to be quite as meticulous as the owner – you. When I bought my first condo property, I needed someone to reroute the drain piping as I had wanted to relocate the kitchen sink from its original intended position. I searched through the classifieds in the newspaper and called a number – what looked like professional plumbing service.
Advertisement
So, this is the story.
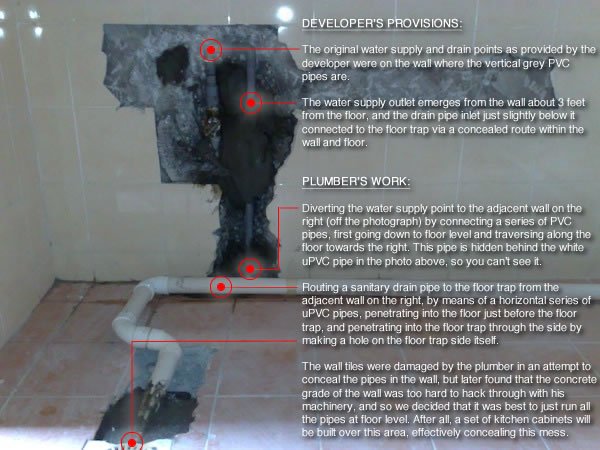
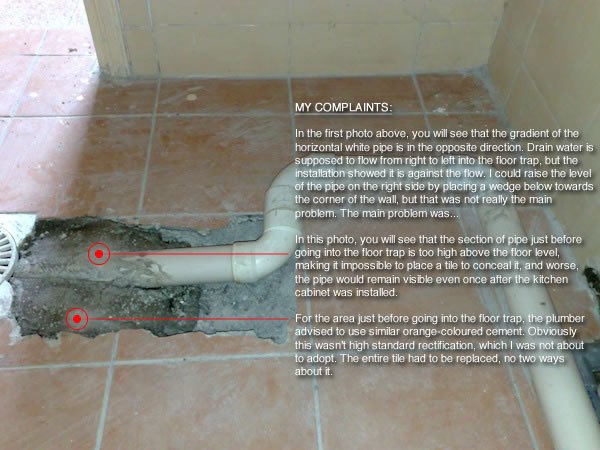
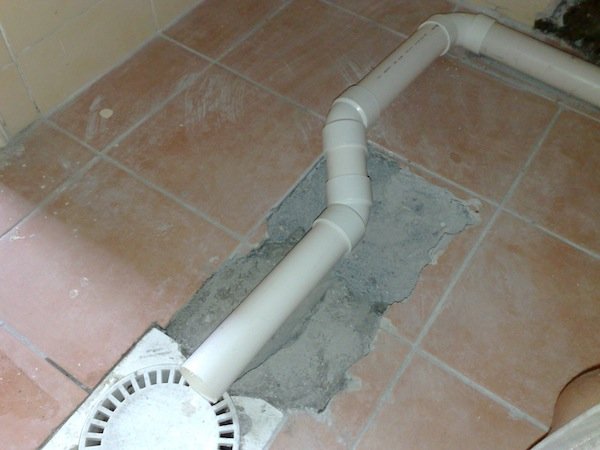
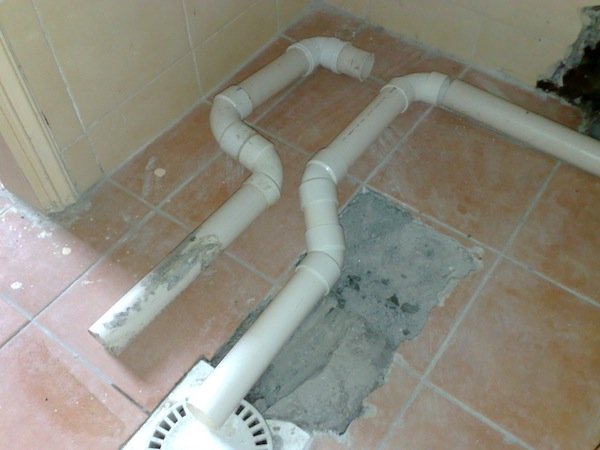
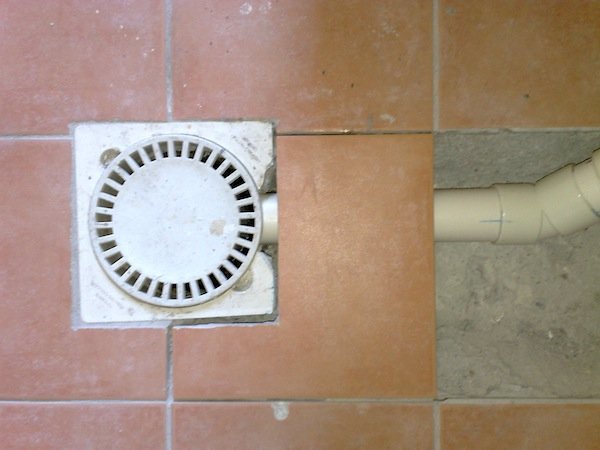
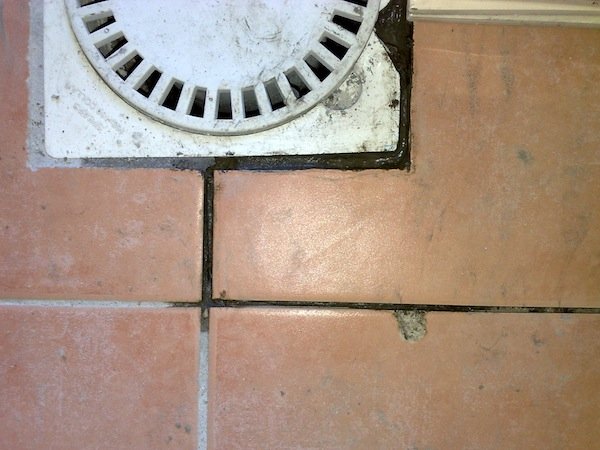
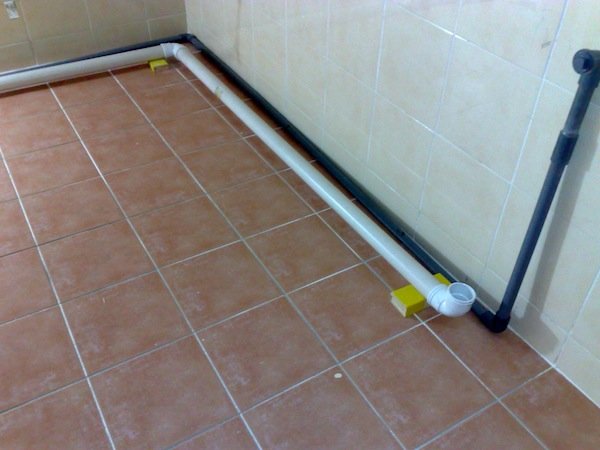
What you see in the photos above were the final installation by the “professional” plumber. He said this was the best he could do. I disagreed, paid him the RM250 he requested for with much hesitation, and got to thinking how I could fix this in my own DIY way. Looking back, this situation had forced me into learning more about hydraulics and plumbing, and had set me on a path to a lot more DIY work on water pipes and plumbing around the house in the months and years to come.
So, this is what I did to fix it.
Fixing the Problem – Removing Existing Work
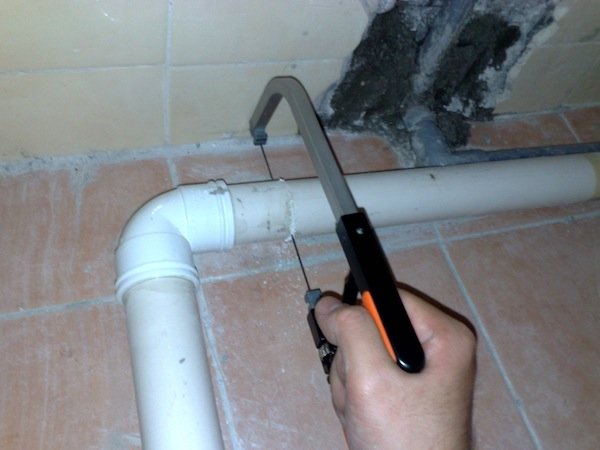
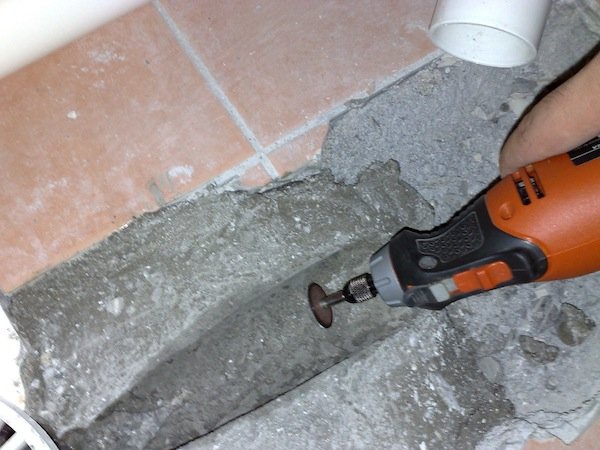
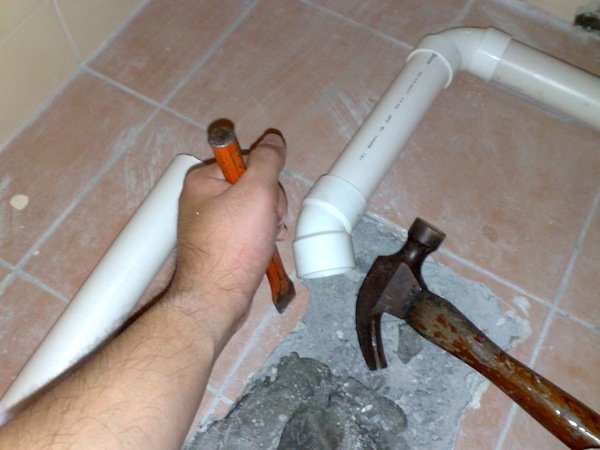
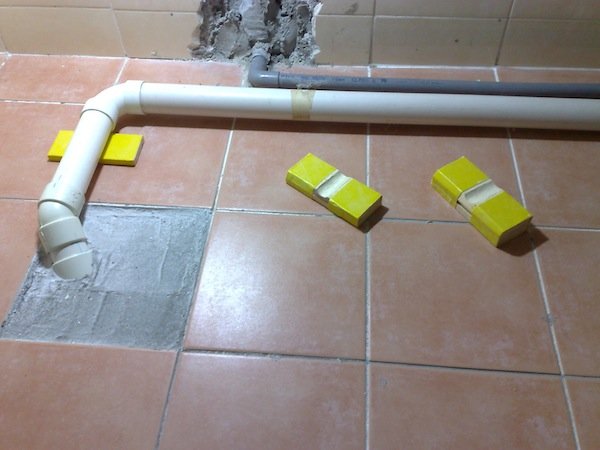
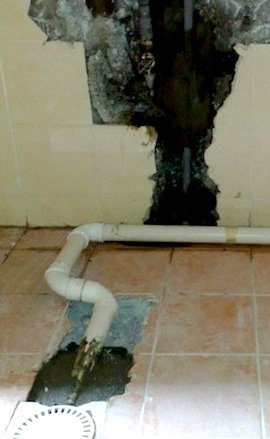
1. First thing I did was to remove the plumber’s pipework at the last elbow before the bend towards the floor trap.2. Next, I had to remove the section of pipe from the concrete into which it was cast into by the plumber, which required a little hacking with a hammer and chisel at the pipe sides, and I used a high speed rotary tool to remove some burrs and smoothen the concrete surface a little, to make way for a new section of pipe which I will connect and lay on my own.3. This is the new section of pipe which I had connected loosely without glue, just to make sure the lengths are correct, and that the pipe-end would ultimately lead to the floor trap at the correct setting out.4. This is probably the most important part of the whole exercise to keep the pipe submerged – using 45-deg. elbows instead of the 90-deg. ones used by the plumber. A pair of 45-deg. elbows allowed me to add a short length of pipe between these fittings, which made it possible to submerge the pipe into the floor deeper and slightly earlier along the route. This provided a more gentle slope such that the pipe-end terminates at the floor trap at the correct point – not too low and not too high. Also, a 45-deg. elbow offers lower losses compared to a 90-deg. elbow, allowing for a smoother water flow. The plumber’s work with a pair of 90-deg. elbows is placed next to my work for comparison in this photo.5. My plan was to have the pipe submerge into the floor deeper at the joints, so that the pipe-end closer to the floor trap could be fully concealed under the floor. To do that, I also had to hack the trench near the pipe joints a little deeper, easily done with a hammer and chisel. The hammer and chisel were also used to hack and remove the leftover tiles within this area. Next, to get the tile prepared…
Get It on eBay
Replacement Tile
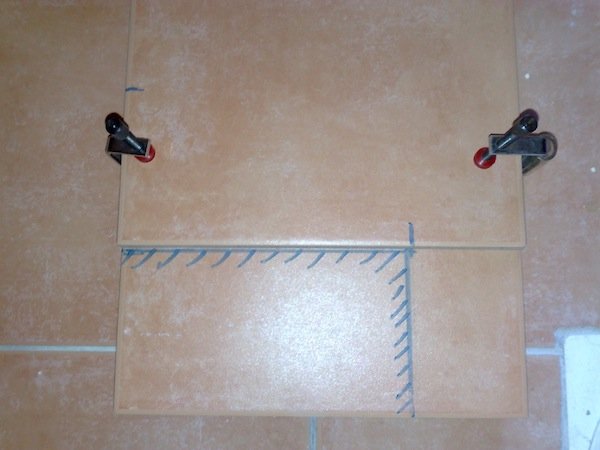
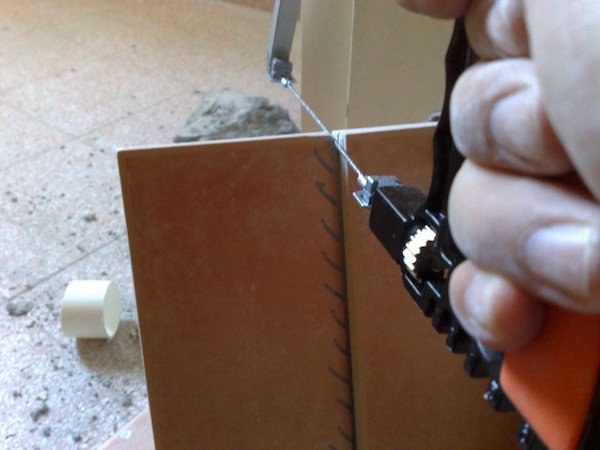
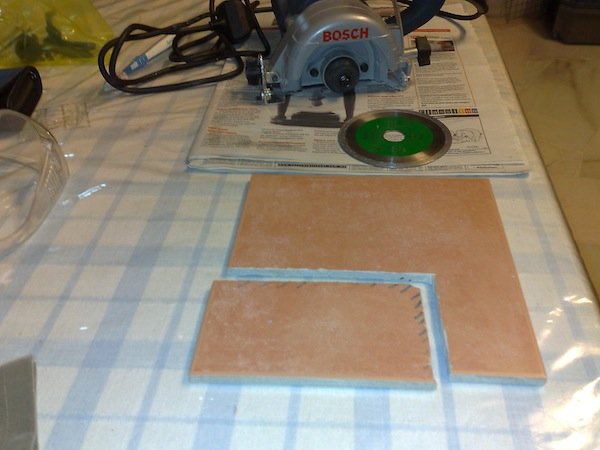
6. Knowing that the tile needed to be replaced, the next step was to cut the tile to fit the space and the floor trap. Fortunately, I was able to obtain a couple of replacement tiles from the developer. Only one tile needed to be replaced. The section next to it will later be concealed beneath the kitchen cabinet, so was ok to remain tileless. Furthermore, that section was also the point of entry for the pipe into the floor. In the photo above, I used a square and marker pen to draw straight perpendicular lines from the edge of the tile, and drew hatch lines on the wasted area to be discarded.7. I used another tile as a guide, and clamped the actual tile to be cut below it.8. I used a special hacksaw designed for cutting tile. Cut tile it did, but very slowly. Too slow in fact! Later I realised that this hacksaw works very well with ceramic wall tiles, but not so well for the more hard-wearing floor tiles. Another tool was definitely required…9. …so I bought a Bosch GDM 12-34 marble cutter. The diamond-coated blade was perfect for cutting anything hard. Buying a circulaw saw to cut a piece of tile probably doesn’t make good economic sense, but I was willing to give it a try. I had not worked on a circular saw prior to this, and didn’t know what to expect, only that it was a very powerful tool and a dangerous one to handle if you’re not careful or do not have much experience. Anyway, I saw this as an opportunity (excuse) to add this new power tool to my collection. As seen in the photo above, the tile was eventually cut, and the circular saw cut it like hot knife on butter! CAUTION: WORKING WITH POWER TOOLS SUCH AS A HANDHELD CIRCULAR SAW CAN BE DANGEROUS AND REQUIRES STEADY HANDS, A FIRM GRIP AND GOOD EYE-HAND COORDINATION, EVEN WITH EXPERIENCE. WITHOUT EXPERIENCE, IT IS BEST TO GET SOMEONE WHO IS EXPERIENCED TO DO THIS FOR YOU, OR AT LEAST SHOW YOU ITS PROPER HANDLING AND USAGE.10. I placed the cut tile over the mock-up pipe just to be sure the fit was right. Apparently, the fit was perfect. Now, it’s time to lay the pipe down for good…
Connecting and Laying Down the Pipe
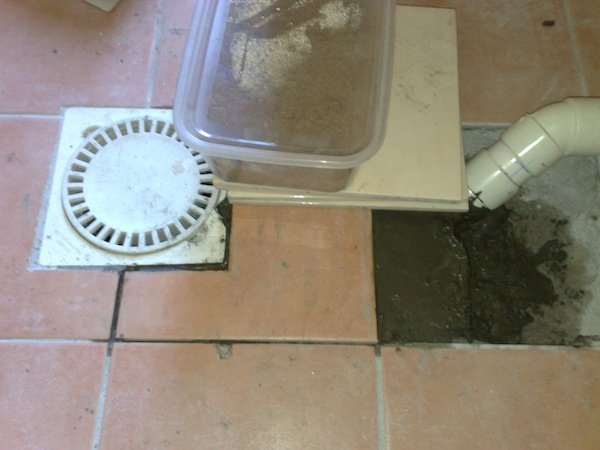
11. Once I was sure the setting out was correct, I proceeded to glue the joints together using a suitable adhesive for uPVC pipes. You will notice the blue marker lines on each section – a good practice for measuring and twisting the pipework correctly during the jointing process – something which I had learned in a few plumbing books. A good solid joint is important to prevent leaks in the future, which you do not want to be concerned with, not when these pipes will be concealed beneath kitchen cabinets later!12. Once the glue has set, it was time to pour concrete into the hollow of the floor. I used a scraper (with red handle) to spread the wet concrete but this is probably best done with a trowel. I didn’t have a trowel handy then – but the scraper worked just as well since the area being worked on was small.13. While the concrete was still wet, the tile was laid above it and pressed into place. I also used some other tiles and a box of sand to keep the pressure on the laid tile. Some of the excess concrete was squeezed into the adjacent tile area to the right as seen in the photo above. Some extra concrete was added to smoothen out this untiled area.14. Close-up, this was how the tile was positioned with respect to the floor trap and other adjacent tiles. A plastic tile spacer is conventionally used for tile-laying, but since only one tile was laid, a good eye is all that is usually required. Make sure that the spacing between tiles is consistent. After that, just wait for the concrete to dry. But that is not the end of it. Not yet…
Wedges for Gradient
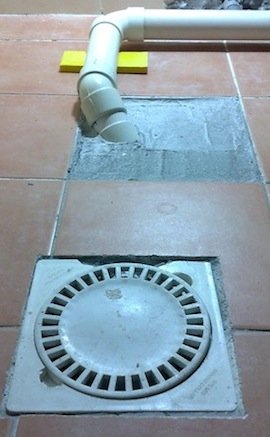
15. After the pipe was laid and the concrete dried, it was time to get the gradient right. I made my own wedges out of quite thin and small pieces of wood, taped together by yellow duct tape as shown above.16. This is a close-up of the wedge. A channel was created on the top of the wedge using my high speed rotary tool (used earlier to smoothen concrete in Photo 2 above), using a small drum sander (not shown). The wedge will help to hold the pipe in place. The number and thickness of pieces to be joined together is determined by the height of pipe to be raised, which for internal sanitary plumbing, could be as gentle as 1:100 or 1:150.17. A single-piece wedge was placed at the lowest end of the entire pipe length, near the elbow for adequate support, especially during water movement. Even though this was a single piece, I had taped it around to match the other multiple-piece ones for consistency. You cannot see it in the photo above, but a channel was also made on the wedge to keep the pipe in place.18. The other two wedges (higher and highest) were placed on the other elbows earlier along the pipe route. The drain water inlet point nearest to the sink location should be the highest, of course. Now, we are done and all that is needed is a set of kitchen cabinets and a good sink to go above it all.
Conclusion and Final Comparison
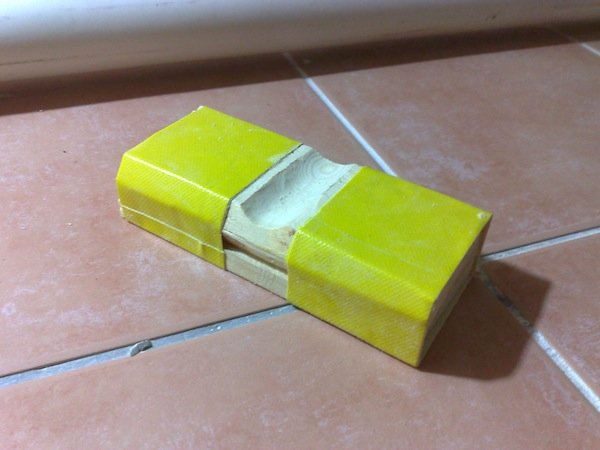
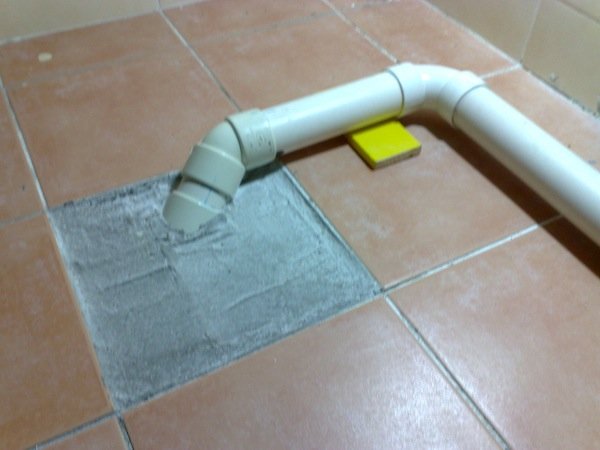
This was the end result of my endeavour to correct the plumber’s work. Sure, it took a lot more time and effort, but I’d like to think it was a better job than……the plumber’s final installation. He could probably have done better if he were paid more, and had more time and better power tools and resources. Maybe…