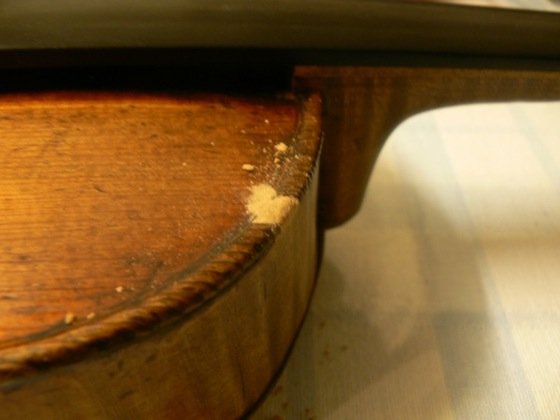
The following job was carried out on 1st July 2007, and involved patching a broken or chipped edge on my old Northern Italian school violin made in the 19th century. Unfortunately, the severity of the edge was not photographed prior to the repair, but can be visualised from the first photo below:
Fixing a Violin Top Edge Chip
First, any debris, dirt or goo must be removed from the area concerned to ensure a secure bond with the compound we are about to apply.
Use a suitable wood putty, a cellulose fibre filler commercially called Plastic Wood by some brands (click here to buy), and apply an appropriate amount into the gap.
Use a plastic putty knife or even better, work the putty into the gap with your fingers. You may allow a little more than is needed, as the putty can be filed down once it has cured and hardened.
For the next step, file down any excess putty to the level of the surrounding edge with a fine flat or rat tail file. Read the work at eye level and be careful not to harm the existing surrounding surface and varnish.
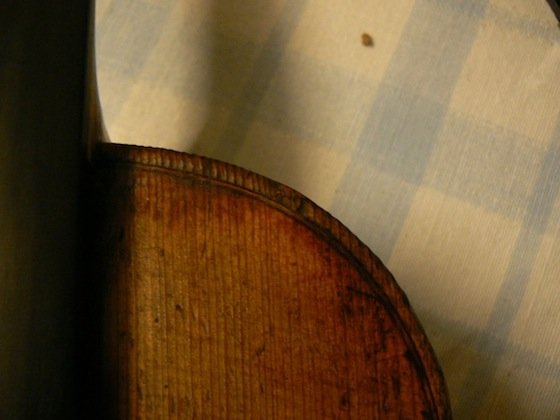
Depending on the finishing of the surface surrounding this area, it is best not to sand down for a fine finish or the repair work may be obvious. The intention is to keep the repair work hidden from the eye or from a fleeting glimpse.
Once the correct level has been achieved, it is important to blend the putty to match the characteristics of the surrounding wood.
Special attention must be paid to the grain lines of the spruce top for the repair work to remain effectively hidden.
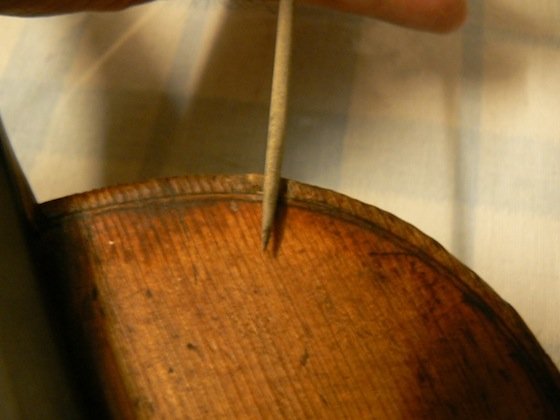
Use a sharp X-Acto blade and cut fine groove lines into the putty to mimic the continuation of the spruce grain lines from the top and go around the edges.
Work with the design of the X-Acto blade to your advantage and use the point side around the edges. The groove lines should just be lines and not be too wide or too deep.
It may be simply sufficient to just apply a slight pressure with the blade on the putty and gently rocking it left and right slightly to create a groove just slightly wider than the edge of the blade. Do this only once the putty has dried and harden. Mark these groove lines with a sharp pencil.
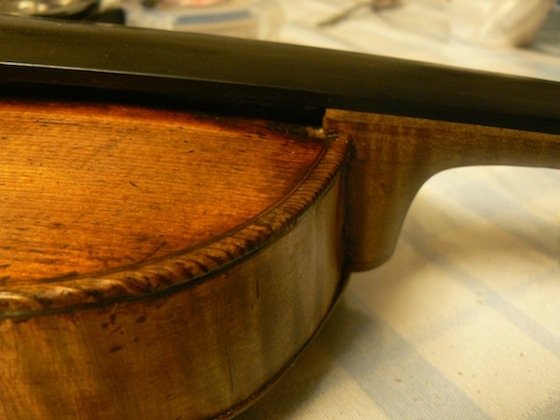
Finally, blend the whole putty area to the surrounding wood colour by means of a brown furniture marker pen. I know, marker pen doesn’t seem like the professional way of doing this, but as you can see in the final photos below, they do give professional results, and that is ultimately our bottom line!
To buy commercial Plastic Wood, click here.
If you require animal hide glue for your woodwork, click here or see the links below.
SEE ALSO: