With the iPod classic being such a portable device, it won’t be a surprise that its hard drive could eventually fail or get damaged due to accidental impacts and shocks while in operation during transport.
For my iPod classic, it is suspected that the hard drive had failed due to shock when it fell off the bed and hit the floor at one time. (Note to self: Always place your iPod back into its protective neoprene case when listening to the iPod before going to sleep. You spent good money on the case – use it!)
A failing hard drive is indicated in a number of ways – music failing to play, clicking noise as it is trying to play, freezing on random songs etc. In my case, the iPod failed to complete its syncing process with iTunes, with intermittent freezing during the syncing process and a louder-than-normal audible clicking noise every once in a while.
A sure sign the hard drive was on the verge of giving up!
Advertisement
The iPod was still new when this happened, and I wasn’t going to let a component ruin an otherwise working machine.
Replacing the hard drive was in order, but sourcing for one this size proved to be a challenge. For one, it wasn’t easy to find one locally. Second-hand ones were expensive. Finding one online was the easier and cheaper solution.
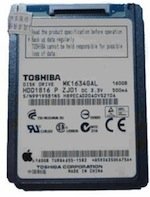
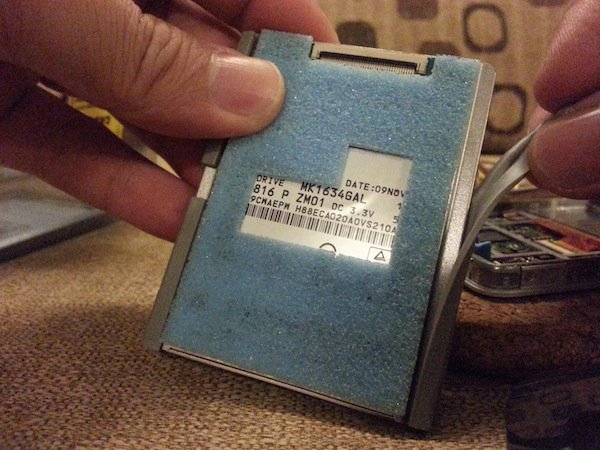
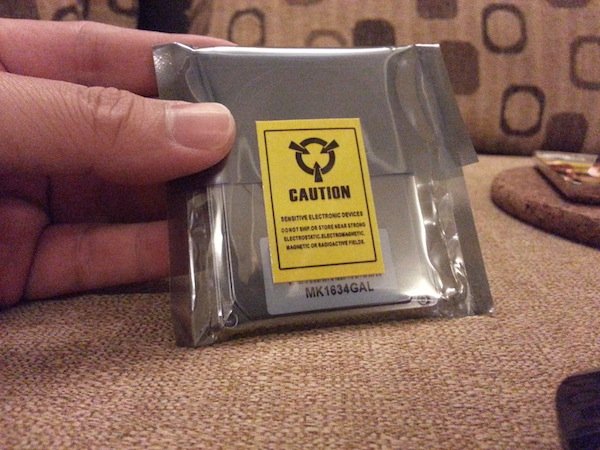
For the 2009 160GB iPod classic model, the hard drive required is a 1.8-inch 4200 RPM ATA-66 5-mm thick HDD. You may find this listed as MK1634GAL under the Toshiba brand. See also links at the bottom of this page.
You will also need a set of feeler gauges (optional) a number of thin putty knives (at least three).
If you’re ready, let’s begin!
N.B. The following procedure may also be used if you wish to upgrade the capacity of your existing iPod hard drive, or if you wish to replace it with the newer, more shock-resistant and much faster solid-state drive (SSD).
Get It on eBay
Opening the iPod classic Casing
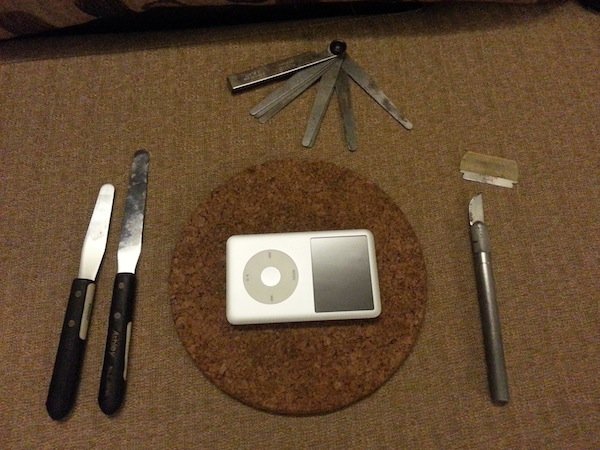
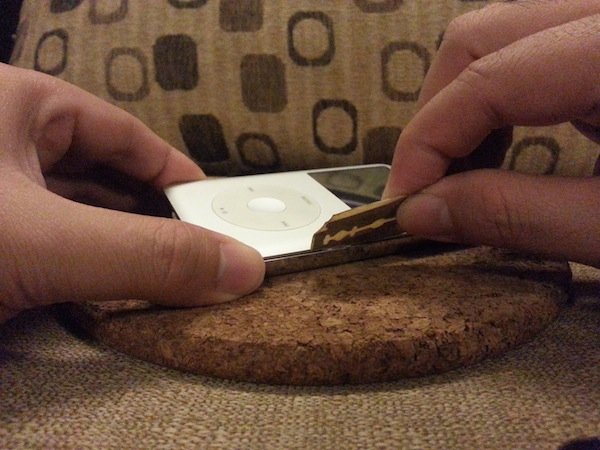
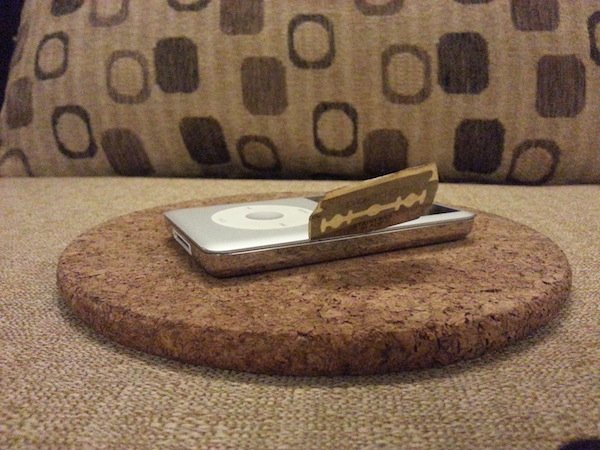
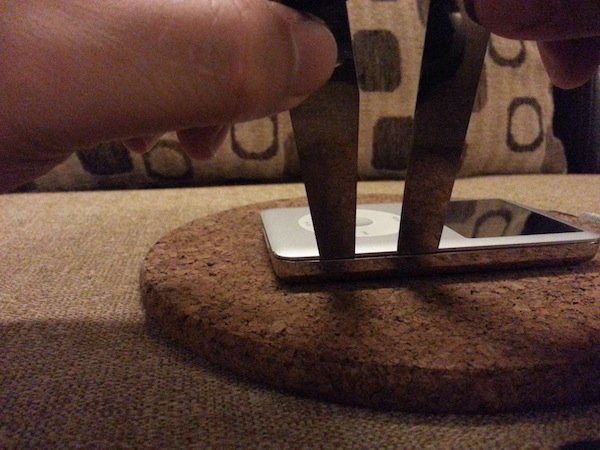
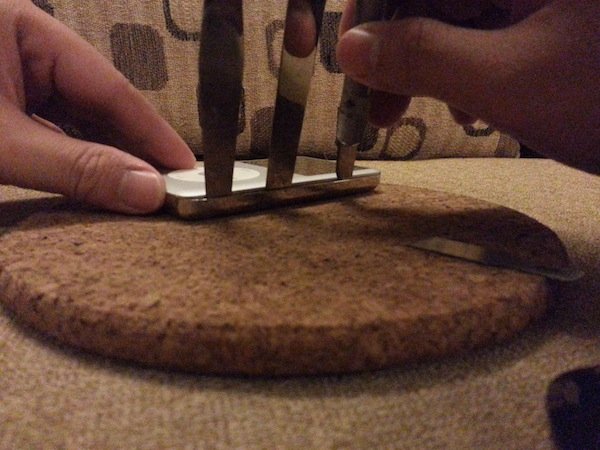
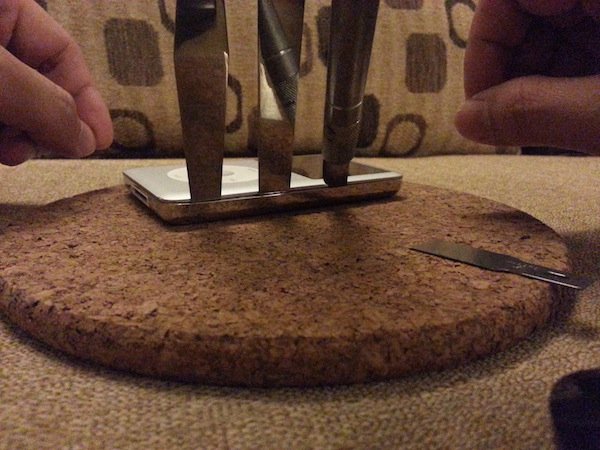
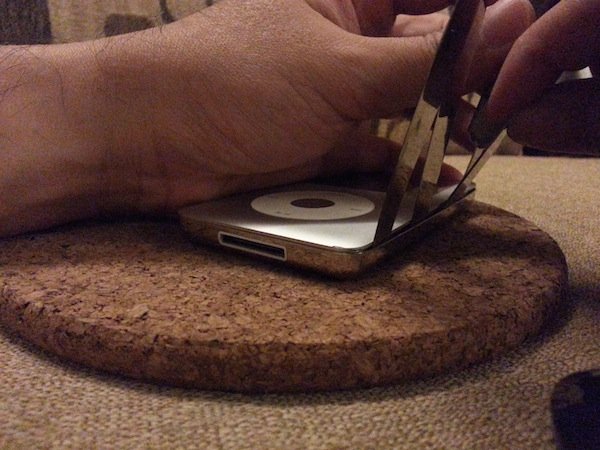
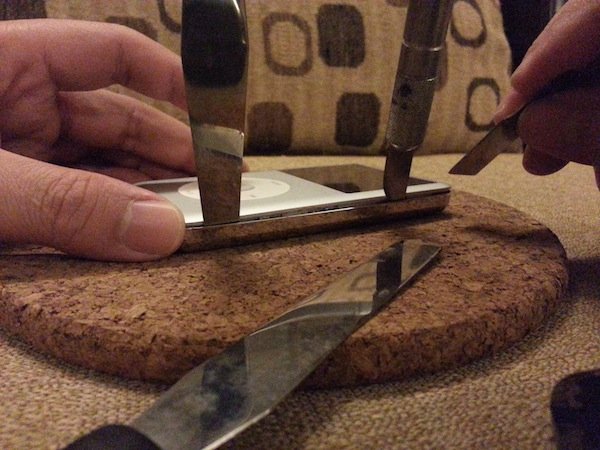
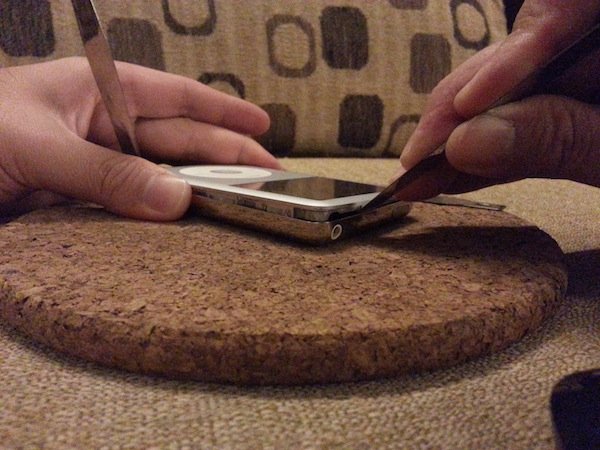
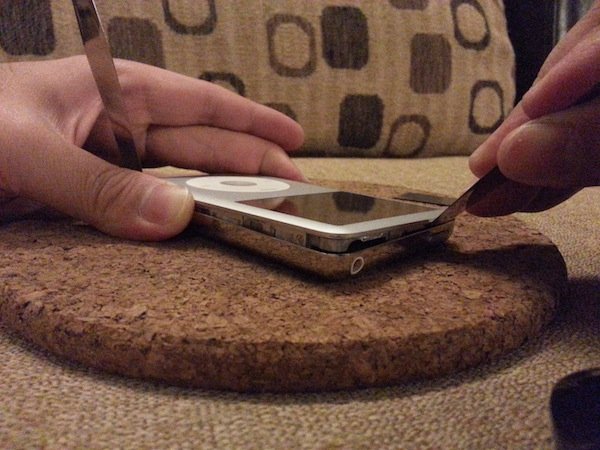
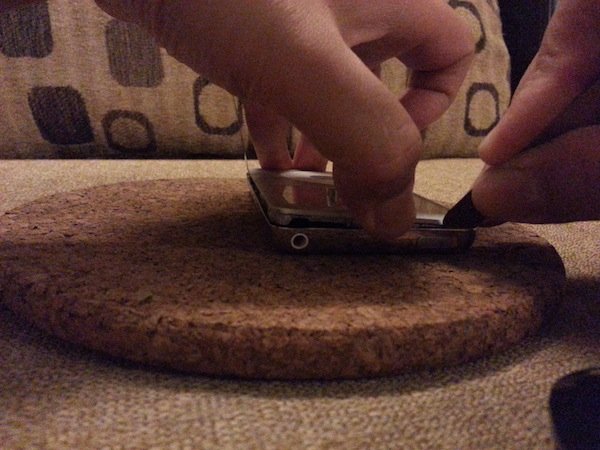
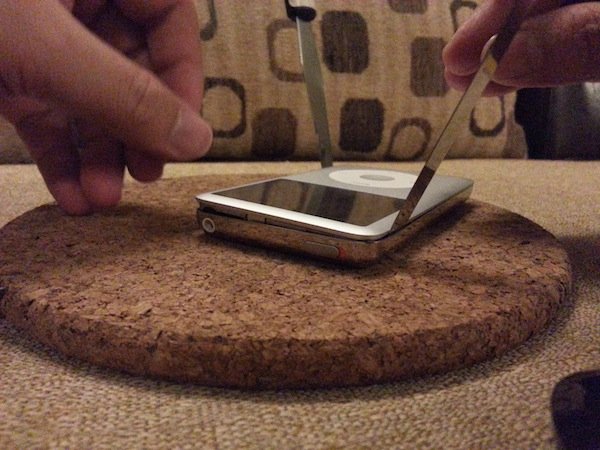
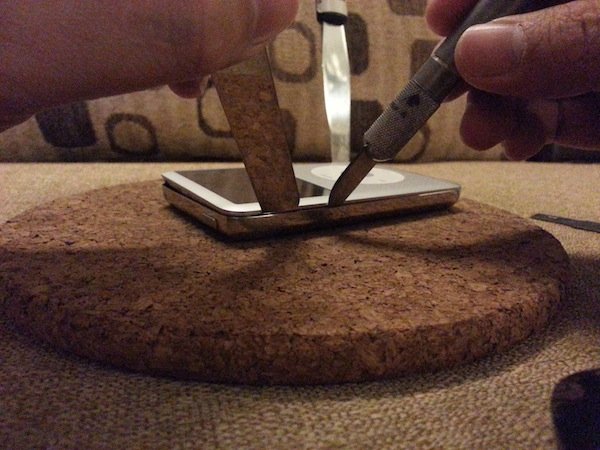
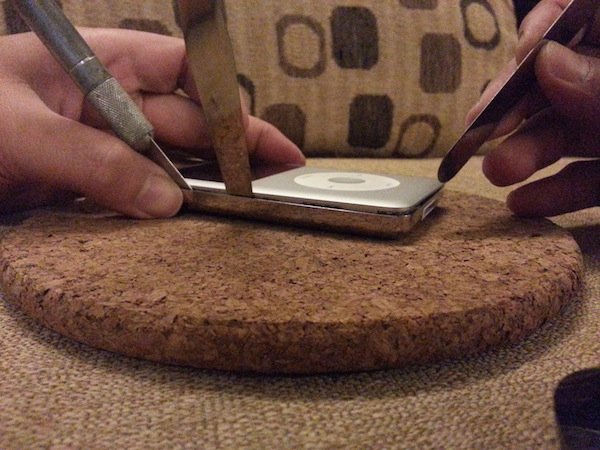
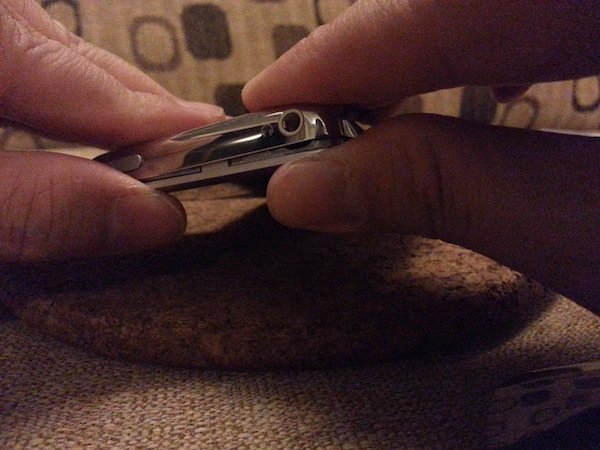
1. Prepare a number of tools required for this job: a set of feeler gauges (optional), putty knives, razor blade and a curved-edge X-Acto blade. A curved-edge blade such as the one shown above is preferred over the usual pointed type blade, but either one is ok – just that the pointed one requires more care and caution during work! Basically, what you will require is a number of implements that will allow you to pry open the iPod casing point by point at a time in a continuous fashion around the casing. Other tools not shown in the photo above are a small chisel edge and multi-purpose glue, which are shown in the photos for Steps 6 and 31 below.2. First, I use a razor blade to get into crevices between the two halves of the iPod classic. A putty knife is not going to fit in as it is too thick, and you will need something razor-thin to pilot the opening.3. Leave the razor blade in the crevice while you grab a putty knife. You may want to place masking tape on the opposite edge of the razor blade for safety, as seen above.4. Stick the first putty knife next to razor blade, then remove the razor blade while sticking the second putty knife in place of the razor blade. You should now have two putty knives stuck into the two halves as shown.5. Leave the two putty knives in place and pry in knife no.3 along the same side as shown. If you do not have any more putty knives, you may use other similar bladed implements such as an X-Acto knife as I did above. Be very careful when working with X-Acto knives as they are extremely sharp!6. The three blades should remain deeply positioned within the crevice without support from your hands. If they fall out of the crevice when released, they are not deep enough and you risk chipping the iPod upper casing in the following steps. Notice that there is a short chisel blade in the photo above, which we will use in the next step. You may also use the feeler gauge or another blade for this purpose.7. With the short chisel or any other flat bladed tool, wedge it into the crevice in between knife no.2 and no.3. With the chisel and knife no.3, use a prying motion to separate the two halves slightly as shown. Do not pry completely open yet at this point. We will need to do this slowly.8. Once you have unhooked the first clip successfully, the gap between the two halves is now wide enough such that putty knife no.2 falls out of its place on its own.9. Leaving the first putty knife in its place, continue to work your way along the crevice around the iPod. You may use one or two blades depending on the gap width as you go along. Once you have managed to separate the top side of the iPod, separating the two halves becomes much easier.10. Continue to work along the top side…11. …use your fingers if you have to…12. …and all around to the other side!13. You may find that at times, you will still require an additional blade to help with the prying. Use two blades if one blade won’t do the trick.14. You may also leave some of the blades in place as you work further along the edge. Once you have reached the bottom side of the iPod, the first putty knife should fall out of its place in the crevice.15. You would then have completely pried open the two halves successfully!
Now let’s get to work on the insides!
Removing the Existing Damaged Hard Drive
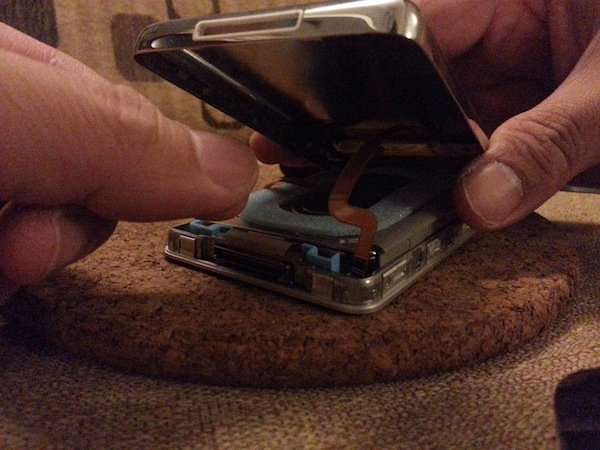
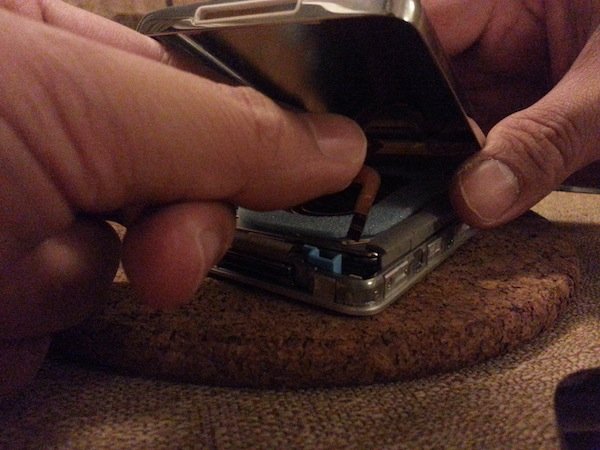
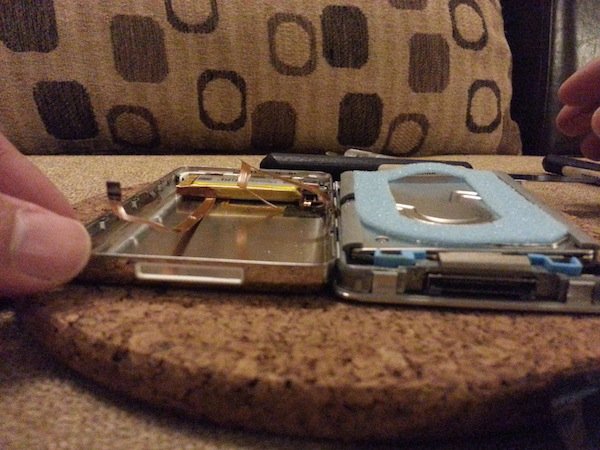
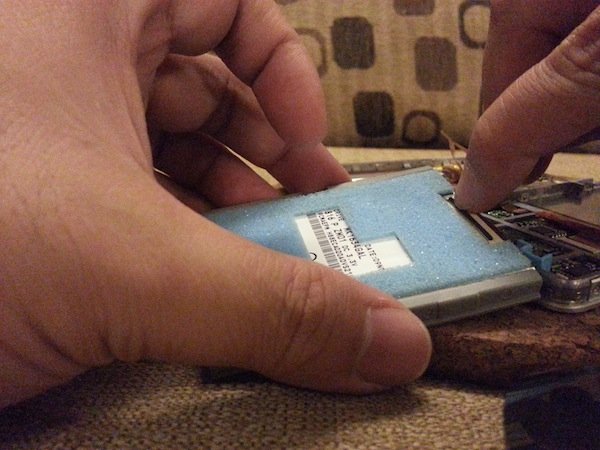
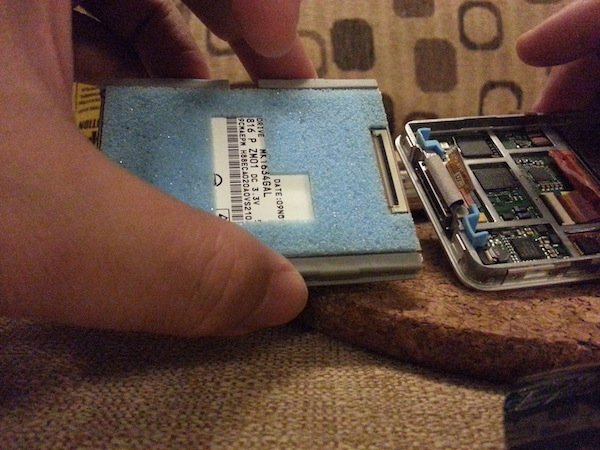
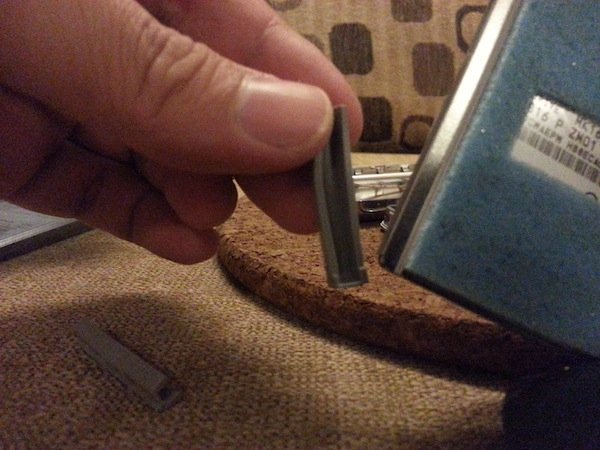
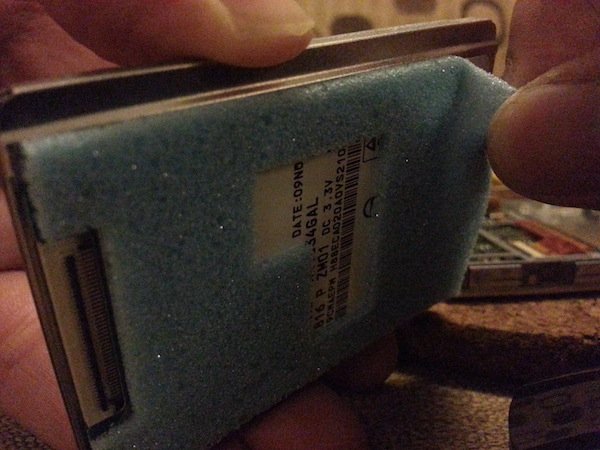
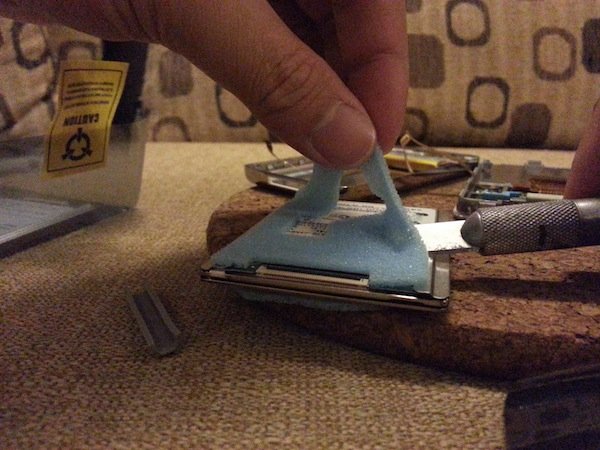
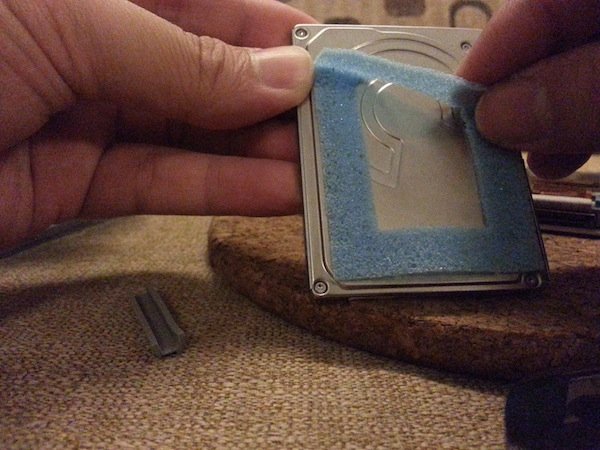
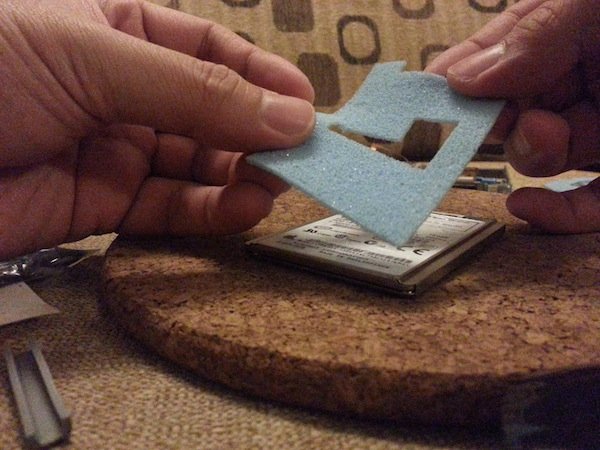
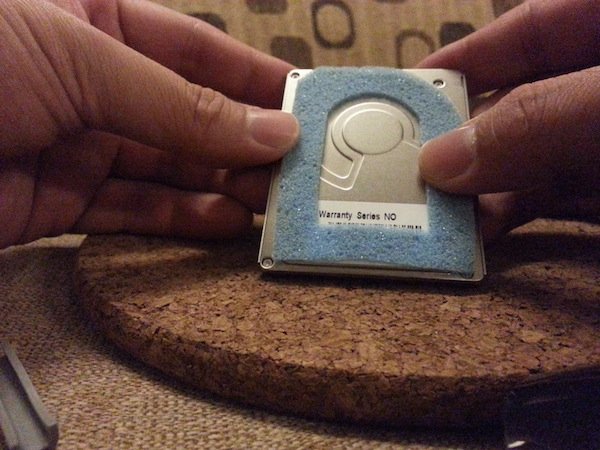
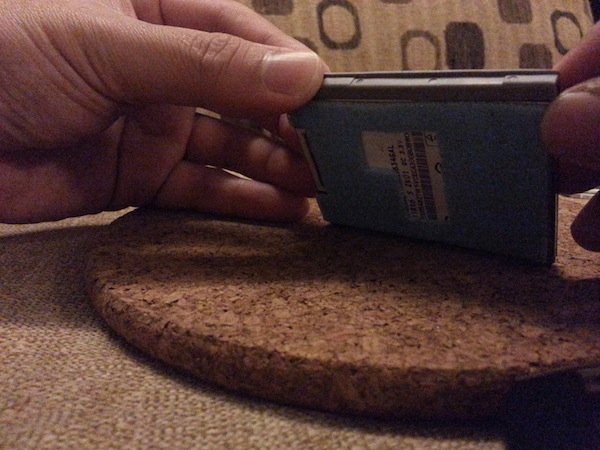
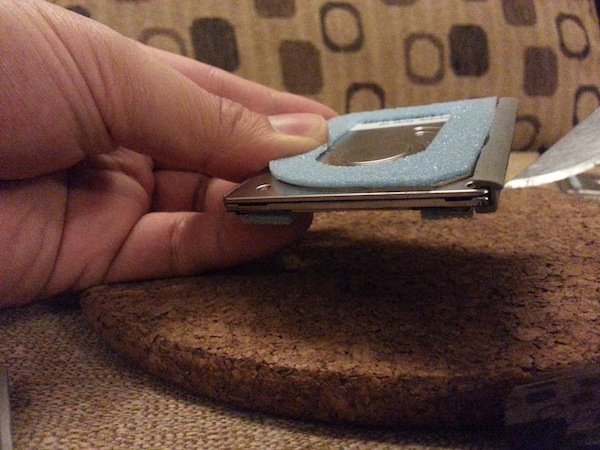
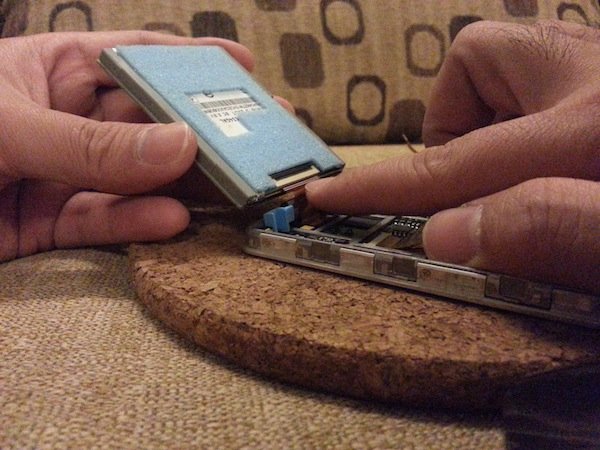
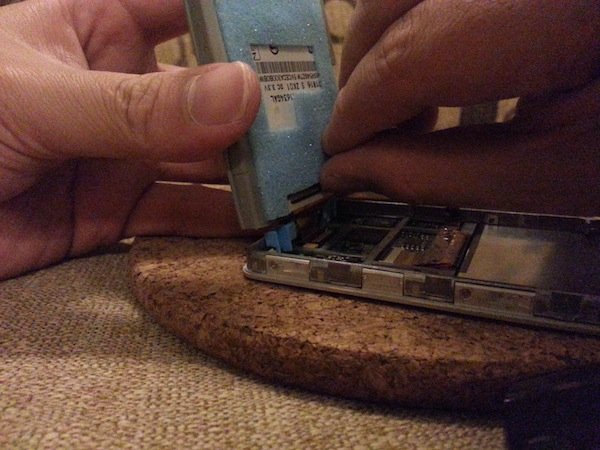
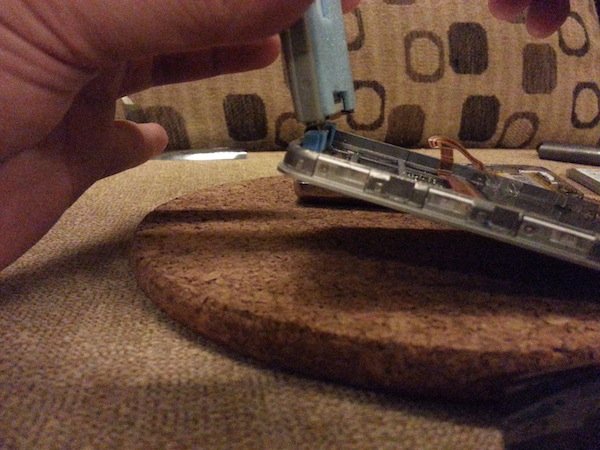
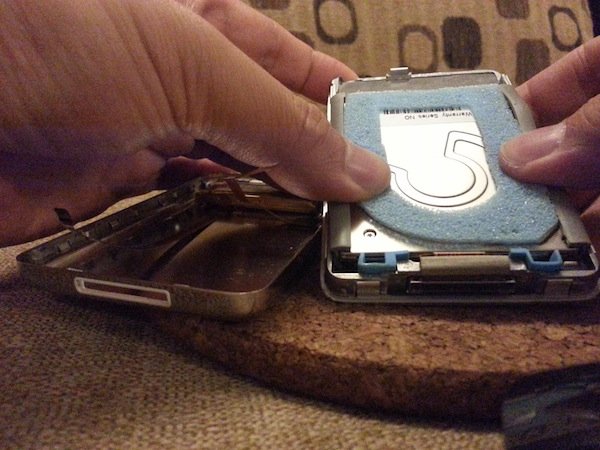
16. For ease of work, it will be crucial to be able to separate the two halves completely. First, look for the ribbon cable near the bottom side of the iPod.18. LIFT UP THE BROWN/DARK GREY CLIP locking the ribbon cable in place in its port and then gently pull and remove this cable from this port. You may use a flat tip screwdriver to help lift up the clip. YOU MUST FIRST LIFT UP AND UNLOCK THIS CLIP BEFORE ATTEMPTING TO PULL THE RIBBON CABLE FREE FROM ITS PORT. You will notice that this ribbon cable is connected to the battery pack located in the other (shiny mirror-finish) half of the casing.19. Place the two halves open side by side. We will be concerned with replacing the existing hard drive, seen above as the component with the light blue foam padding attached to it.20. Remove the hard drive from its seating and flip it around out of its casing. You can only flip it around (as opposed to twisting it about) as it is still attached to a ribbon cable.21. Gently flip open and unlock the cable clip with your fingernail. The cable clip is seen as a long black plastic piece on the hard drive’s cable port.22. With the cable clip in the unlock position, gently pull the hard drive away from the casing, and the ribbon cable should easily detach itself from the hard drive. We will now remove all foam (blue) padding and silicone (grey) sliders on the existing hard drive, to be reused on the new hard drive.23. Start with the label side of the hard drive facing you, with the cable port at the top. Begin by removing the grey silicone slider on the right edge. The silicone slider on the right edge is a single piece.24. Next, remove the silicone sliders on the left edge, which consist of two pieces, as seen above. Remove the left top slider…25. …and then the left bottom slider. Note the difference between the top left and the bottom left sliders for reassembly later.26. Next, peel off the blue foam padding off the surface of the hard drive. This is held in place by adhesive, and you will need to peel it off very gently and slowly to avoid damaging it beyond repair or use.27. You may find the X-Acto knife handy in peeling certain areas which are harder to remove by hand alone. Cut into the adhesive (or into the foam very slightly) if necessary.28. Remove the foam on the other (non-label) side of the hard drive as well. Keep all removed foam padding and silicone sliders in a safe place.
Replacing the iPod classic Hard Drive
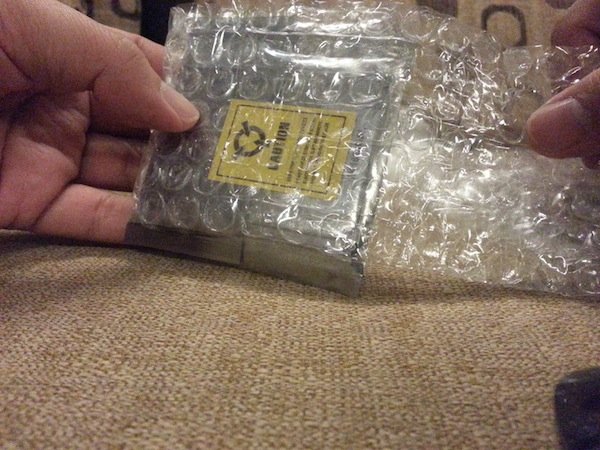
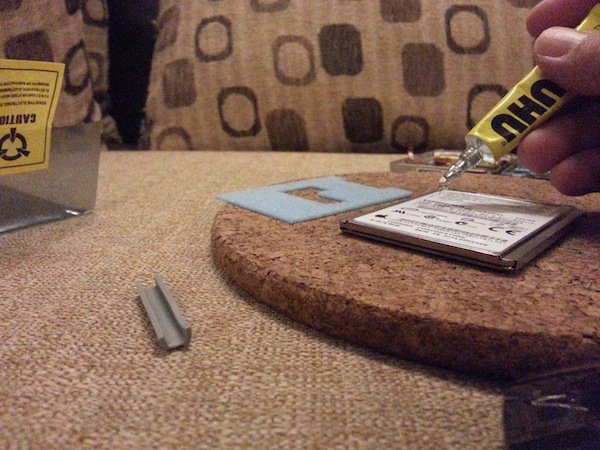
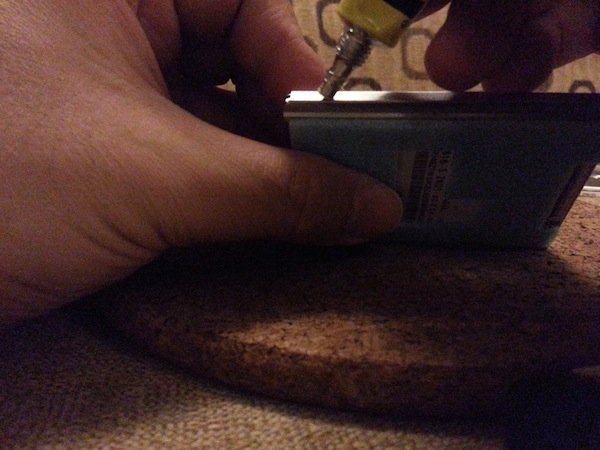
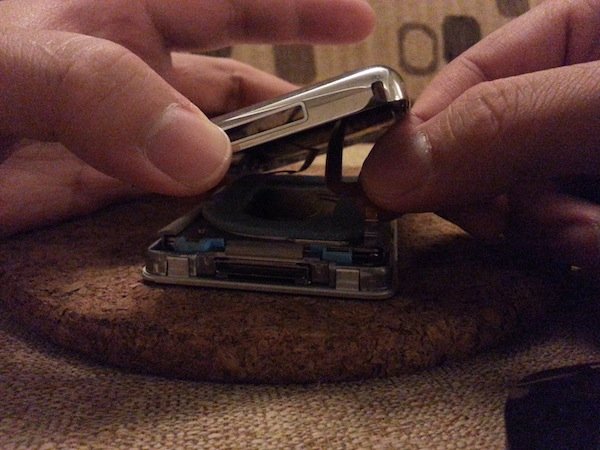
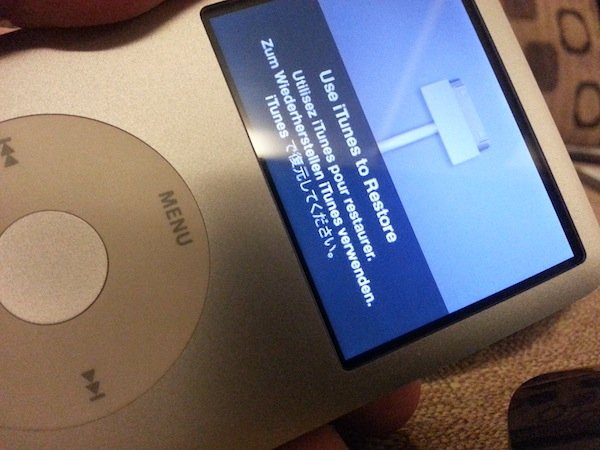
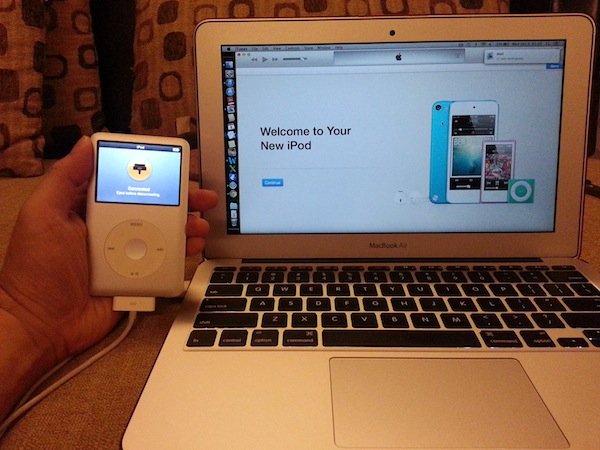
29. Remove the new hard drive from its packaging. The hard drive should be delivered to you in multiple bubble-wrap for a very secure packing keeping it protected from impact…30. …as well as in an anti-static envelope to protect it from electrostatic damage. Remove the new hard drive from all packaging materials and prep it for proper padding.31. Spread a very thin layer of multi-purpose adhesive such as UHU glue on the label surface. You may also use thin unpadded double-sided tape if you wish. This is probably easier to work with and is preferred over liquid glue.32. Stick the correct foam pad to this surface. Note the cutout and outline pattern of the foam pad with respect to the orientation of the hard drive.33. Glue and do the same for the other unlabel side of the hard drive. Again, note the cutout and outline pattern of the foam pad with respect to the hard drive orientation.34. Next, apply some glue to the side of the hard drive. Do this one side at a time. Apply glue to one side and attach the silicone slider before proceeding to apply glue to the other side or edge, to prevent the glue from drying prematurely.35. Attach the appropriate silicone slider to the correct side of the hard drive. Note that the label side should be facing you, and the slider reattached based on the orientation it was removed from the old hard drive earlier. With this in mind, glue and reattached the remaining two pieces on the other edge of the hard drive.36. One thing to note is that the silicone sliders are designed with a keyed slot outline, as pointed by the tip of the blade above. This key runs along the surface of the non-label side of the hard drive. This is important as it allows the hard drive to be properly seated in its place in the casing.37. Once all foam and silicone attachments have been properly installed, connect the ribbon cable to the hard drive cable port, as shown.38. Push the cable clip back in place to secure the cable in the lock position.39. When the cable clip and the ribbon cable are secured properly, the cable will not detach itself from the hard drive when lifted up as shown. The assembly should not be lifted too high – just high enough such that one end of the iPod casing is still resting on the base.40. Flip and place the new connected hard drive to its seating location within the iPod casing.41. Turn the other half of the casing around and bring it close enough so that the battery ribbon cable can be reconnected to the port on the other half of the casing. Lock down the clip to secure the cable in its place.42. BEFORE CLOSING AND SEALING THE TWO HALVES COMPLETELY, turn on the iPod to ensure that it is functioning properly. A screen similar as shown above should be seen. This is to prevent having to go through the difficult process of reopening the casing should any connections or reinstallation be done in error. At this point, the hard drive is empty and without a firmware, and will need to be restored with iTunes. We will be doing this shortly. First, let’s settle the hardware part of the job!
Closing and Sealing the iPod classic Casing
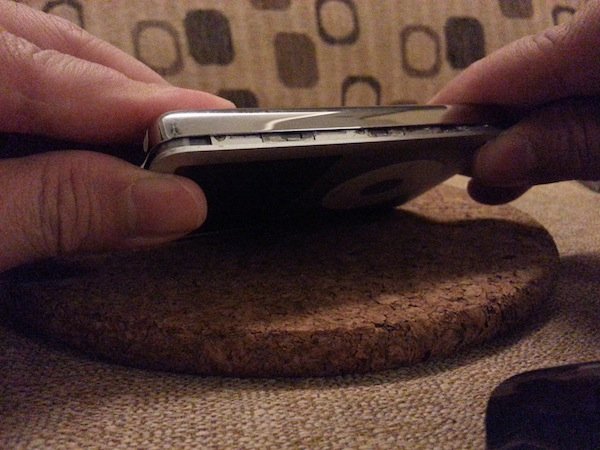
43. Once it is certain that the iPod is working correctly, proceed to close and seal the casing. Start with the sides…44. …and then work around to the top and bottom edges of the casing. Gentle finger pressure to seal the gap shut should be all it takes!
Connecting to iTunes, Reinstalling the iPod Firmware, and Syncing
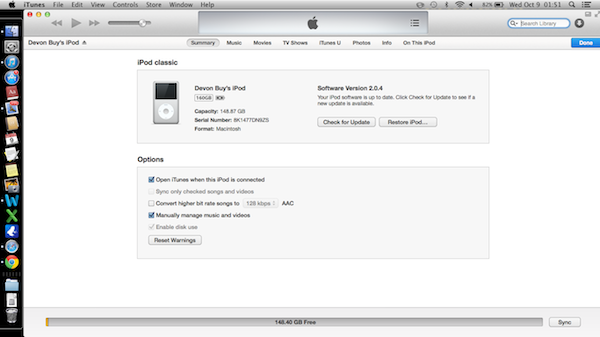
45. Connect your iPod to iTunes on your MacBook so that the iPod firmware can be installed onto the iPod’s new and empty hard drive. Once that is done, you will be greeted with a “Welcome to Your New iPod” on your MacBook screen! Great – we’ve done everything correctly so far!iTunes will reveal information on your iPod. When everything checks out right……proceed to sync all your songs and audio files back in!
In Conclusion…
I hope you have managed to replace the iPod classic hard drive successfully by following the guided steps above. If you have, congratulations! Do note that the above method may also be used to replace or upgrade your hard drive to one which is of higher capacity, or to replace it with the newer, more shock-resistant and much faster solid state drive or SSD.
HDD REPLACEMENT for iPOD CLASSIC
HARD DISK and SSD REPLACEMENT PARTS FOR iPOD CLASSIC
COMMERCIALLY AVAILABLE TOOLS RELEVANT TO THIS PROJECT
Hi!
Thank you for this tutorial. I’m trying to replace the HDD of a 7th gen iPod with SSD. I’m stuck on how to disconnect the flat cable from the original disk. Can you please give more detail on how to perform this operation?
Thanks
Hi Luiz, thanks for writing in! The ribbon cable is attached to the original hard disk and is kept locked/secured in place by a cable clip lock. You will need to first unlock this with your fingernail or thumbnail as described in Step 21 above (sorry the photo does not show this too clearly), and once the cable clip lock has been flipped to the unlock position, the ribbon or flat cable should come off quite easily simply by pulling the hard disk away from the iPod casing. This is assuming that the hard disk used in your 7th-Gen iPod… Read more »