How to Upgrade RAM on iMac

One of the simplest performance upgrade a user could perform on an existing computer is a RAM upgrade. This is usually done after using your computer for a few years, but can also be done at the start with a new computer purchase as well.

This is an upgrade that I do on nearly all my laptops and desktops, usually after a few years have passed and when the specific RAM chips for that particular computer have fallen in price. It is a good way to bring new life to an old computer.

As your computer usage grows more dependent on memory over time, a RAM upgrade becomes not only necessary but imperative. The RAM or random access memory is where data that is actively being used and processed by the computer is stored. In other words, it has a great impact on your computer performance and your computing experience.

In my case, 3 years into owning my iMac, my usage of iMovie, Fireworks, Photoshop, Lightroom and other graphic- and video-editing software have grown pretty regular, and the 8GB of memory wasn’t going to be sufficient, even though it was more than ample when I bought the iMac.

Today, I will be going through the steps in upgrading my late-2015 27” Retina 5K iMac from its initial 8GB to 32GB. This was done in 2019, 4 years after purchase.

Identifying the iMac Model and RAM

The first step would be to identify the model of your computer. Different computers, even by the same manufacturer, utilise different types of RAM, so identifying and getting the correct RAM for your computer is important.
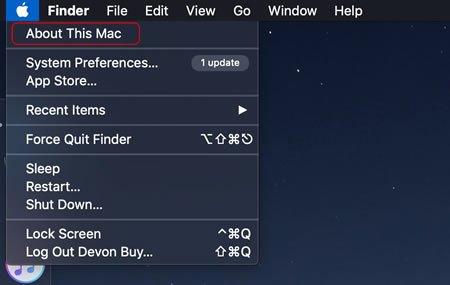
On the Mac:

upgrade ram on imac
Click on the Apple logo, and then About This Mac in the top left of the status bar…
upgrade ram on imac
Under the Overview tab, the iMac model as well as details and specifications of the existing RAM are shown.
upgrade ram on imac
Click on the Memory tab at the top, and details of the memory slot are shown. Here we see there are 4 GB RAM in each of the 2 slots i.e. 8 GB in total, with 2 more empty slots to take in more RAM. Clicking on Memory Upgrade Instructions on the lower right…
upgrade ram on imac
…takes you to the Apple support website with more information on the RAM specifications.

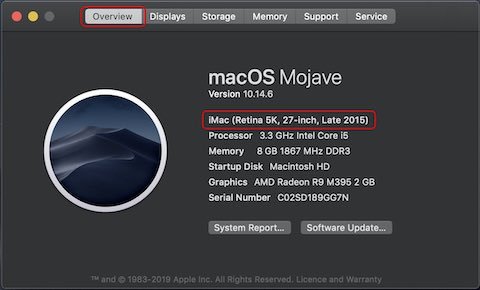
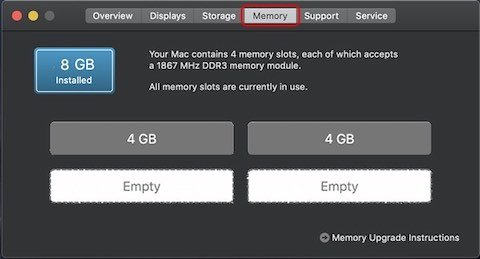
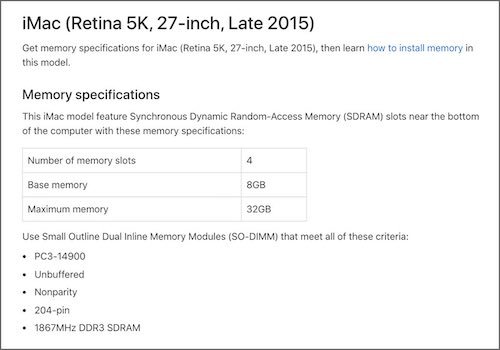
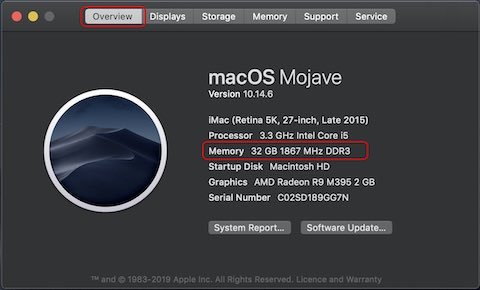
As shown above, I see that I have a Retina 5K 27-inch late 2015 iMac which can take 4 nos. of PC3-14900 204-pin 1867 MHz DDR3 RAM modules, up to a maximum of 32GB.

This means that to upgrade my iMac to the maximum RAM capacity of 32GB, I would need to purchase 4 x 8GB 204-pin 1867 MHz DDR3 RAM modules.

Purchasing the RAM

Now that we know the type of RAM required, the next step is to source for the correct RAM at the best price possible. RAM can be quite costly and it takes a bit of searching to make sure you don’t pay more than you need to.

RAM for Mac
A-Tech PC3-14900
204-pin 1867 MHz
DDR3 SDRAM

VIEW ON EBAY

There are also many brands available, and some brands will be priced a little more premium than others.

I usually source for my RAM on eBay, but other online sites like Amazon are also ok.

For my late-2015 iMac, the following RAM by A-TECH from eBay was the one I purchased. I managed to save up to 30% choosing this brand, and as much as half the price of what I could get from most offline retail shop. Check the brand and verify the specs before buying to make sure you’re getting the correct RAM for your computer.

See Installation Instructions further below.

Note that you don’t have to upgrade to the maximum allowable RAM capacity. If you have 8GB of RAM currently, you can also upgrade to 16GB, or 24GB.

Advertisement

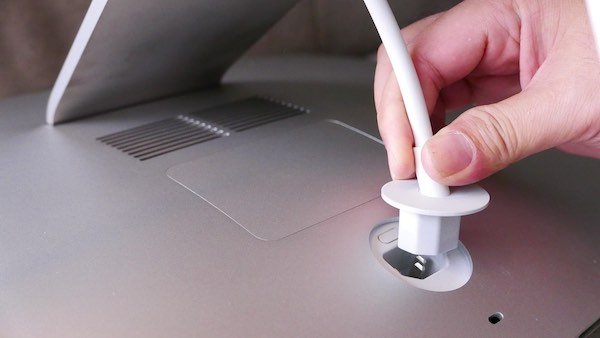
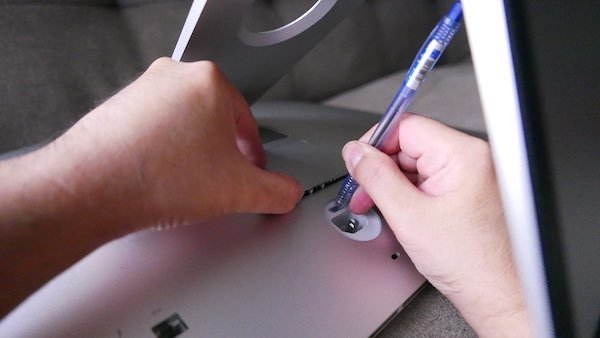
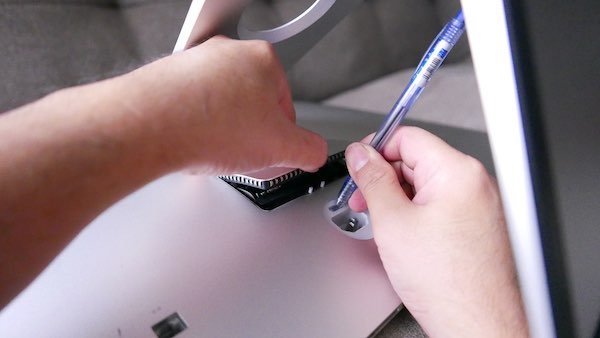
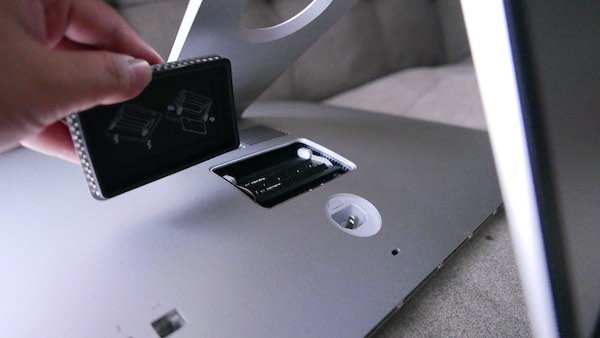
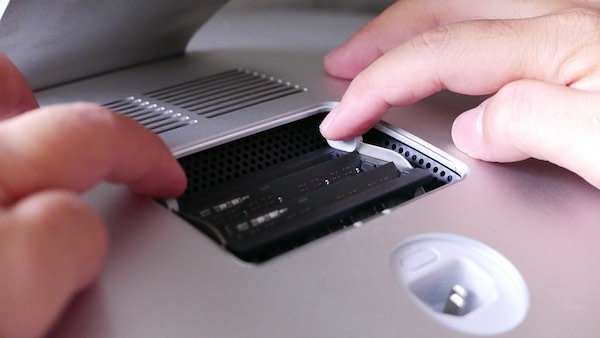
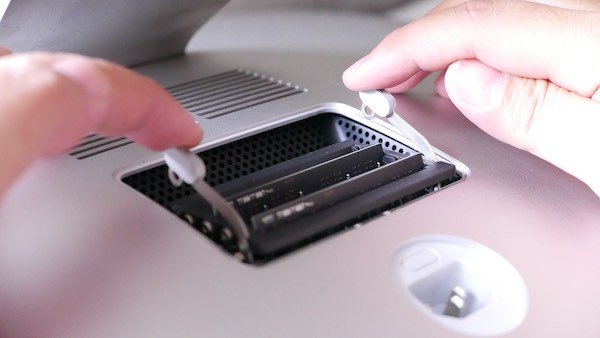
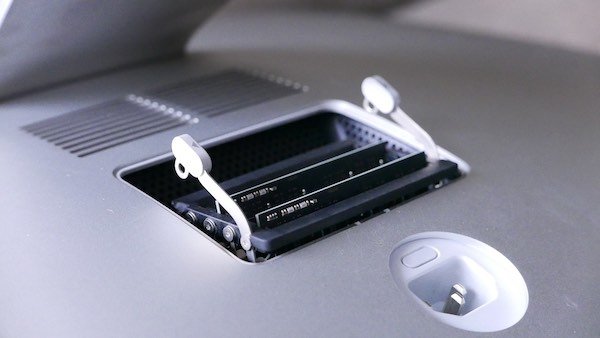
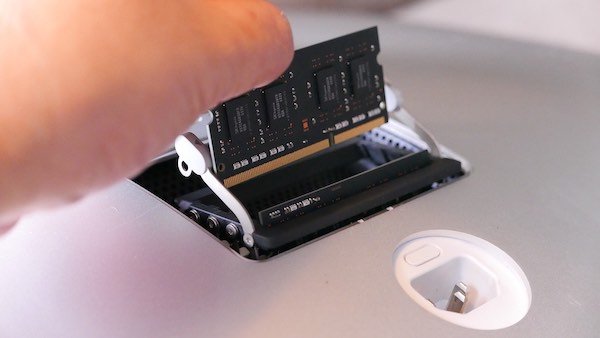
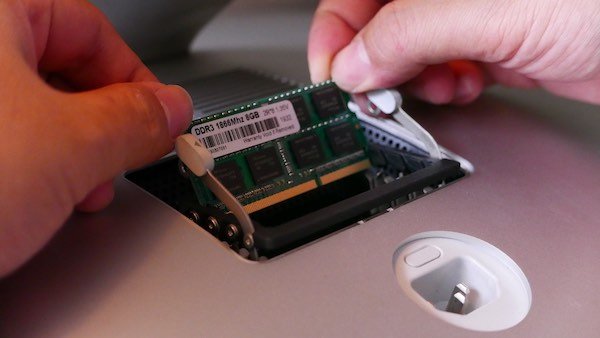
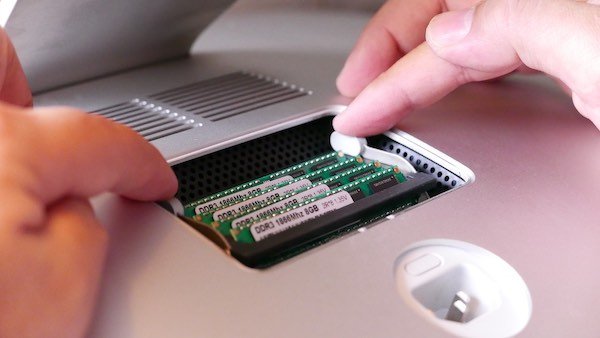
A. Removing the Existing RAM

Before you begin, if you had just powered down your iMac, allow some time for it to cool down before starting work.

opening iMac

A1.Unplug the power cable on your iMac and set it face down against a soft surface, such as on a sofa. Ensure that there are no rough or hard items on the sofa to prevent scratches on the screen. If you’re working this on a table, be sure to protect the screen by placing a soft cloth underneath.

opening iMac

A2. Locate the push button which is just above the AC power port. Push it down with a pointed object such as a pen or a blunt plastic instrument.

opening iMac

A3. This will disengage the lock on the memory compartment door located just above it.

opening iMac RAM door

A4. Remove the memory compartment door and put it aside.

remove iMac RAM

A5. Locate the memory cage lever tabs (as shown above)…

remove iMac RAM

A6. …and push the tabs outwards to release the memory cage from its locked position.

remove iMac RAM

A7. Allow the levers and the memory cage to tilt up on its own. This gives you access to the RAM and the memory slots.

remove iMac RAM

A8. Remove the existing RAM by holding it between your fingers and pulling it straight up. You may need to rock it slightly to dislodge it from its connecting port.

remove iMac RAM

A9. As you’re pulling out the RAM, notice where the notch (i.e. the break in the row of gold connectors) is on the bottom. Remove all other existing RAM in place and set them all aside.

Get It on eBay

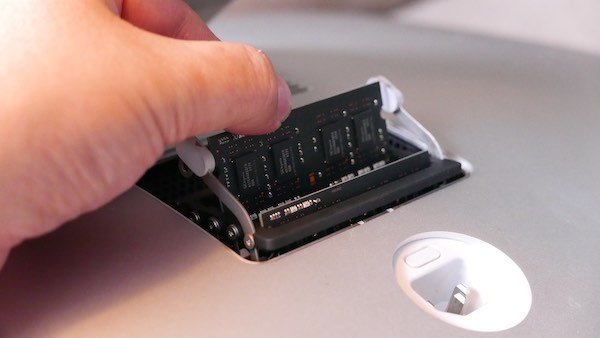
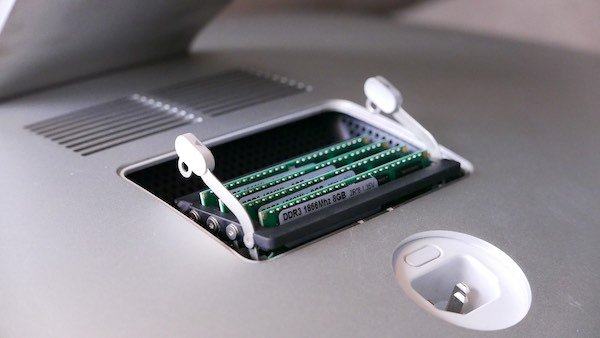
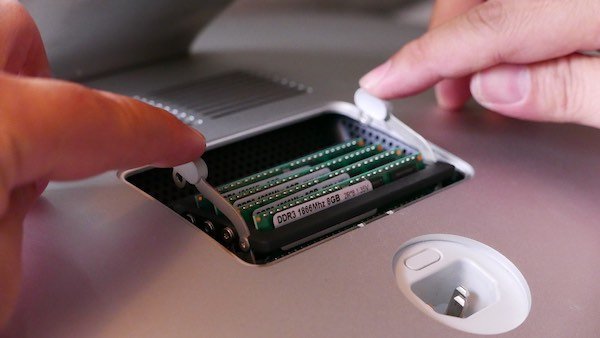
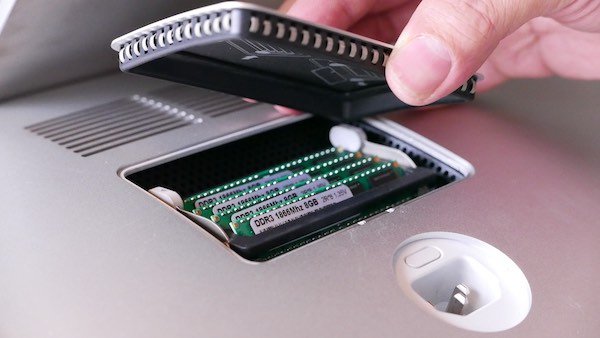
B. Installing the New RAM

We will now proceed to install the new RAM.

install RAM iMac

B1. Remove the new RAM from its packaging. Note the notch (as seen in Step A9 above) and position the RAM along the first holder (located furthest from you).

install RAM iMac

B2. Slide the RAM down gently along the holder until it clicks in place at the bottom.

install RAM iMac

B3. Repeat the same with the other new RAM into each holder in sequence towards you.

install RAM iMac

B4. The above shows all four new RAM in their respective slots. Ensure that each RAM is firmly seated in its holder.

install RAM iMac

B5. Push the memory cage levers down with both fingers…

upgrade RAM iMac

B6. …until they lock in place.

upgrade RAM iMac

B7. Replace the memory compartment door…

upgrade RAM iMac

B8. …and make sure it is pushed into its place completely. Check to make sure the door is thoroughly flushed with the rear surface of the iMac.

upgrade RAM iMac

B9. Place the iMac back upright on the table, plug in the AC power cable. Turn the power on. See further instructions below.

Memory Initialisation Procedure

Upon turning the power on for the first time after a RAM upgrade, the iMac performs a memory initialisation procedure.

  • This process should take about 30 seconds or more.
  • Note that the display of the iMac will remain dark until this procedure is complete. Do not interrupt this initialisation procedure.
  • If the display remains dark for more than 5 minutes, it is possible that one or more of the RAM was not inserted properly into its slot.
  • In such a situation, you will need to open up the compartment again and make sure all the RAM have been pushed in all the way. You may even need to swap RAM across slots. Turn it back on and see if it starts up correctly.

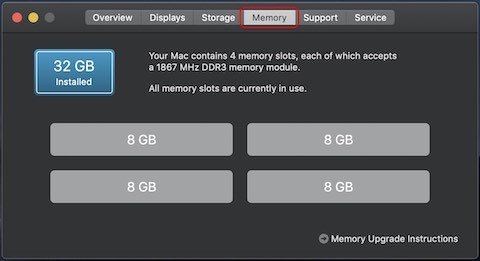
Checking New RAM Specs

Once your Mac starts up, go back to where we went earlier to check the installed RAM details:

RAM on iMac
Under the Overview tab, it now shows 32 GB 1867 MHz DDR3.
RAM on iMac
Under the Memory tab, it now shows all 4 slots occupy an 8 GB RAM module each to a total of 32 GB RAM.

If you are thinking of upgrading the RAM on your iMac or if you’re seeing that spinning colourful beach ball more often than you’d like, this is one option worth considering.


RAM for iMAC (select correct model)

 
DDR3 SDRAM for Retina 5K 27-inch iMac (Late-2015)


Subscribe
Notify of
guest

This site uses Akismet to reduce spam. Learn how your comment data is processed.

0 Comments
Inline Feedbacks
View all comments
devonbuy.com