Alright, let me start by highlighting this: the following article was written in March 2014. Why should this come as a surprise?
Because, the Sony VAIO PictureBook PCG-C1MV is a highly portable laptop which found its way into the market all the way back in…September 2001! I know it sounds crazy – why write about something so obsolete by now, over 12 years since it was launched?
Truth is, I bought this only fairly recently. I had a similar model about 10 years ago, which I regretted selling away. I did that because I needed the money. Now that I have some spare money for a little fun in my life, here’s what I did: Spent USD110 on a used Sony VAIO PictureBook on eBay, and then splurged a further USD400+ to refurbish and bring it up to spec!
I know. Silly, right? No, not when I’m deriving pleasure from this. Most won’t understand. Read on.
The Sony VAIO PictureBook PCG-C1MV
SPECIFICATIONS:
![]() PROCESSOR and MEMORY
PROCESSOR and MEMORY
- Transmeta Crusoe TM5800 733MHz
- Graphics: 8MB AGP-ATI Mobility Radeon
- RAM: 256MB DDR SDRAM
- Hard Disk: 20GB
- Cache: L2 512kB
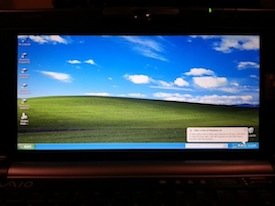
- Microsoft Windows XP
![]() DISPLAY
DISPLAY
- 1280 x 600 pixels UW-SXGA Widescreen
- 24-bit 16.7 million colours
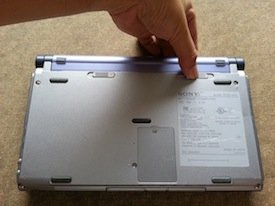
![]() DIMENSIONS and WEIGHT
DIMENSIONS and WEIGHT
- Width: 248.0 mm
- Depth: 150.0 mm
- Thickness: 30.5 mm
- Weight: 1.0 kg
![]() OTHER HARDWARE
OTHER HARDWARE
- 0.27-megapixel webcam on screen bezel
- Built-in Microphone
- Sound Blaster 16/Pro compliant standards
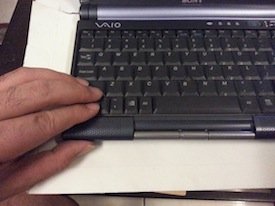
- Pointing Stick located at middle of keyboard
- Built-in Memory Stick Card Reader
![]() CONNECTIVITY PORTS
CONNECTIVITY PORTS
- 1 x 10/100 Ethernet IEEE 802.3 compliant standards
- 1 x modem – phone line RJ-11
- 1 x 4-pin Type A USB
- 1 x 6-pin IEEE 1394 (FireWire)
- 1 x 15-pin HD D-Sub (HD-15) display/video VGA I/O Port
- 1 x PCMCIA CardBus slot
- Microphone and Headphone 3.5mm jacks
![]() BATTERY
BATTERY
- Operation: 4 hours
The Sony VAIO PictureBook series was Sony’s enthusiastic venture into the subnotebook market. It was called the PictureBook because of the built-in webcam, photo- and video-capturing features of this hardware.
The first model which rolled out on 19 September 1998 in Japan featured a Mobile Pentium MMX 233MHz CPU, an integrated modem, a now-miniscule 3.2GB hard drive, 64MB of RAM, a wide 8.9-inch TFT display, and a 0.27-megapixel webcam above it – all in a 1kg package.
Throughout the months and years following that, Sony released different versions of the PictureBook, with upgrade in specs on its CPU speed, hard drive capacity, graphic card and software.
The Sony VAIO PictureBook PCG-C1MV was eventually released in September 2001, with specifications shown in the box at right. The PCG-C1MV was not the most advanced version in terms of specs, and was second only to the PCG-C1MW (note the last alphabet) released in August 2002, with its higher processor speed of 867MHz and increased hard drive capacity of 30GB.
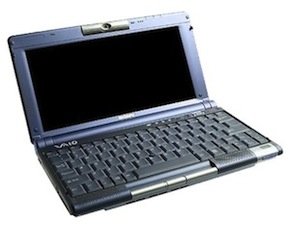
The Sony VAIO PictureBook series was in many ways ahead of its time then – it ran on the relatively power-efficient Transmeta Crusoe processor, it came with a swivelling webcam on the bezel above the screen which allowed photos to be taken in front of the laptop as well as behind it (a novelty no less), video editing made possible on a laptop (this is taken for granted these days but back in the early 2000s, this was something to shout about!), and a high resolution of 1280 x 600 on an 8.9-inch screen (a resolution comparable to my 14-inch screen Dell desktop replacement laptop). All great features.
However, the Sony VAIO PictureBook series didn’t kick off as well as expected, and that was likely due to its “too small to be comfortable” dimensions for extended use, by both businessmen and casual users alike. It’s highly portable size made it ideal for travel, but certainly not for working on long hours on it.
Still, it didn’t stop me from buying one even after I was aware of its shortcomings.
So what did I do with it?
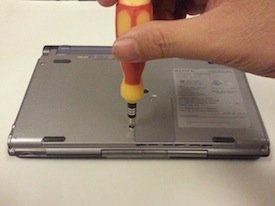
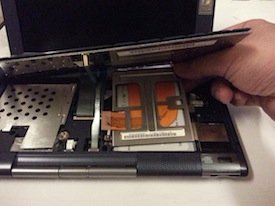
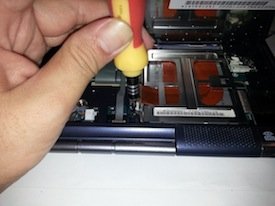
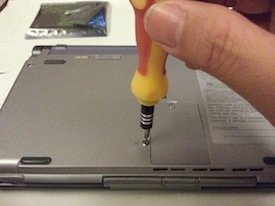
I spent (some would say wasted) money fixing and upgrading it to the best of my endeavours – subject to resources and availability of parts. The photos below do not show in detail the procedures to perform the upgrade (that’s beyond the scope of this article), but rather just snippets and some photos I took in the process of upgrading, just to give you an idea of what was actually done, and could be done if you have such a device and plan to do the same.
Let’s proceed with the upgrades then:
Upgrade 1: RAM Upgrade
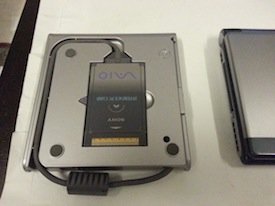
The Sony VAIO PictureBook PCG-C1MV comes with 256MB RAM by default from the factory – the first 128MB is onboard, and another 128MB on a single slot for additional RAM. The maximum memory allowable for RAM for this laptop is 384MB, which means that I needed a 256MB RAM to maximise this.
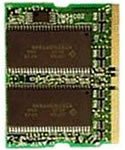
The Sony VAIO PictureBook PCG-C1MV uses a 144-pin PC133 SDRAM MicroDIMM (your attention is drawn to the description 144-pin in this case), which is quite rare. Sourcing for this RAM chip (see right) was difficult and proved to be futile even at the most well-stocked IT and computer hardware complex in my country – the closest I got was a single piece second-hand 64MB, which is not what I needed.
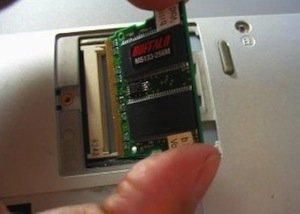
I eventually managed to find a new Buffalo 256MB RAM from Japan online, and installed it on the Sony VAIO PictureBook PCG-C1MV successfully.
The RAM now reads the original 128MB and the additional new 256MB, bringing the RAM now to a total of 384MB – the maximum allowable on this machine.
To purchase additional RAM and other upgrades for the Sony VAIO PictureBook PCG-C1MV, see the links at the end of this article or click here.
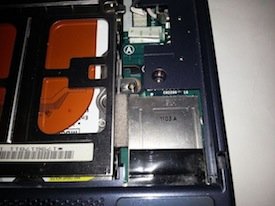
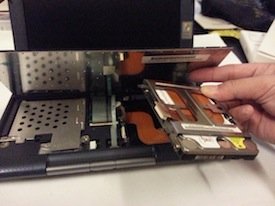
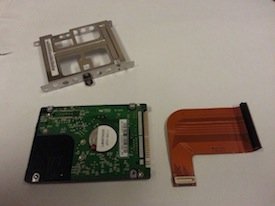
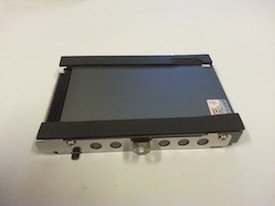
Upgrade 2: Hard Disk Upgrade
The Sony VAIO PictureBook PCG-C1MV comes installed with a 20GB hard disk drive, which is insufficient by today’s standards.
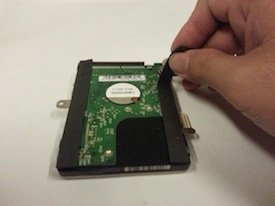
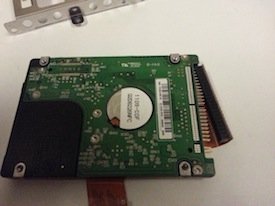
An external hard disk or thumb drive could be used, but that didn’t seem like a permanent solution – certainly not the most elegant. I attempted to replace the hard disk with one of higher capacity, and due to my oversight, bought a Serial ATA or SATA hard disk, instead of the Parallel ATA or PATA hard disk that the VAIO PictureBook uses.
This 250GB SATA cost me about USD100 at that time, and since it could not be used here, I have converted it to an external hard disk for media use.
I then bought a 160GB PATA hard disk for about USD90, and somehow that didn’t work as well. It was a working hard disk, but could not be detected or run in this machine.
At this point, I was already quite mad at myself for having bought the wrong item time after time, and this was not how I was planning to spend my money.
I was on the verge of giving up upgrading the hard disk, but knew that there was no way a laptop with 20GB would be anywhere near useful.
I toyed with the idea of using Compact Flash (CF) storage, but realised this was just too expensive. The CF capacities available then were not really more than the 20GB I already had.
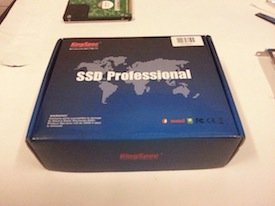
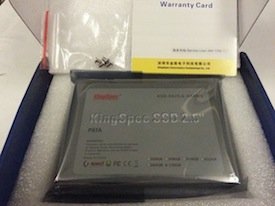
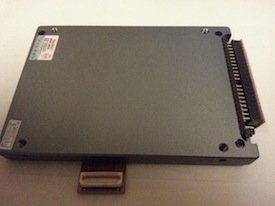
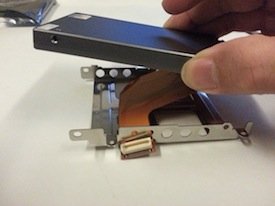
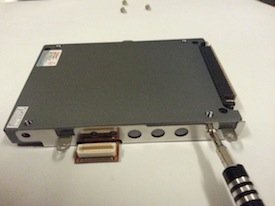
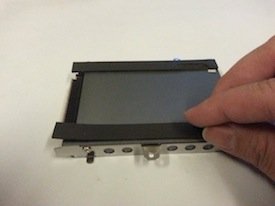
I next considered Solid State Drives (SSDs), and despite some reports that it may not run in this laptop, I decided to go ahead with it anyhow.
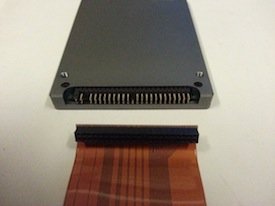
Because of the year when the motherboard was built, I realised that running a storage capacity greater than 128GB may result in a slower laptop. I was able to find a 128GB PATA SSD online for exactly USD141.17 – very expensive, and it had better work! I was already out of options.
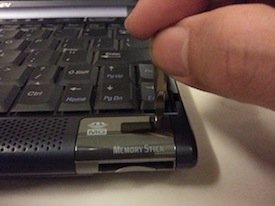
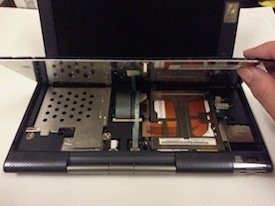
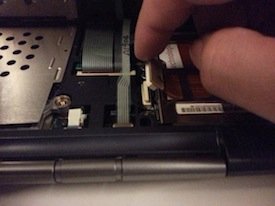
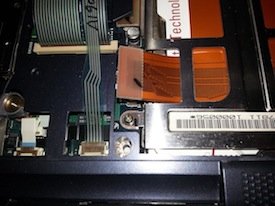
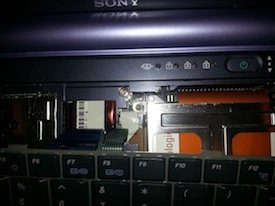
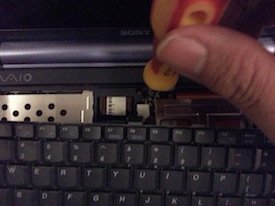
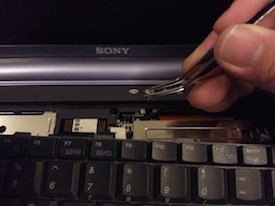
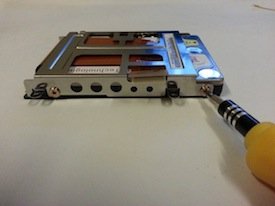
As it turned out, the SSD worked perfectly. It rendered a relatively faster and shock-resistant VAIO PictureBook. Since this upgrade had cost me the most, I will outline the steps in a little more detail below.
 |
 |
 |
 |
 |
 |
 |
 |
 |
 |
 |
 |
 |
 |
 |
 |
 |
 |
 |
 |
 |
 |
 |
 |
 |
 |
 |
 |
 |
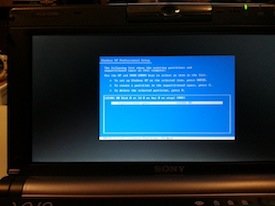
Since this is a new and empty SSD, I will need to reinstall an operating system.
The USB 1.1 on this machine doesn’t allow a flash boot install, so using a thumbdrive to reinstall the operating system was not possible. Hence the next upgrade…or purchase, rather.
As all work on the insides has been done, the following sections are more purchases than upgrades. But I’ll refer to them as upgrades still.
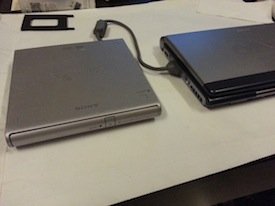
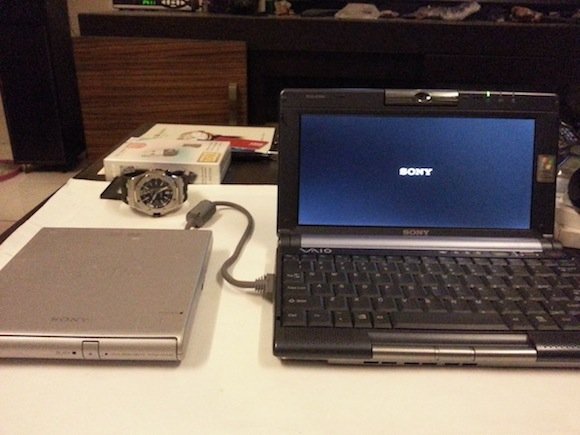
Upgrade 3: An External DVD-ROM
As mentioned before, the USB 1.1 port on the Sony VAIO PictureBook PCG-C1MV makes it not possible to reinstall the Windows OS using a flash boot method, and the next logical way was to use the old-fashioned way of a CD install.
Problem was, not any CD-ROM or DVD-ROM drive would do. I tried an external Samsung DVD-ROM drive, and that did not work, presumably because of the USB 1.1 as well.
Seems the only way was, as I had dreaded, via the PCMCIA port on the PictureBook. In order to reduce the risk of again buying something that couldn’t work, I decided to get a used Sony PCMCIA DVD-ROM drive PCGA-DVD51.
 |
 |
 |
 |
The Sony DVD-ROM drive PCGA-DVD51 cost me about USD20. It is seldom used, but is there when I need it to install software from CDs, or if there is ever a need to reinstall the operating system.
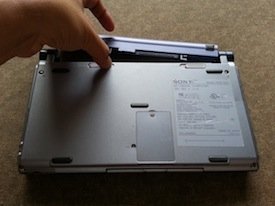
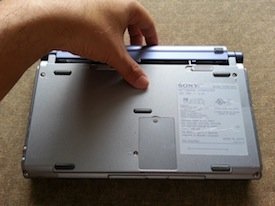
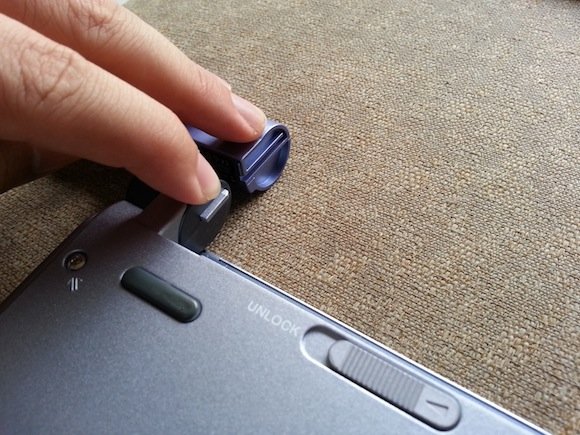
Upgrade 4: Battery Replacement
The Sony VAIO PictureBook series come with an external battery attached, with an option to install a larger capacity battery for extended runtime. Being the small laptop that it is, I wasn’t interested in the longer hours it could run, if it meant having to install something half the size of the laptop’s width behind it. This may be ok with a desktop replacement, but not for the portable laptop that the PictureBook is. For those who treasure extended runtime, this is a viable solution.
 |
 |
 |
 |
 |
 |
 |
|
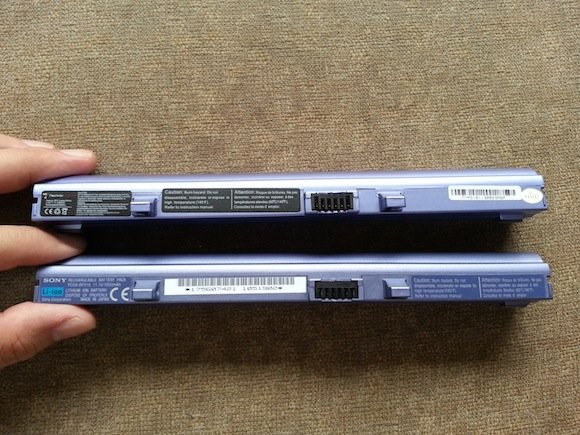 and the original battery which came with the laptop (lower). |
|
The new OEM lithium-ion replacement battery from Techno Earth cost me about USD35. The first battery which was sent to me couldn’t be charged after 2 months of use, and Techno Earth was kind enough to deliver a replacement after that. The second battery has been holding a steady charge since.
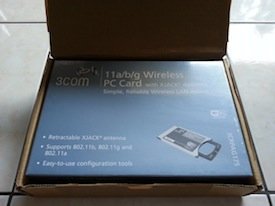
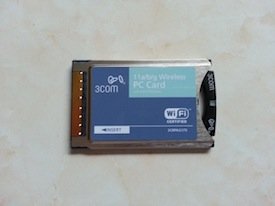
Upgrade 5: WiFi Capabilities
Laptops manufactured at the time this PictureBook came without built-in WiFi – something we take for-granted these days. A suitable WiFi card was in order. The most suitable one for this machine, considering its size, is one which is low profile, or tries to be as low profile as possible. I found that in the 3COM XJACK 11a/b/g Wireless PC Card 3CRPAG175.
 |
 |
 |
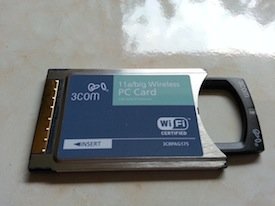 |
Again, this is more a purchase rather than an upgrade. A purchase that cost me about USD15.
Upgrades That Weren’t Perfect: Bluetooth and USB2.0
One thing I enjoy having on my laptops is Bluetooth capabilities to work with one or two of my Bluetooth mice (can we use this plural when referring to this computer peripheral?).
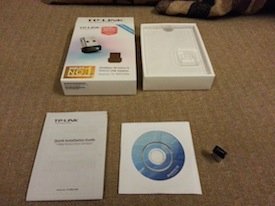
I could always use a generic wireless mouse, but that would involve using a wireless USB dongle on my only free single USB port.
I thought of ways to enable Bluetooth on this machine, and there were a couple. This upgrade however did not work to my favour, but I will outline what I did below anyhow for reading interest.
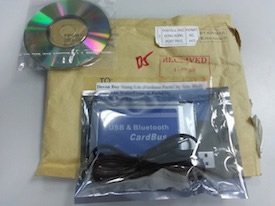
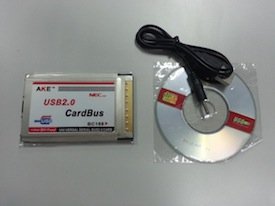
One way, I thought, of keeping WiFi, Bluetooth and a free USB port available was to use a PCMCIA card at least two of the three features. I came across one, a Bluetooth PCMCIA card with a built-in USB port, which I had planned to use with a Wifi USB dongle.
 |
 |
 |
Note that in the combination of two out of the three upgrades in this section, some worked, some didn’t work as well, and some didn’t work at all. In the end, I decided to go without the Bluetooth and USB 2.0 feature, and reverted to the 3COM WiFi Card with extendable antennae in Upgrade 4 mentioned above.
In Conclusion
Despite the upgrades, the Sony VAIO PictureBook PCG-C1MV remains unusable in a practical sense by today’s standards.
The SSD, while fast, is only relatively faster than an otherwise much slower conventional hard disk. This is in part due to the maximum allowable RAM of 384MB, which doesn’t help to make processes fast enough for more demanding use.
However, if the Sony VAIO PictureBook PCG-C1MV is limited to only word processing and spreadsheet use, and maybe even a little web surfing, it is still quite alright.
For me, all I had wanted to do was to make an old laptop a little bit more powerful than what was offered out of the box by default. To a certain degree, it was successful…but at a cost.
And here’s the cost. On top of the cost of the Sony VAIO PictureBook PCG-C1MV unit itself at USD107.50, there are these, including attempts that weren’t favourable:
| Price (US$) | Shipping (US$) | ||
|---|---|---|---|
| 1. | RAM Upgrade from 256MB to 384MB… | 28.50 | 2.50 |
| 2. | Hard Disk Upgrade from 20GB to 160GB SSD… | 141.17 | 0.00 |
| 3. | External DVD-ROM Drive PCGA-DVD51… | 16.99 | 15.88 |
| 4. | OEM Lithium-Ion Replacement Battery… | 34.21 | 19.99 |
| 5. | 3COM XJACK 11a/b/g Wireless PC Card 3CRPAG175… | 9.99 | 9.72 |
| 6. | AKE Bluetooth and USB CardBus… | 12.66 | 0.00 |
| 7. | AKE USB 2.0 CardBus… | 6.99 | 0.00 |
| 8. | TP-Link WiFi USB dongle… | 11.95 | 0.00 |
| 9. | Others, including hard disks not used… | 193.00 | 0.00 |
| TOTAL | 455.46 | 48.09 |
End of the day, I spent about 5 times the price of the laptop in order to bring it up to specs.
If you happen to find yourself with a Sony VAIO PictureBook laptop and wanted to do the same, I would suggest best to confine your endeavours simply to RAM and hard disk drive upgrades – these seemed to be the most worthwhile!
Most importantly, have fun!
Good article, know anyone who successfully upgraded one of these?????