at an online auction site
I bought a hip flask during my student days in Leeds, as I had always wanted a hip flask for some reason. It’s called a hip flask because it is contoured to fit your hip (if you keep it in your back pocket) or thigh (if you keep it in your front pocket)! I used to keep a small amount of Malibu in it, to keep me warm on those cold winter nights.
It is not uncommon to find hip flasks which have been compressed due to pressure differences between the inside and the outside, or simply squashed due to someone accidentally sitting on it.
A quick search for hip flask online revealed some online auction sites selling a number of hip flasks which are old and squashed.
Well, old would be great since these were presented as vintage items, but if you feel the sale value of the flask could be a lot better if it were at or close to its original shape, then trying what I am about to suggest below may help improve its value or chances of getting it sold. Unless of course, if part of its charm is in its squashed appearance.
Fixing my own Squashed Hip Flask
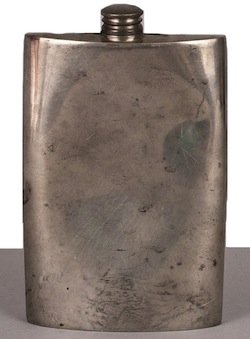
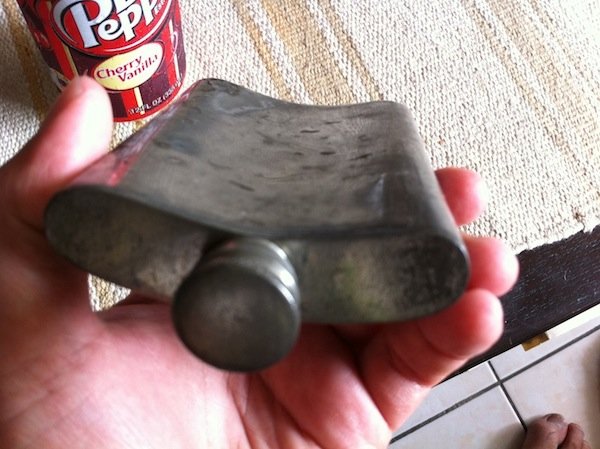
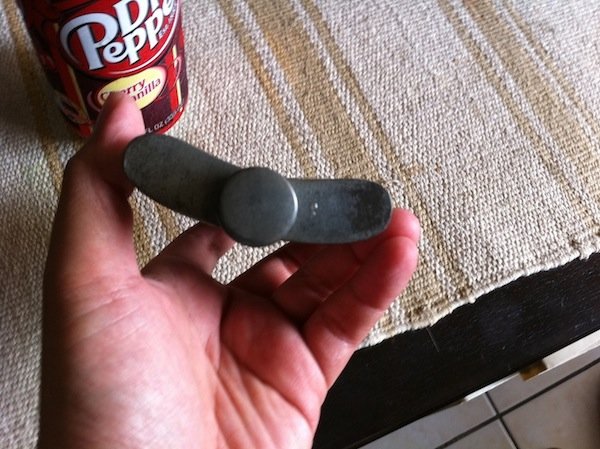
So I have a hip flask which had crushed from impact (see photo above). Not sure if I had sat on it, or if some liquid inside had “contracted” and caused it to be compressed. Either way, I was determined to get it back in shape.
I tried what seemed like the most convenient thing to do: opened the steel cap and squeezed it at the sides with my fingers to try and pop the front surface back up. This would likely work if the flask were made of rigid plastic. So no, this method did not work. I got my brains to work a little harder, and thought of this, which worked well enough:

Soda with Salt
Some of you may think of adding salt to Coke inside the flask to induce a large amount of gas quickly; I thought of the same but was not sure if that would be too fast, or too much gas beyond my control. Didn’t want to end up with a bulge on the flask that I would have to try and compress back into shape after.
Anyway, without the salt, the time taken to expand it back to shape was under 5 minutes. Best to be patient with this.
The method outlined above should work with any metal canister that can be filled and capped air-tight, so if you find yourself in a similar situation with a squashed canister, go ahead and give it a try! Provided the canister is not squashed to a crease…
Disclaimer
Please proceed to use the above method at your own discretion. If your vintage hip flask is of great provenance or of significant historical value, using the above method may cause further damage to the hip flask e.g. over-bloat or leak at the joints and edges and as such, the dent may be best left on its own.
SEE ALSO:
- White Wall Crack Repair – A Simple Cosmetic Fix
- How to Repair a MacBook Pro Adapter
- How to Replace a Sink Trap
- How to Replace Watch Leather Strap
Squashed my flask over 10 years ago. It was worse than the one pictured above, Just tried this method using coke. Half filled flask, lid on and a quick shake gave an instant ‘pop’ as the flask went back into shape. Thank you for posting.
Really glad the method worked for you! I discovered this by accident as I was sitting in my kitchen one day and thought about how I could fix my own squashed hip flask which was sitting on the countertop, and the “inducing gas from within” idea came like an a-ha lightbulb moment… 😀
It worked nicely for me. Tried heating it from the outside with a hair dryer first thinking it would behave like a car door but nothing. This did it in a few minutes.
Hi Sam, thanks for sharing your experience with us! I’m truly glad this method worked well for you. Cheers!
Malibu??
Yes, the coconut-flavoured rum in a white bottle I so happened to have in my room at that time. I don’t consume alcohol, and I certainly didn’t buy that bottle. It was a leftover that someone left in my room, and I took the liberty of finishing it slowly via this hip flask. That was over 20 years ago. Good times, fond memories! 🙂
Brilliant idea. Needed a bit of warming in simmering water too and it’s not quite the shaope it was but it looks like it has lived and now I can use it again so much thanks.