a wooden box with a good seal (see Step 1 for description)
a hygrometer (refer to link at bottom of page)
a humidifier (refer to link at bottom of page)
a drill press (you may use a handhell drill, but a drill press makes work a lot easier and neater!)
a Forstner bit and hole saw of 55-mm diameter or diameter matching the hygrometer and humidifier of your choice
a metal ruler and awl or pencil
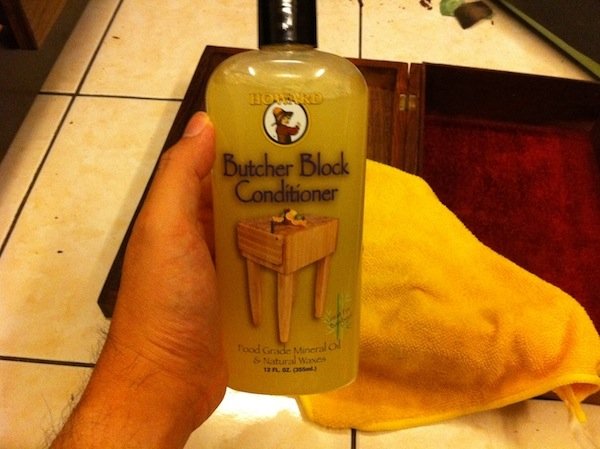
a butcher block conditioner and lint-free cloth
Some Spanish cedar wood pieces, if not American cedar wood will do too (explanation further below)
OPTIONAL:
plastic wood or wood epoxy
a sharp blade
a toothbrush and paint brush
a towel or microfibre cloth
furniture marker pen of the same colour as wooden box
propylene glycol solution and/or water pillows
NOTE: Links to purchase items used in making a humidor and alternative options are presented at the end of this article.
Humidors are expensive. But they shouldn’t be, if you know how to construct one. I used to have a small collection of cigars and pipe tobacco, and after some time, this collection grew to a rather sizable quantity necessitating a humidor to store them in.
I did shop around for a humidor, and you would be expected to pay about RM3,000 for one of fairly decent construction. Buying one seems appropriate if my cigars were Cohibas and Davidoffs, but since those that I burn these days are Quorum, Romeo y Julietas and Monte Cristos, I thought why not get adventurous and attempt to build one DIY-style at home. So this is what’s going to happen.
Today, we are going to try and make a humidor from home for a tenth of the price of commercial humidors. Don’t expect it to be of a standard equal to those commercially available in the hundreds or thousands of dollars; nevertheless it will be close and good enough to keep your cigars in a sealed environment at the required humidity.
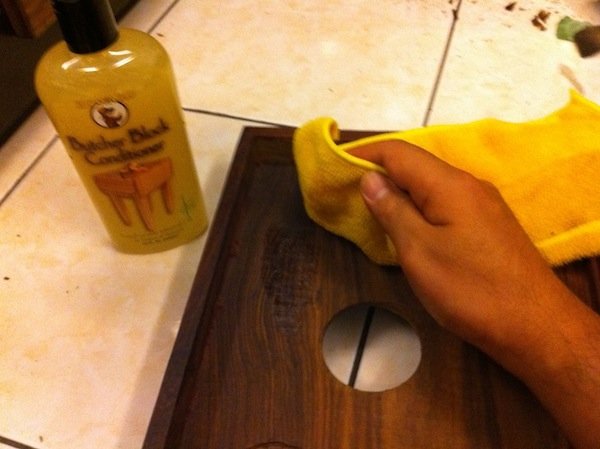
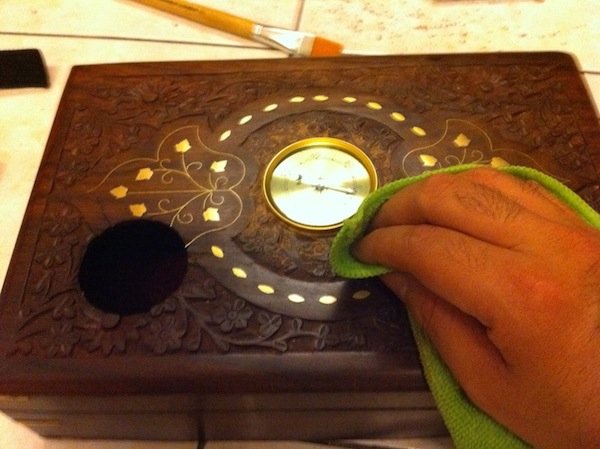
We are going to try and make it look good at the same time. If you are doing cigars, you are likely to agree that aesthetics are important, that form and function are crucial. First, some items will need to be prepared and made available before starting – refer to inset box at right.
I have also provided links to source for the tools and components used in this project at the bottom of this page for your convenience. If you don’t feel like making a humidor and prefer to just buy one outright instead, click here or head all the way down to the bottom of this page for a selection of affordable humidors at great value!
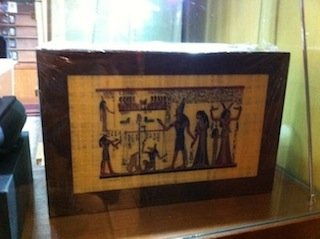
Humidors are very expensive items – this one with Egyptian motif costs RM18,000.
CIGAR HUMIDOR – Get It On eBay
Design Considerations
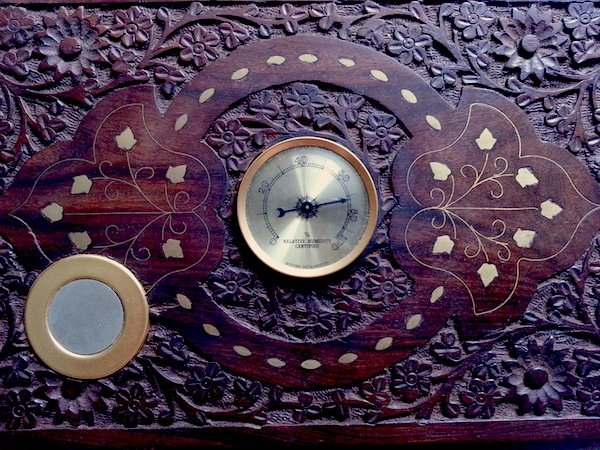
A few design considerations and methods of construction method to take note of before we begin:
We will not be building the actual box, but rather buying ready-made ones as this will make life a lot easier. You are free to make the box from scratch, but this will not be the method outlined in this article. Dovetails and tenon joints are too lengthy to cover in this article, and probably too difficult to perfect for the novice builder. After all, ready-made mahogany wooden boxes are easily available and come in the right sizes, are fairly cheap (considering the hard work you will save) and look decent enough – most already come with ornamental motifs or engravings.
I believe humidors are more interesting to look at and definitely more functional if the hygrometer is installed and displayed on the outside, whilst measuring the relative humidity within. With this method, a good seal is something to think about, but if you want the job to be easier, you can choose to install the hygrometer inside the humidor. The only thing with having the hygrometer on the inside is you will need to open the box in order to check the humidity once in a while. Today’s article will show the former, and a clue on how to do the latter if you should prefer that method. Of course, I will also assume here that the hygrometer in use has been calibrated and tested for accuracy.
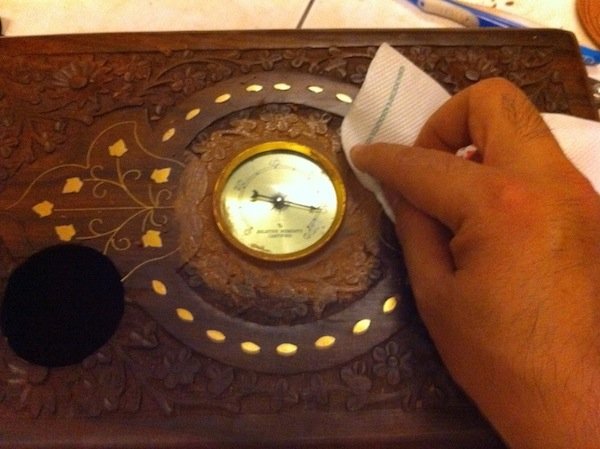
It is imperative that your internal humidor surface be coated with a moisture seal. This is where the butcher block conditioner comes in. A food grade conditioner such as the one recommended in the steps below is preferred, as other products such as polyurethane or lacquer would leave behind a scent which could ruin your cigars. This is very important. A link to acquire the food grade butcher block conditioner used in this project is provided at the bottom of this page.
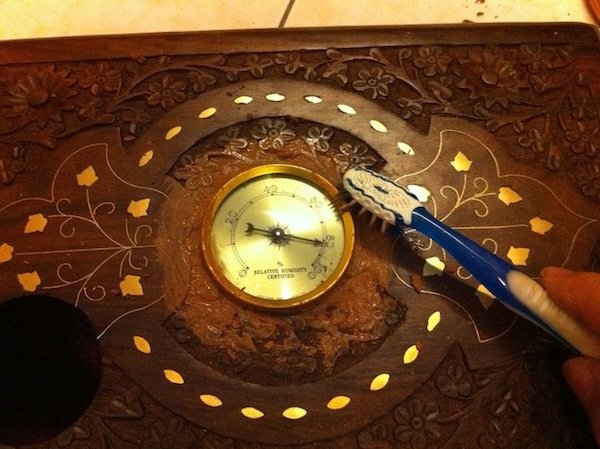
If you are able to place a tray of Spanish cedar wood inside the completed humidor, fine and dandy. In most cases, as in our case, fitting a tray in is too much trouble. If you can place some of this cedar wood inside the box, then you’re on the right track, though not perfect. If Spanish cedar is not available, the next best wood is American cedar. The cedar wood serves three purposes:
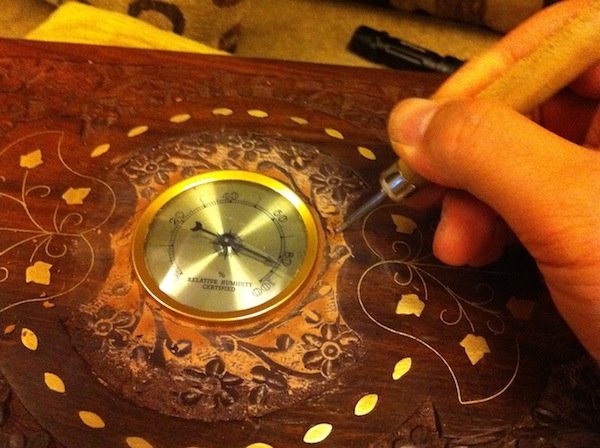
it absorbs excess moisture from the humidifier and prevents it from building up in the humidor, keeping your cigars fresh with the right aroma.
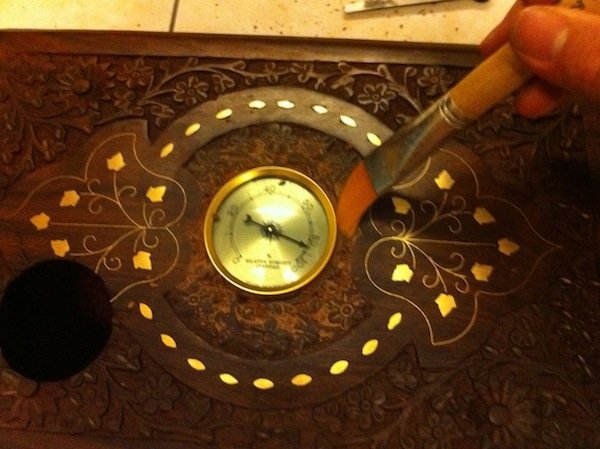
it imparts a light woody flavour to your cigars which is considered favourable.
its strong scent keeps wood worm away and prevent them from ingesting your cigars – not to be dismissed or taken lightly as it has happened to my La Flor de la Isabela cigar.
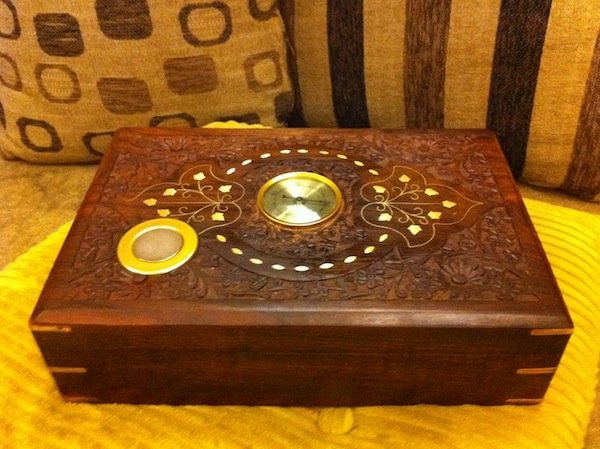
Advertisement
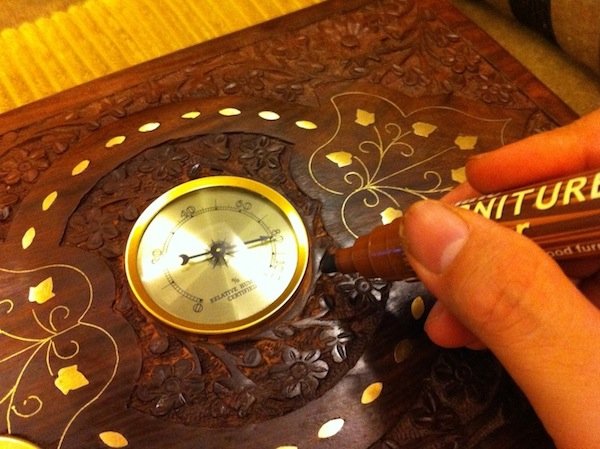
The Construction
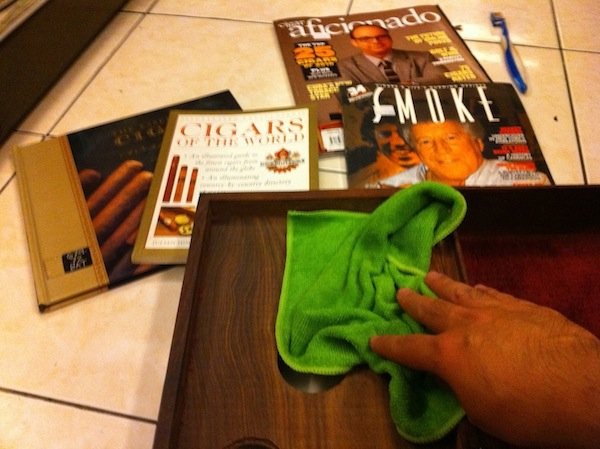
Once all the materials and tools stated in the inset box above have been obtained (see end of this article at bottom of page for purchase options), and with the design considerations and construction method established, let’s dive right in and start!
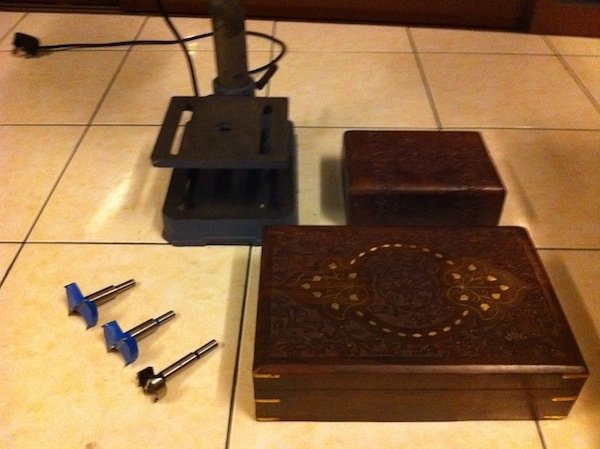
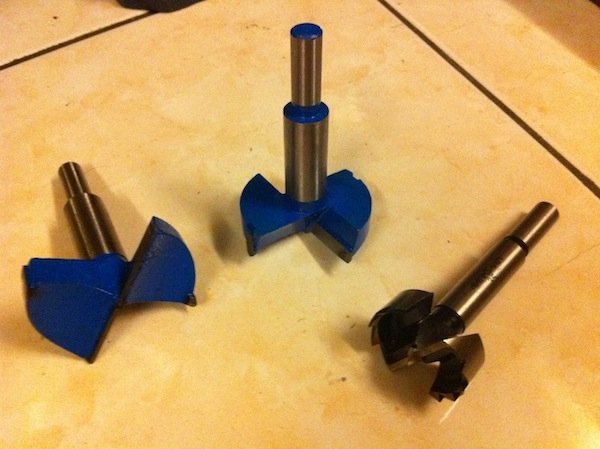
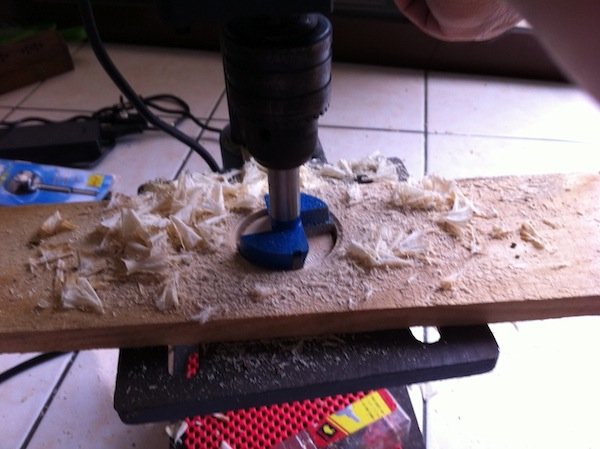
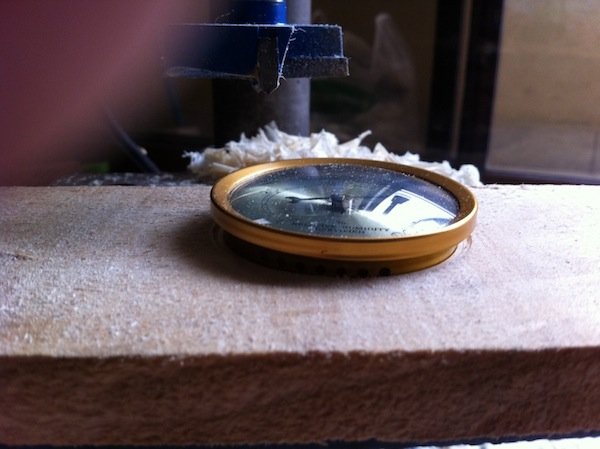
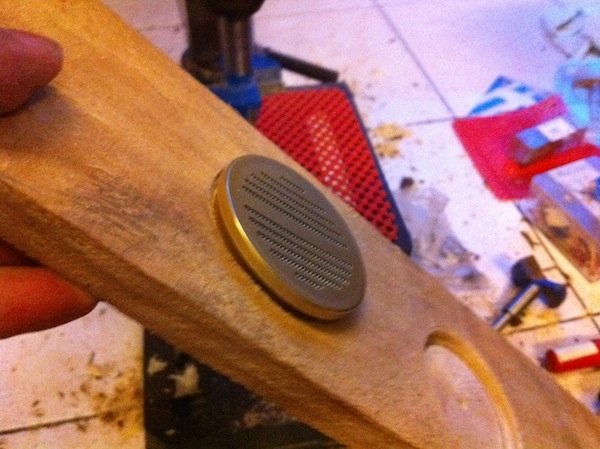
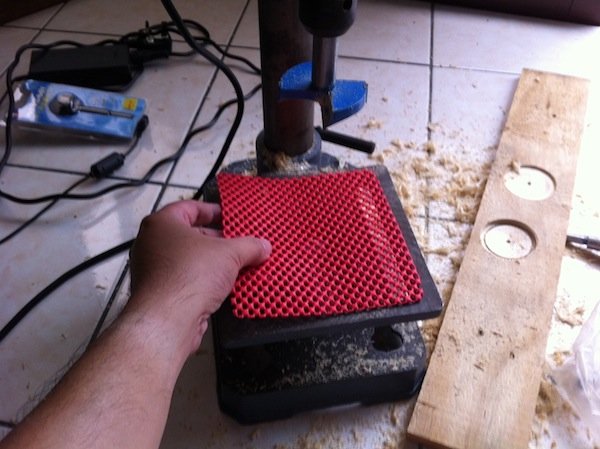
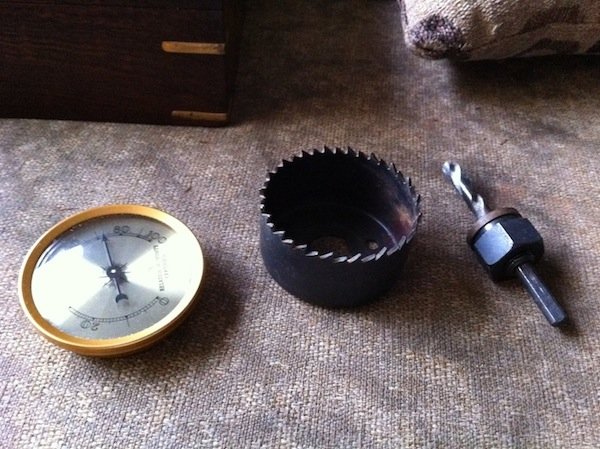
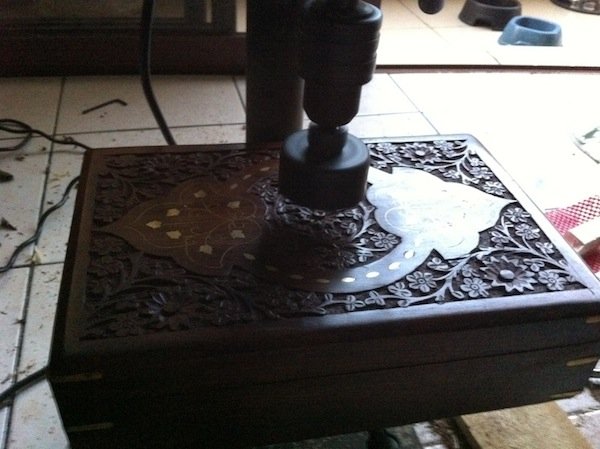
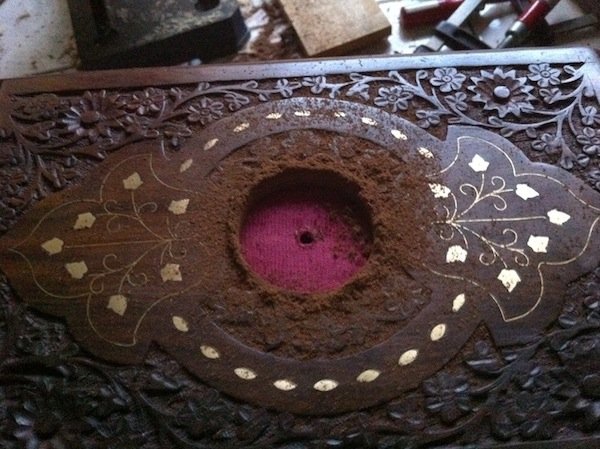
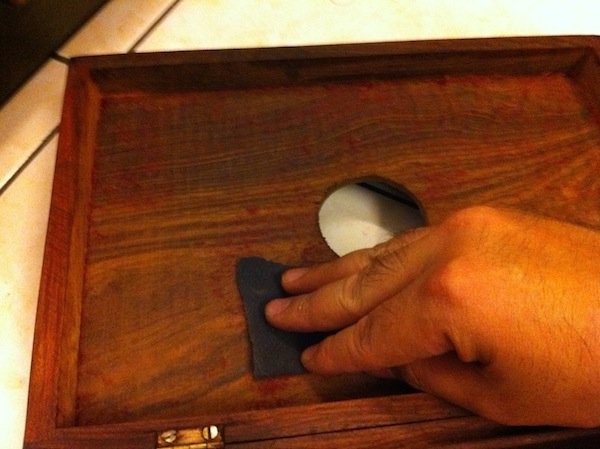
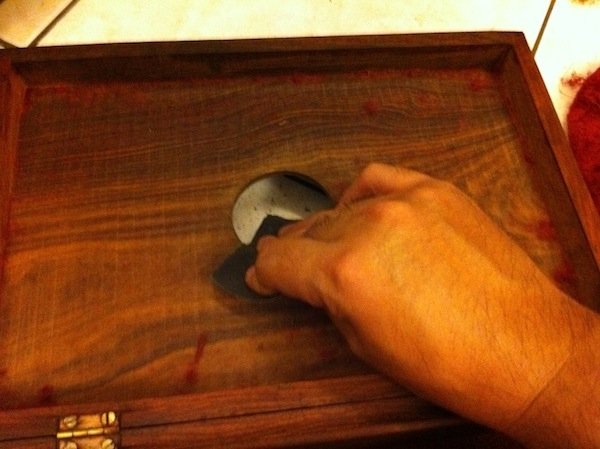
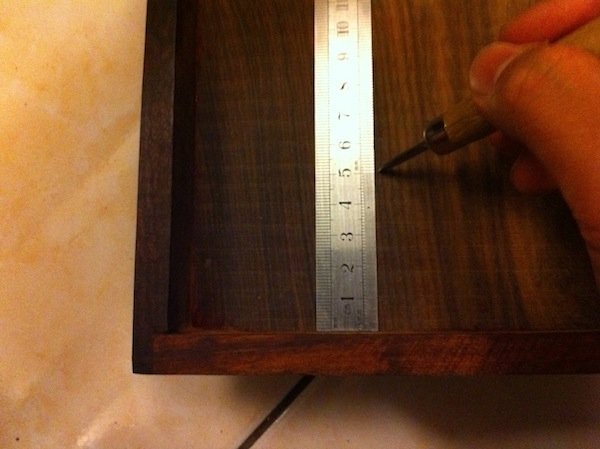
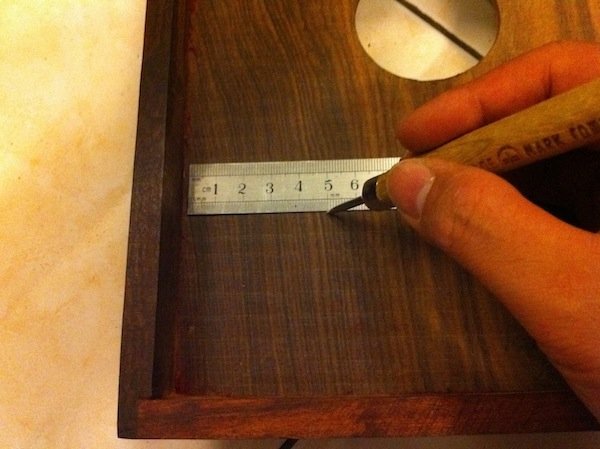
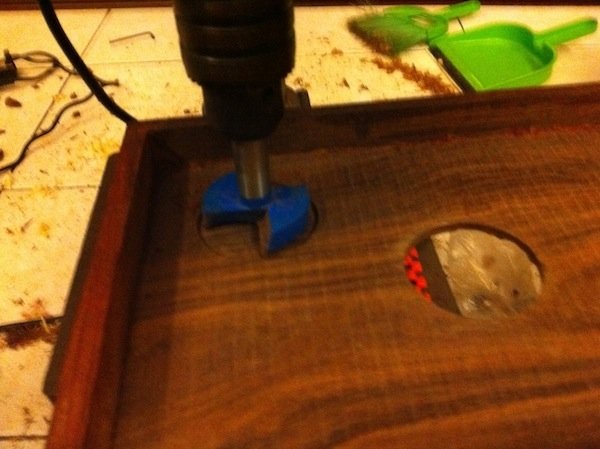
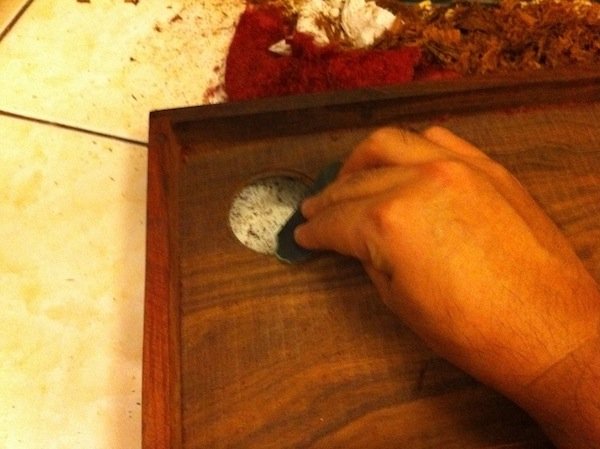
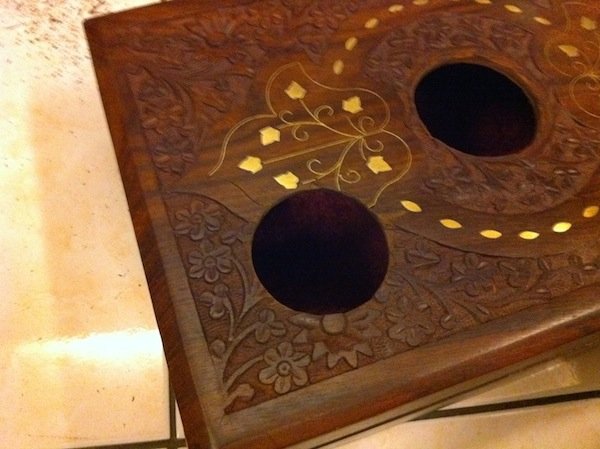
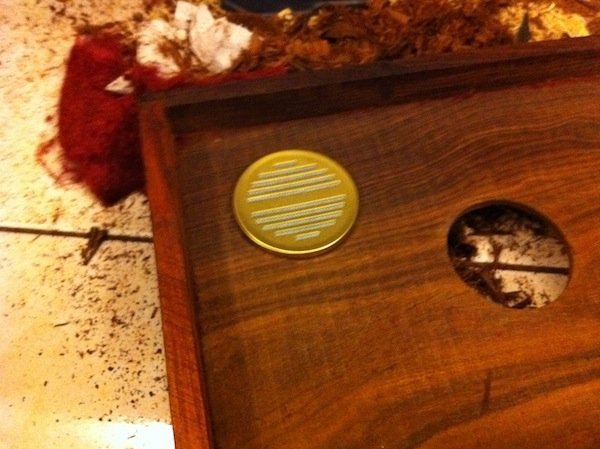
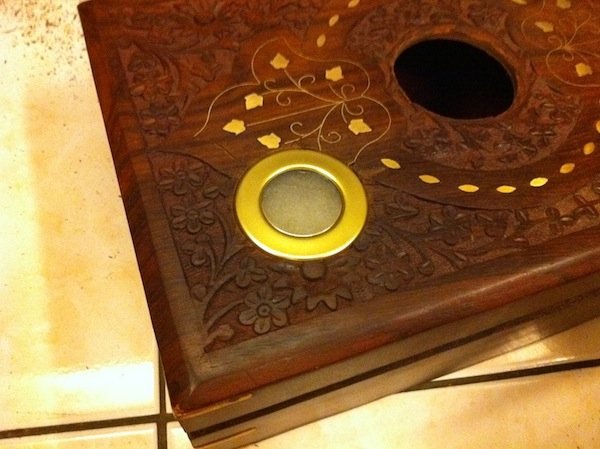
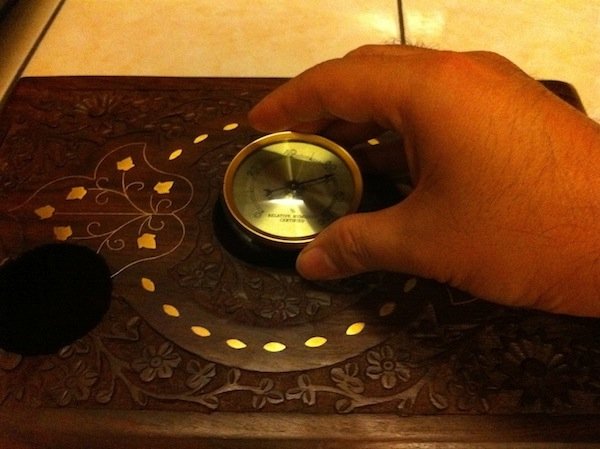
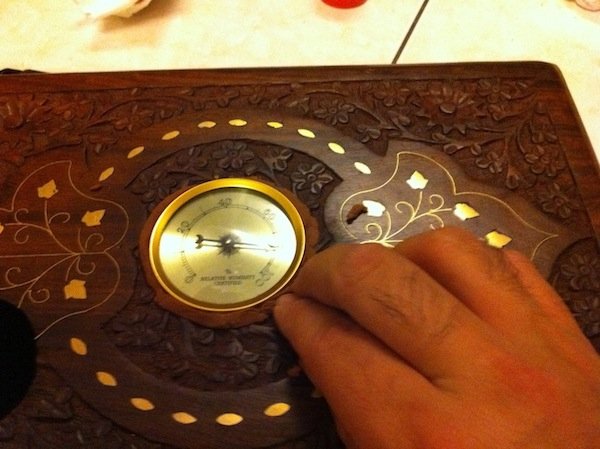
1. These are the main tools we will be using, to work on the wooden mahogany box. Shown here are one large and one small box, with two Forstner bits of different sizes and one metal hole saw, and a drill press. Ignore the small box for now.2. Here are the two Forstner bits and one hole saw bit up close. Ignore the hole saw as that is a metal hole saw which happened to have found its way in the photo. The actual hole saw for wood is shown in Step 7 below. No need to hurry; just wait till we get there. So what’s the difference between a hole saw and a Forstner bit? The former cuts a hole right through the wood; the latter just cuts a hole with a flat bottom in the wood!3. If this is the first time you’re working with a Forstner bit on a drill press, I would suggest that you run it first on a piece of practice wood, to get a feel of how the bit rotates and cuts into the wood. The action can generate quite a lot of heat, to a point of smouldering the wood even, so regular breaks in between is a must. Just go slow.4. There is another very good reason for doing Step 3 above. It is to test and see if the right Forstner bit diameter is used, before applying it to your precious wooden box, causing it irreversible damage. Drill up to a depth just sufficient to install the hygrometer into the wood. If the right diameter is used, the hygrometer should be held snugly in place just by tight-fit alone.5. Remove the hygrometer and replace with the humidifier, which if purchased in a set, should be of the same diameter and similarly held snugly in place. As you can see, the humidifier remains in place even when the wood piece is tilted. You can see the approximate depth required in the hole adjacent to the humidifier on the wood piece.6. I would recommend placing a non-slip pad on the drill press platform to prevent the object or wooden box from slipping during the drill process. Also, the soft material of this pad would help prevent any scratch or damage to the underside of the wooden box.7. Replace the Forstner bit on the drill press with a hole saw. The hole saw is just a little more complicated to fit compared to other drill bits. If you’re not sure, do check online on how hole saws are fitted.8. Place the wooden box on the drill press platform and make a hole exactly in the centre on the top of the box. Like with the Forstner bit earlier, this drilling action does create some frictional heat, and there should be regular breaks in between to allow the bit to cool.9. Allow the hole saw to penetrate all the way through the top of the box. In my case, there is a red cloth lining on the interior of the box which needs to be removed.10. Cut the interior edges with a sharp blade and remove the velvet lining on both the inside top and inside bottom of the box. I chose to remove the velvet lining as it does not, in my opinion, make for a good humidor construction due to its scent and moisture-retention properties.11. With the lining removed, proceed to sandpaper away all traces of glue and lining lint with a 600-grit sandpaper. Fold the sandpaper in half and work into the four edges of the compartment as well.12. Work the sandpaper around the edge of the hole that was just made. Finish the interior surface with a 1000-grit sandpaper.13. Next, place the humidifier where you think would be the most suitable place on the inside top of the wooden box. In the case above, a 50 mm clearance from both edges seems ideal.14. Measure with a steel ruler and mark 50 mm from one side using an awl…15. …and do the same with the other adjacent side. You may use other dimensions, but in my case, 50 mm was ideal.16. Replace the hole saw on the drill press with the Forstner bit and drill at the mark created with the awl in Steps 14 and 15 above.17. I over-estimated the thickness of the wood here and the Forstner bit went all the way through. Ideally, the Forstner bit should stop short before emerging out on the other side, but no worries – let’s just make the best of the situation. Smoothen the hole edge with a 600-grit sandpaper.18. This is how the other side of the hole looks like. Not too bad. The box-centre hole was intentional, the other wasn’t. But we can still make it look like it was, with proper finishing.19. Before proceeding further and installing any items, we should now coat the internal surface with a butcher block conditioner. As explained earlier, this is to protect the interior wood from warping and damage due to the relatively high humidity to be maintained internally later. A food grade one should be used to prevent introducing unpleasant odours and toxins into your humidor environment.20. Wipe the internal surface evenly with the butcher block conditioner using a clean lint-free cloth. Wipe in the direction of the wood grain and allow to soak for 20 minutes before wiping off any excess.21. Finally, buff the wood to a nice sheen. Use a different cloth if necessary.22. Install the humidifier as shown. The fitting should be a snug and tight one as had been done on the practice wood piece earlier in Step 5.23. This is how it looks like on the other side, from the outside of the box. Come to think of it, it doesn’t look half as bad as expected, and in a way, tells an observer that there is another item of sophistication within, without opening the box. Let’s remove the humidifier for now, to prevent damage as we work on the next part.24. Next, place the hygrometer from the outside of the box into the centre hole. It should also fit snugly, and if not, a metal bracket or bar can be fitted on the inside to securely hold it against the box top. Let’s take a peek on the underside…25. Use a torch to see if there is any leak or if a good fit has been achieved. In the case above, some light was visible when viewed from the interior side of the box through the gaps and this needed fixing. Another important thing to note – the hygrometer model that is used here measures relative humidity via a number of small holes on its sides, so depending on the model that you purchase and use, make sure these holes are not obstructed or buried in the wooden box.26. To seal off any gaps, work some wood epoxy or what is sometimes commercially known as plastic wood into the area between the hygrometer and the hole with your fingers. This step may be omitted and is only necessary if there are any sizable gaps. CAUTION: In fact, the fit should not be too tight, otherwise any inadvertent expansion of the wood caused by moisture from the outside of the humidor may squeeze and cause the glass on the hygrometer to crack.27. Remove excess plastic wood with a slightly damp kitchen towel…28. …and a wet toothbrush for areas such as crevices and ornamental engravings. Water-based type plastic wood is soluble in water for easy removal and excess should be wiped off and removed before it is set. Here, water was used, which explains the high relative humidity reading exceeding 80% RH on the hygrometer.29. Any plastic wood which has dried and set can be removed slowly with an awl or sharp pointed object. Be careful not to damage the wood underneath it.30. Loose dry plastic wood can be brushed off from crevices and ornamental engravings with a paint brush as shown. Use the paint brush wet if there is unset plastic wood which needs to be removed.31. Any left over residue and mess can be further cleaned and removed with a damp cloth by dabbing. Use the paint brush again if necessary.32. Reinstall the humidifier as had been done in Step 22 and we’re almost done. Oh, it looks like there’s just one more thing to do. Can you see it in the photo above?33. Here it is! Let’s place the final finishing touches by using a furniture marker pen on the light-coloured set and dried plastic wood. Any plastic wood in the engravings which could not be removed earlier can also be darkened with the marker pen to conceal it. The colour used here is mahogany, which is the same colour as the wooden mahogany box used in this project.34. Once all wet finishing is dry, we can finally put the completed humidor to use. To keep the environment within at its optimum relative humidity of 70% (see footnote below), drip a few drops of water mixed with commercially-available propylene glycol solution in 50/50 proportion into the humidifier. Alternatively, you may also use perforated packets with damp tissue in it, known as water pillows (shown inside the box above) to achieve the desired humidity. Finally, I threw in some Spanish cedar wood pieces to regulate the humidity levels.
Get It on eBay
Other Considerations and Remarks
NOTE: The correct relative humidity to be maintained within the humidor should be between 68% and 72%, and should never exceed 75% to prevent fungus growth and the hatching of tobacco beetles. The best way to achieve this is to drop into the humidifier a 50/50 solution of propylene glycol and distilled water. The link to purchase commercially-available propylene glycol solution is provided below. I use an activation solution marketed as Madelaine 50/50 Propylene Glycol Solution, which I highly recommend.
OPTIONAL: You may also use a small forstner bit to create a hole just small enough to embed a strong alnico magnet elsewhere on the same surface as the humidifier, so that a metallic cigar cutter could be attached and held in place by the magnet for storage when not in use. Just be sure that the magnet is not too close to the edges such that the cutter will not fit.
Update in Performance
After 5 months of use with one refill within that period, the relative humidity within my humidor is maintained at 72% RH – thanks to a good seal and a suitable activation solution!
[…] the steps to make a humidor using this method, with photos and description along the way at Making Your Own Humidor/. Please take a look at the article, and I welcome any comments or constructive suggestions for […]
Wow! it’s just great. This is really very helpful. I really appreciate the way you have made this. Thanks a lot for sharing this. http://lacasadelhabano-brussels.be/en/


[…] […]
[…] […]
[…] the steps to make a humidor using this method, with photos and description along the way at Making Your Own Humidor/. Please take a look at the article, and I welcome any comments or constructive suggestions for […]
Wow! it’s just great. This is really very helpful. I really appreciate the way you have made this. Thanks a lot for sharing this.
http://lacasadelhabano-brussels.be/en/
db, when i got the raw materials ready i will make apt with u all rite?(^@^)