Cold Air Intake Heat Shield Fix

Car engines always run best with cool air, and draw outside air in through an air intake hose past the air filter and through the MAF sensor and to the throttle body.

alfa romeo
The air intake inlet is hidden from view by the heat-insulating fabric, which seemed to have become too soft and collapse under its own weight and due to suction over time.

Some cars are fitted with a cold air intake heat shield, to minimise the amount of heat dissipated by the running engine being introduced into this stream of air.

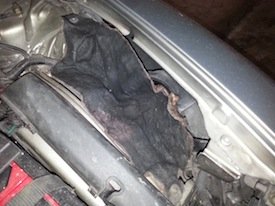
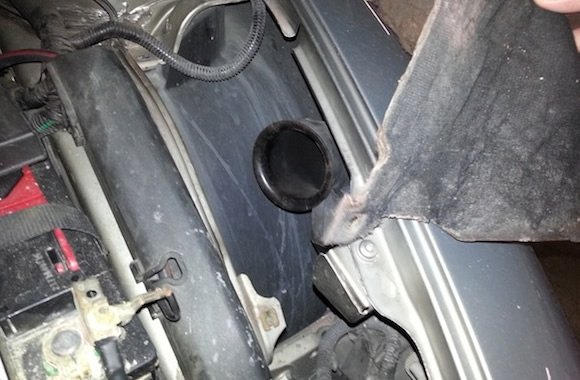
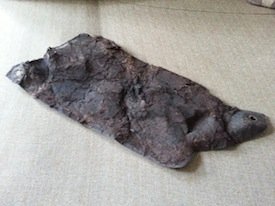
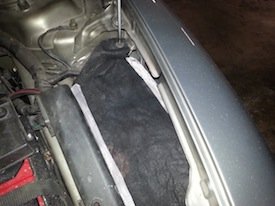
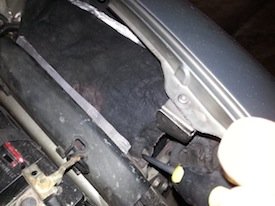
In the Alfa Romeo 147 for instance, a piece of heat-insulating fabric is installed just over the air intake inlet, which is found at the far left end (next to the car battery) under the hood. The air intake could be at different locations under the hood for different car models.

After some time, as the fabric gets older, it becomes soft. Small pieces on the underside may also break off and get inadvertently sucked into the air intake.

These pieces, should there be any, will be caught by the air filter along the way. This is not a cause for critical concern, just that the air filter will need to be replaced or cleaned more frequently.

Advertisement

“…with the heat shield blocking the way of the airflow, you may find your car’s performance adversely affected.”

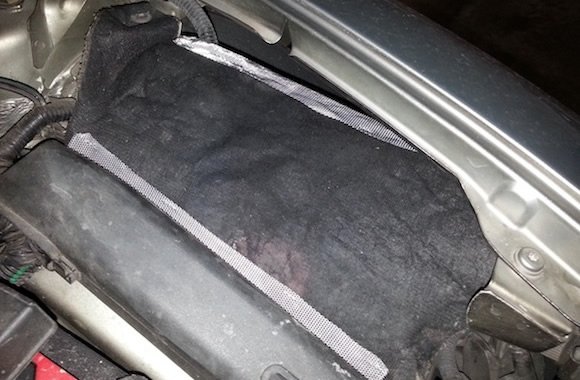
What is more of a concern is when the heat shield fabric becomes too soft, and it gets sucked in by the strong suction during throttle.

The fabric is screwed onto the chassis of the car, so it will not be completely sucked in, but with the heat shield blocking the way of the airflow, you may find your car’s performance adversely affected.

This will be indicated by a loss of power, some flat spots in the lower gears, and if bad enough, even some sputter like the engine is gasping for air. It will be noticeable.

So, should the heat shield be completely removed and the car run without it in place? Well, I’ve tried that once and the car’s performance took a noticeable dip.

There is a reason for the heat shield being there in the first place, and quite an important purpose for it to remain there. Of course, such a fabric could always be replaced, but in my case, I chose to reuse.

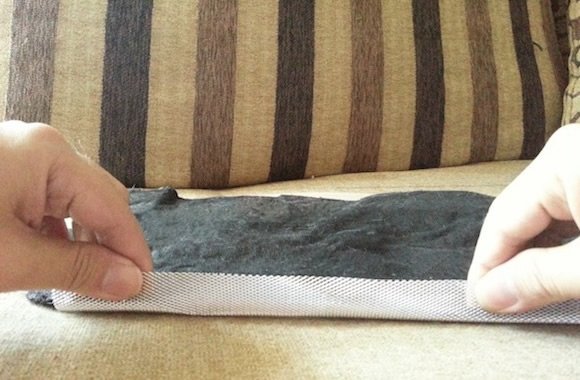
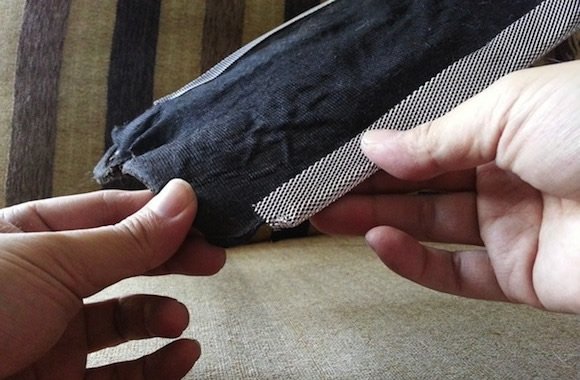
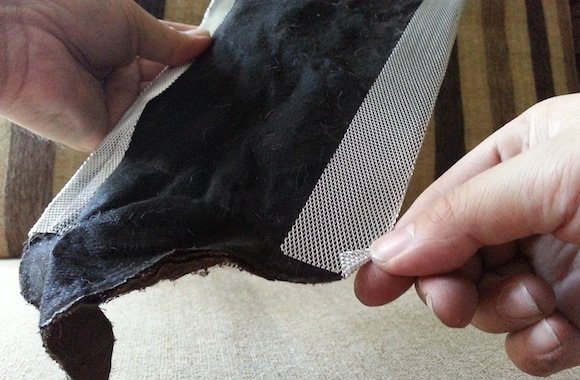
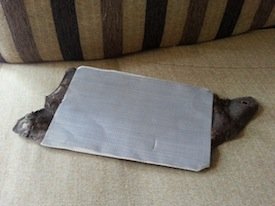
In order to do that, the fabric had to be reinforced slightly.

To perform this task, we will need a few items and tools:
Philips screwdriver (to remove and replace the heat shield on the car)

  • A pair of pliers
  • A normal stationery stapler (optional)
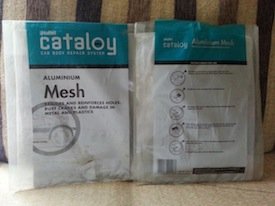
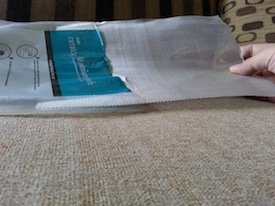
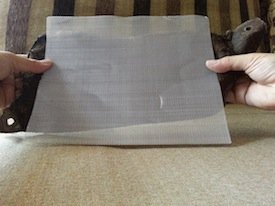
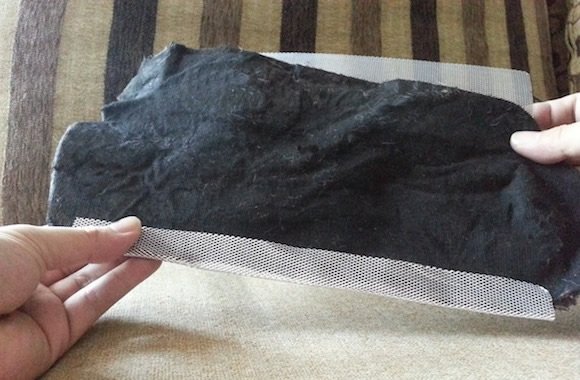
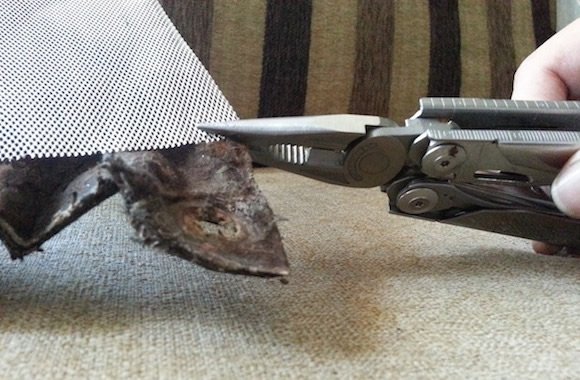
  • Aluminium wire mesh

Let’s proceed!

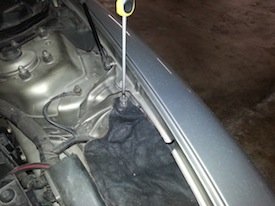
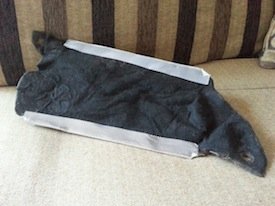
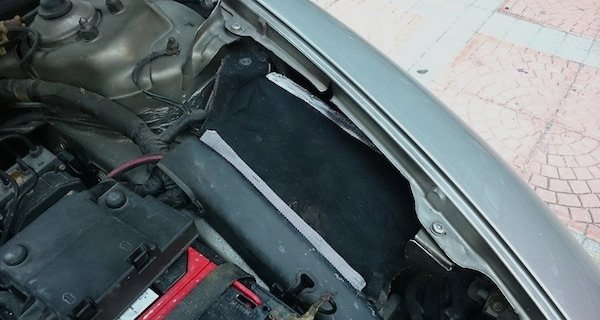
First, locate the heat shield under the hood of the car. Once you’ve found it, remove all screws or mounting holding the heat shield in its place.

alfa romeo
1. On the Alfa Romeo 147, the heat shield is held down by only two screws.
alfa romeo 147
2. Remove both screws.
alfa romeo engine
3. Remove the heat shield fabric from its place and identify the topside from the underside of the fabric. This is important. The cold air intake inlet should now be visible. Take the fabric to your regular workbench.
cold air intake heat shield
4. These are the aluminium mesh that will be used. The size should be slightly bigger than the fabric, and be able to wrap around it. In my case, this is about the size of an A4 paper. I happened to have a few sheets lying around.
cold air intake heat shield
5. Remove one sheet of aluminium wire mesh from its packaging.
cold air intake heat shield
6. Study the heat shield fabric and determine the topside from the underside, if you haven’t already done so when you removed it from the car earlier.
car heat shield
7. Place the aluminium mesh flat across on the underside of the fabric, leaving about an inch or so extending on both sides of the fabric. The screw holes should remain uncovered.
cold air intake heat shield
8. Take one extended end and fold it around the fabric, making sure that the other unfolded extended end is about the same dimensions as this one.
cold air intake heat shield
9. Press down firmly along the line of fold. As the aluminium mesh is rigid yet malleable, folding it around the fabric wraps it quite tightly without the need for adhesives, tape or similar.
cold air intake heat shield
10. Fold and do the same for the other extended end. Both sides should have more or less equal widths of aluminium mesh folded over against the topside of the fabric.
cold air intake heat shield
11. Look at the underside at ensure that the aluminium mesh is flat against the underside of the fabric before proceeding. If it is sagging with too much space between the materials, redo the folds.
cold air intake heat shield
12. This step is not really necessary, but I would advise to do it anyway. Fold away the corners of the aluminium foil to a chamfer, for two reasons – to reinforce the grip of the mesh at the corners, and to remove the sharp corners of the aluminium mesh.
cold air intake heat shield
13. Once the position of the aluminium mesh is final, squeeze along the entire fold lines on both sides tighter with a pair of pliers. Do this for the chamfered corners as well. This will provide a very secure fit and grip between the two materials.
cold air intake heat shield
14. Again, this is not necessary, but for added measure, the aluminium mesh could also be stapled to the fabric. Here, the top of the staples is on the top side of the fabric, which will be away from the air intake inlet should the staples come loose. Not really a cause for concern as there is still an air filter along the passage of airflow downstream.
cold air intake heat shield
15. This is the finished topside…
cold air intake heat shield
16 …and underside of the fabric reinforced with aluminium mesh.
cold air intake heat shield
17. Reinstate the fabric to its place in the car…
cold air intake heat shield
18. …and fasten back both screws.
Get It on eBay

Alfa Romeo engine bay
19. That’s it! For this car, the left edge of the folded aluminium mesh can actually be pushed into a long slot which is part of the car chassis. This helps to further hold the fabric in its position.
“There is a reason for the heat shield being there in the first place…”

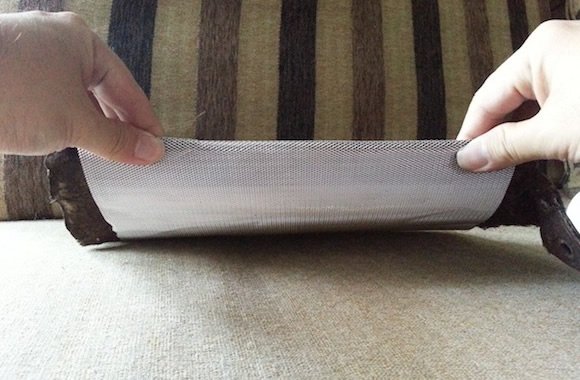
After a week of driving, check the fabric to ensure that everything is still in its rightful place – that the fabric has not collapsed or been dislodged, and that the aluminium mesh has not detached itself from the fabric.

I have driven the car for months now, and the whole setup has not moved from its position. At least now, I know for sure my cold air intake will not be blocked by a fabric which collapses under its own weight or gets sucked in by the throttle, and that the heat shield fabric will still be minimising hot air from the engine bay from entering into the air intake.

Of course, some may argue that the fabric could already be too old to have proper insulating properties for its function, and that it would be best to replace the heat shield fabric altogether; but this is a quick fix for those who want an alternative. Or for cases when such a fabric cannot be easily sourced or replaced.

air intake heat shield
UPDATE: 3 months into the restoration after hundreds of kilometres, the reinforced heat shield fabric still held up well.

See also:

Other related sites of interest:


GET IT ON EBAY


ALFA ROMEO ACCESSORIES AND MERCHANDISE


BOOKS ON ALFA ROMEO AND SPECIFIC MODELS


Subscribe
Notify of
guest

This site uses Akismet to reduce spam. Learn how your comment data is processed.

0 Comments
Inline Feedbacks
View all comments
devonbuy.com