The following is a guide on how to configure email on iPad for one of your existing email addresses. We will use the Mail app, which is found on iOS devices on both the iPhone and the iPad.
We will use the iPad for this walkthrough as emails are best read on the larger screen of the iPad.
Although the screenshots shown here are those you will see on your iPad, you will also find that these steps will be similar on your iPhone and iPod touch.
If you have not used Mail on your iPad and are planning too, let us assure you that the iPad is highly apt at handling your email reading and sending needs.
But first, your email accounts will need to be set up and configured. Let’s get started!
Advertisement
How to Configure Email on iPad
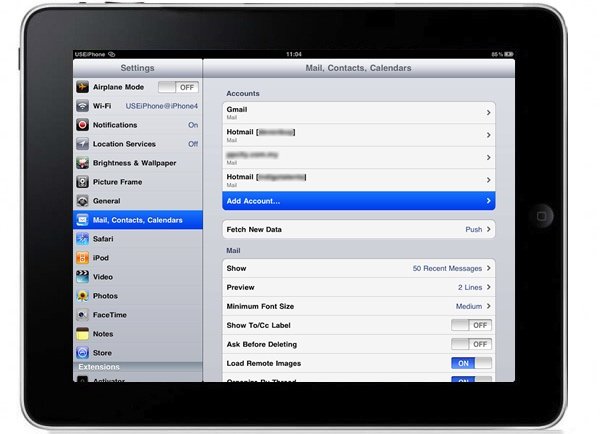
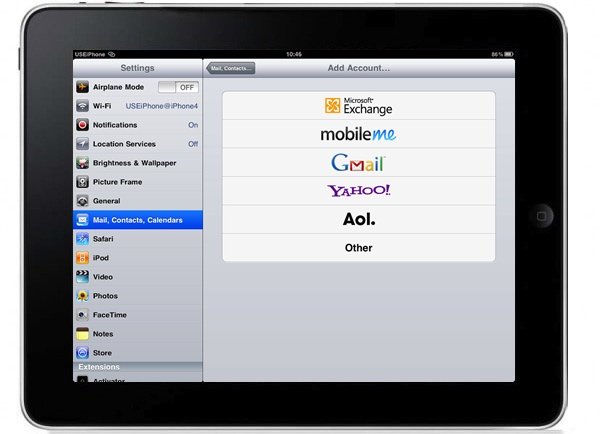
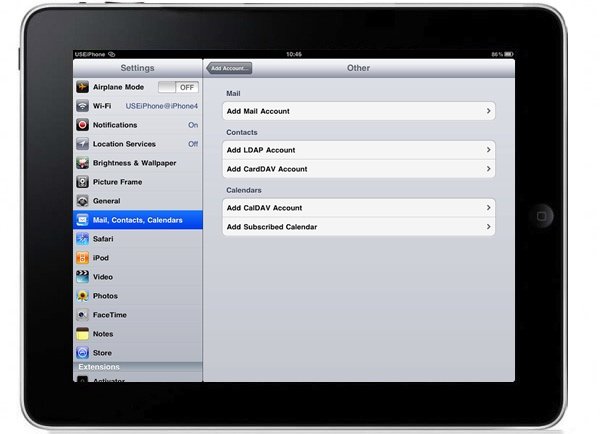
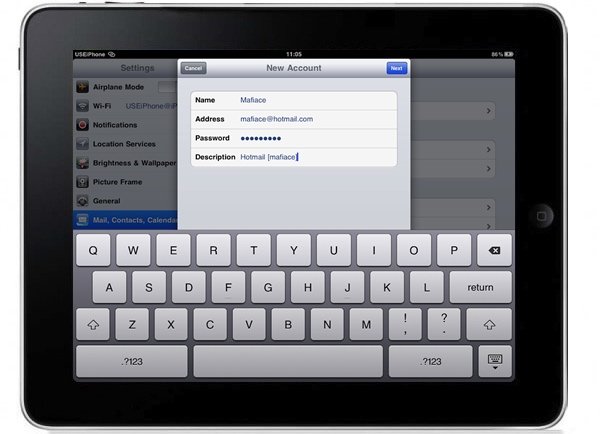
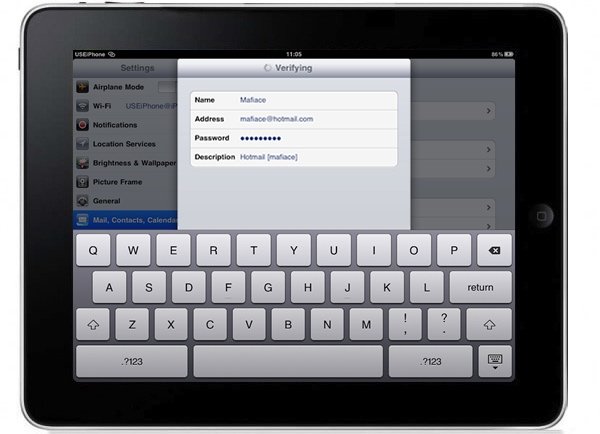
1. Go to “Settings” on your iPad and you will see a display similar to the one above. Find “Mail, Contacts, Calendars” in the list on the left column and look for the section that says “Add Account…” on the right. If you have not added or set up any email accounts before, you will not see the list of email accounts blurred out in the right column above. You should only see “Add Account…”. Go ahead and tap on “Add Account…”.2. Tapping on “Add Account…” brings you to a list of common service providers. Adding any one of the default ones like Gmail, Yahoo Mail or AOL is quite a straight forward process. Let’s set up a Hotmail account, which is not included. To do this, tap on “Other”.3. On this “Other” screen. Just tap on the first option “Add Mail Account”. Do not be concerned with the LDAP and other account setups below that. If you’re not familiar with these terms, you would probably never need to set these up by yourself. Those are linked to your organisation, something your company IT guy will likely be responsible to set up for employees.4. In the New Account screen, fill in the particulars of your email account. You will need to get the second and third fields correct and fill them accurately as these are your username and password. For the username, you will need to fill in the entire email address as shown. The first and last fields are entirely flexible. For the last field Description, this label will appear in your Mail app later so use an appropriate description. Click on the Next button at top right once you are done.5. Upon clicking Next, mail setup then takes the next few seconds to communicate with the email server to verify the information you have just typed in. Once the information has been verified and confirmed, you will come to the next screen.
Get It on eBay
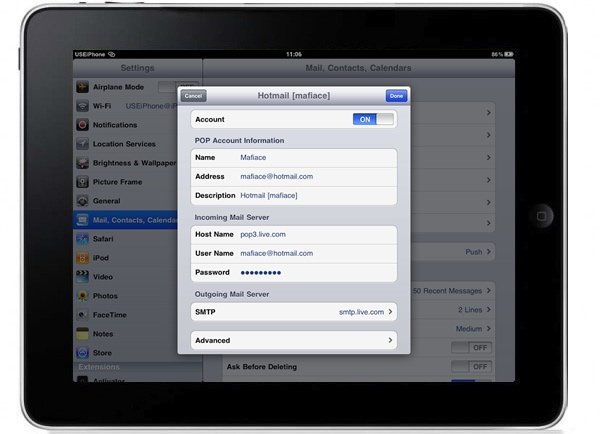
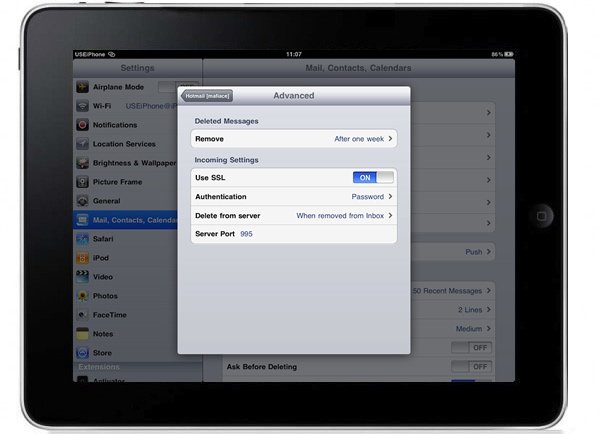
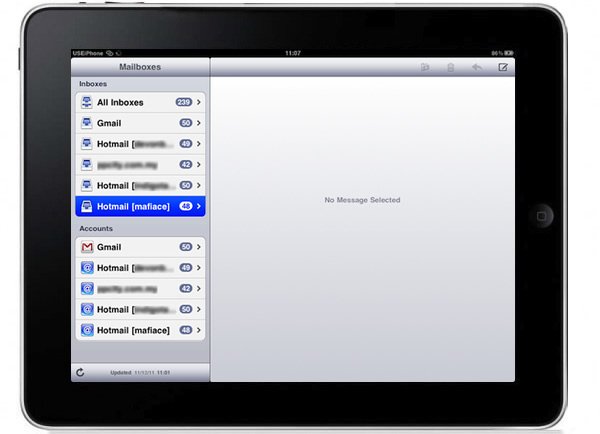
6. In the following screen upon successful verification as shown above, other information related to your email account such as incoming and outgoing mail server are shown. At the top, an option to switch the account on or off is available. If you have set up a number of email accounts on your iPad, there are times when you do not want all your email accounts to show in your Mail app, and this is where you set such accounts off. We will leave this on for now, and explore the advance settings in this setup process. Click on “Advance” right at the bottom.7. Advanced is where you set the finer details of your email account on your iPad. You may set your emails to be deleted and removed after a specified time. In the screen above this has been set to messages to be removed after one week. Tap on this to change this to other settings. You may leave the other settings under Incoming Settings as default, with the exception of “Delete from server”, where you may configure to have your emails deleted from your server when you delete them on your iPad. If you prefer to retain emails deleted on your iPad in your server the next time you check emails on your desktop, then set this to “Never”. The other option is to set to delete from server after seven days. Once this is done, tap the top left button to go back to the previous screen, and click on the Done button at top right.8. Finally, get out of “Settings” and launch the Mail app on your iPad, which comes pre-installed on all iOS devices by default. As you can see in the screenshot above, our new hotmail address is now listed in the list of mailboxes in the left column.
Now that you have read up on how to configure email on iPad, read How to Use Mail on iPad to follow up and learn more about the default Mail app and start emailing!