WHAT YOU WILL NEED:
- a 3 mm-thick fiberboard or particle board of dimensions as large as you want the knife to be, from handle tang to the tip of the blade
- regular creaseless kitchen aluminum foil
- a block of timber wood of at least 150 mm (L) x 60 mm (W) x 40 mm (D)
- 6 nos. of brass single slot screws, i.e. (-), not (+)
- tools including fine hacksaw, metal file, F-clamps, drill press, wood drill bit, countersink bit, pencil, ruler, retractable utility blade and glue (details below)
Here’s a step-by-step pictorial guide on how you can make a realistic and convincing theatrical kitchen knife, minus the sharp hazards, suitable for plays and Halloween.
This knife was commissioned by a friend for his Halloween costume party contest organised by his company, which he ultimately won top prize.
While I would like to think that the knife played an instrumental role in this success, I have to admit his overall costume was one-of-a-kind and creative, with more effort than a normal person would care to put in – like getting a mobile shower cubicle custom-built with curtains and castors, at the mill!
Although the knife played only a supportive role in his getup, it nevertheless added the required touch in the overall presentation.
A. Conceptual Design
When the request to manufacture such a knife was made, the first idea that came to mind was the classic conventional kitchen knife following the designs of Zwilling J. A. Henckels. I personally use a similar J.A.Henckels in my kitchen and it is a joy to use.
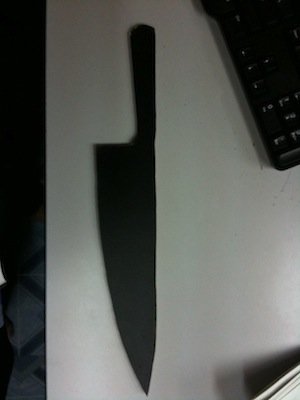
My first step was to determine the design and dimensions the knife was to take form. The photo below shows a picture of a model that was suitable for the purpose. Before commencing, I ensured that all tools and materials as outlined in the box at right were in hand.
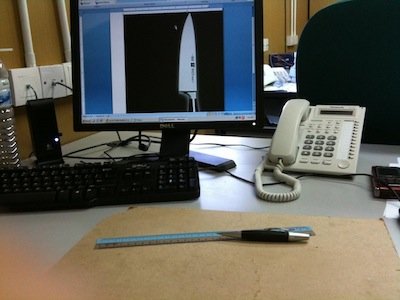
A1. I was only interested in the form or shape of the knife. A 3 mm-thick fiberboard would be most suitable, as it is neither too thin and flacid, nor too thick and rigid to work with. You could either print the picture out to trace on the fiberboard, or trace it freehand the way I did.
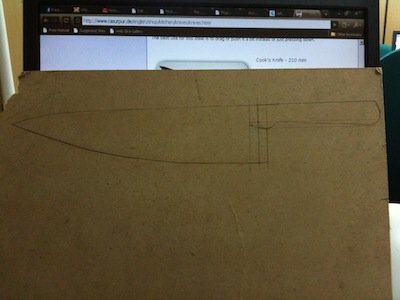
A2. I have to assure you at this point that I am not particularly gifted in the art of copy sketch and drawing. The result of my lack of skills is as shown above. See, not too bad! A good tip would be to use the ruler as a guide to work out the curves on the knife. As you are drawing the outline of the knife with the ruler, gradually tilt the ruler as you draw with the pencil to achieve the desired curves. A dimension of 210 mm was given as a clue for the length of a cook’s knife, but I had wanted the knife to be longer and larger for a more menacing impression. After all, it was for Halloween!
B. The Preparation and the Raw Cut
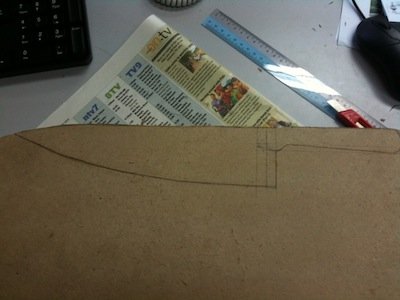
B1. Once you have completed the entire outline of the knife (including the tang or handle section, please do not leave this out), you may proceed to cut out the shape using a very sharp retractable utility blade. Use only a sharp blade for a clean cut, as a blunt blade may damage the edges of the fiberboard, and not to mention, dangerous to the person holding it. In an attempt to exert more force, one is likely to slip and cut something else other than the intended item. Remember, you are only as sharp as your knives and tools. And please do not forget to line the table you’re working on with an adequate amount of newspaper, to prevent damages and cut lines to the table surface underneath. Cut on the fiberboard as shown above.
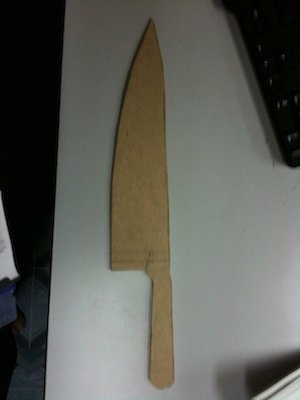
B2. Even with a sharp blade, I required not more than 2 or 3 cuts to penetrate the fiberboard entirely. Proceed with caution, and you will end up with something like this.
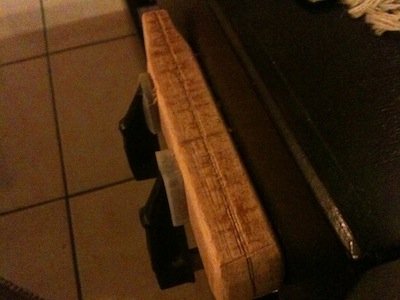
B3. The only fiberboard available to me was bare on one side, but had a black laminate on the reverse side. However, this is not of any concern.

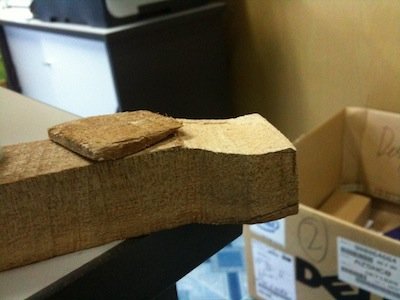
B4. The next step would be to fashion a suitable handle for this knife. I had the classic kitchen knife in mind to go with the theme my client had wanted, and so the handle had to look like it was made of mahogany. We will start off with a simple block of timber of suitable size as shown. I work at a construction site, so sourcing for these materials was easy.
HALLOWEEN COSTUMES ON eBAY
C. Handling the Handle
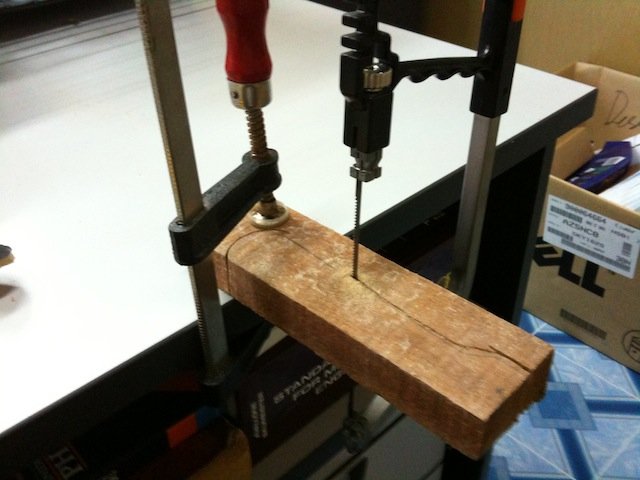
C1. Next, trace an outline of the knife handle on this block of timber. The size of the handle should be slightly larger than the tang of the blade on the fiberboard, and should sit comfortably in your hand. You may want to visualise and estimate how big the handle should be as you hold the timber block in your hand and imagine its size upon complete shaping. Once you’re comfortable with the handle design, clamp the block on the work table and work through the outline with a fine hacksaw.
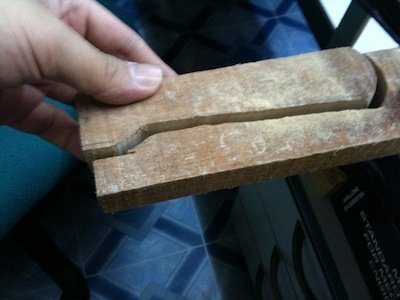
C2. Again, work your way carefully through the outline of your handle design, and allow for some tolerance by cutting “outside” of the outline, rather than “on” or “inside” of the outline. The photo above shows the hacksaw blade being “outside” of the outline. A completed cut-out of the handle will look like the above.
C3. Another view of the handle, which at this moment, looks kinda blocky. In order for the handle (and thus, the entire knife) to look convincing, it must be properly shaped and contoured to fit comfortably in the gripping hand. Use the hacksaw or a coping saw to achieve this.
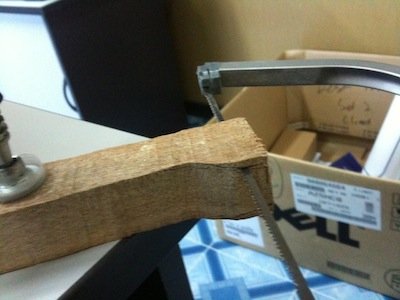
C4. To start with the contours, begin by applying the appropriate chamfers to the blade end of the handle, as shown in the photo above. An angle of 15 to 20 deg. should suffice. Draw the sloping lines on both side of the handle and saw following these lines. A slight curve is alright, if you find it difficult to saw a straight line, as long as both sides of the handle are similarly cut. Remove and discard the sawn-off portion.
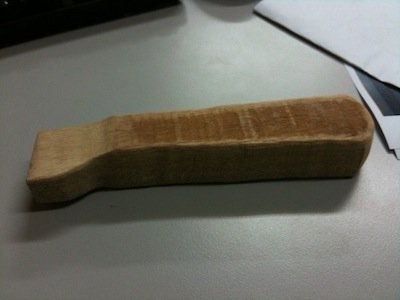
C5. The handle should then look like so.
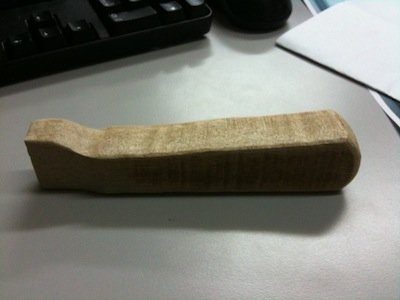
C6. Another view of the handle.
C7. We will then need to split the handle exactly in half along its length. Pencil down a line along the length of the handle. With a crosscut saw, start with a slight groove, just to be sure that the sawing lines will go exactly down the middle. An F-clamp was used to hold the handle against the side of the table to make the sawing work easier.

C8. Once you are certain that saw line is on dead centre, proceed to work your way through the handle with the crosscut saw. Do not use the hacksaw for this job as its more flexible blade will tend to run off-centre as you move down the handle. A crosscut saw is more rigid and will likely saw down without veering off the vertical line down.

C9. In the next step, we will prepare the handle for the aesthetic brass screws. I say aesthetic as the screws do not really hold or fasten the handle to the blade. .
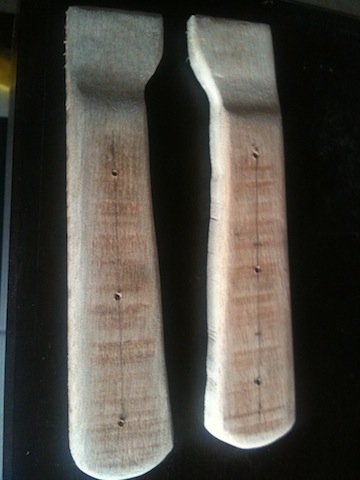
C10. Depending on the length of the handle, you may choose to have 2 or 3 screws on each side. The slot (-) screws are preferred over the philips (+) ones as the classic and modern knives are always fitted with slot ones. Also, select brass or gold-coloured ones for the very same reasons, instead of galvanized or silver ones. Proceed to make 3 pilot holes on each side of the handle, along the centre. Here, it is important that you do not make the holes on the exact setting out position on each handle, or you will find the screws on one side of the handle pushing on the screws on the other side. As a result, you will not be able to turn the screws in fully. Offset one side by at least 5 mm along the length from the other. You can see this offset in the photo above.
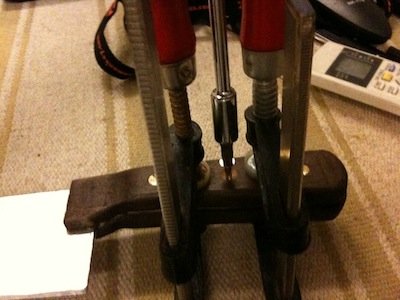
C11. Once you have the pilot holes in place, drill through with a 3 mm wood drill bit. This is to ensure that the wooden handle will not crack as the screws are being driven in later. A drill press is the preferred tool for a true vertical bore through.
C12. The handle should now look like this.
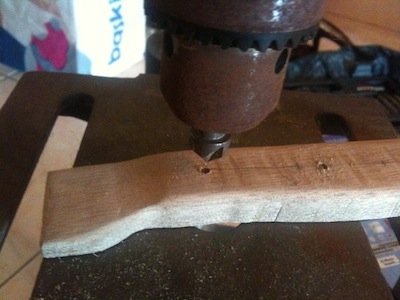
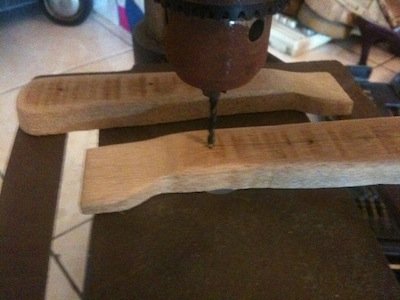
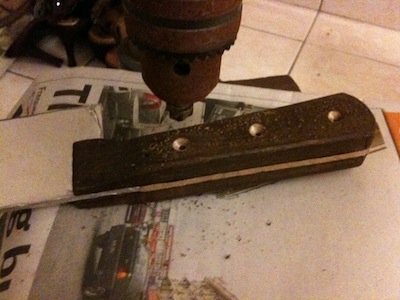
C13. Next, we will proceed to countersink these 6 holes, using a countersink drill bit. Use the drill press as we did before, this time with the countersink bit.
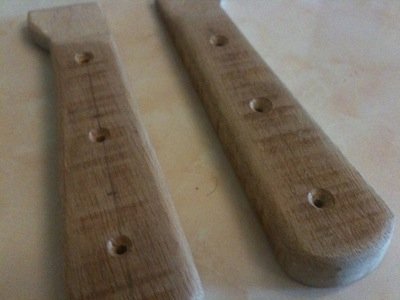
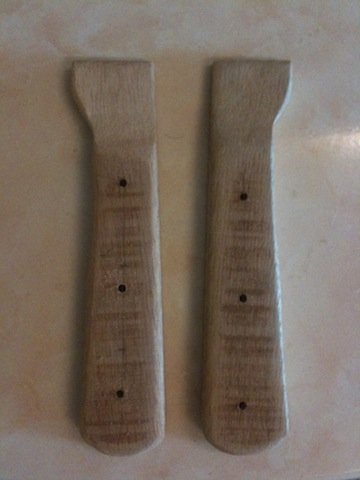
C14. The photo above shows the handle with the completed countersunk holes. The holes must be countersunk so that the screws will later be flushed with the surface of the handle.

C15. Once you have completed the steps above, proceed to give the handle its finishing touch. You may use either clear lacquer or one with an antique stain. I chose a dark coloured one for a mahogany impression. But a light-coloured one is just as fine. Work the brush onto the entire surface of the handle.
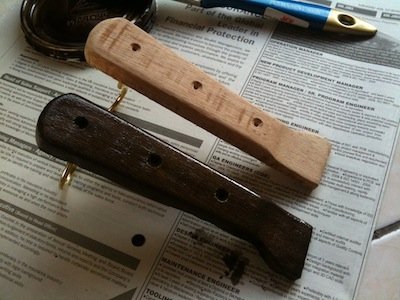
C16. I kept it propped up on a newspaper by means of a hook screw below during the drying. You may use any other suitable method. The handle looked like this as it is being dried (unvarnished other handle for comparison).
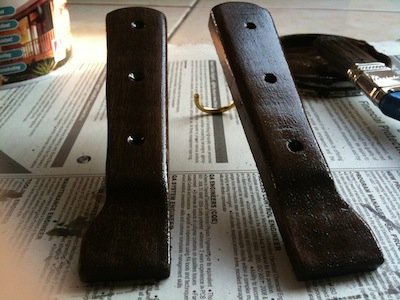
C17. Leave both sides of the handle propped up over a newspaper for drying.
C18. While wet, the handle may look unattractively dark, but it takes on a slightly lighter brown hue as it dries, revealing the wood grains, like so.
D. Glint of Steel…or Aluminium?
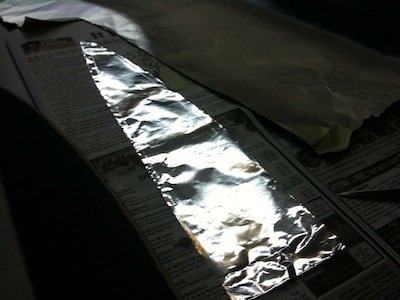
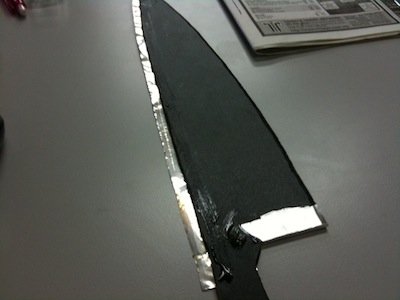
D1. While waiting for the drying process to complete, we will now work on the blade of the knife. To give the blade a metallic look, we have the option of applying chrome spray paint on the surface, or coating it with a kitchen aluminum foil. I was not certain if the spray paint would come out looking exactly the way I wanted it to, and I didn’t have much time to for errors due to experimenting. I also didn’t want to spend extra money on an expensive good quality canned spray paint for the job. I opted for the aluminum foil, as it was cheaper, readily available, and gave a true metallic lustre as it gleams reflected light. Admittedly, foil is harder to work with than spray paint, as it creases easily. Hence, foil must be worked with utmost care to prevent any permanent creasing, which will ultimately affect the appearance of our finished blade. Some creasing will be inevitable during its handling, but this can be straightened later. Before that, file down the supposed cutting side of the blade to give it a more realistic looking edge. Keep the angle consistent at 20 or 30 degrees throughout. This cutting edge will show nicely after the aluminum foil wrap.
D2. For the first side, cut the aluminum foil slightly larger than the outline of the fibre board blade with a pair of scissors, and glue it on one side, with the extended flaps wrapping around over to the other side. For the second side, cut the foil to the exact shape of the knife blade, and glue it to that side of the blade according to its outline. Use wet paper glue for this, as it will allow you to work the creases out with a ruler once the foils have been in place.
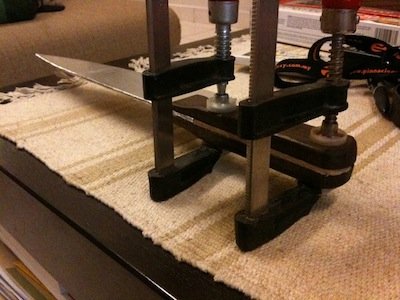
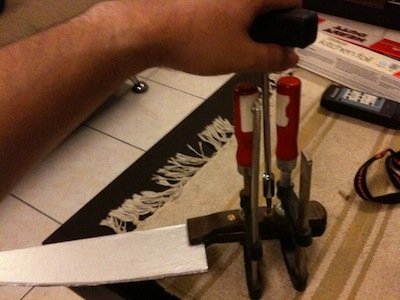
D3. Once you have done that, it is time to glue the handle to the blade. For this job, you should use a stronger glue, such as Araldite or cyanoacrylate (super glue). Use 2 F-clamps to hold it in place while the glue sets.
E. The Final Touches and Completion
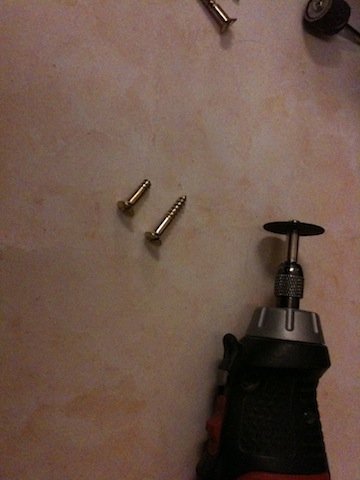
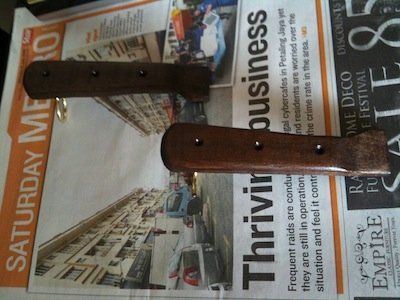
E1. While waiting for the glue to set, cut the brass screws shorter so that they do not drive too far into the handle on the other side of the tang. A high-speed rotary tool was used for this task.
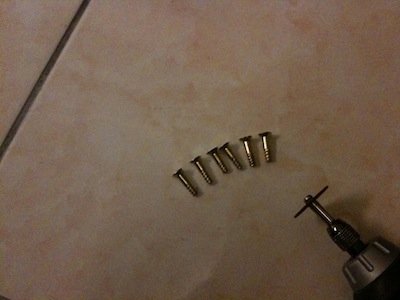
E2. 6 brass screws, now shorter than before.
E3. Remove the clamps from the handle and countersink the holes further where necessary, to the point that the screws will be flushed with the handle surface on both sides.
E4. It is now time to drive the shortened brass screws into the handle. It is best that the handle be clamped as you are doing this, to prevent the two halves from splitting apart as the screws are being driven through.
E5. After installing the screws on one side of the handle, remove the clamps and flip the knife over and proceed to install the screws on the other side of the handle. Use the clamps as before.
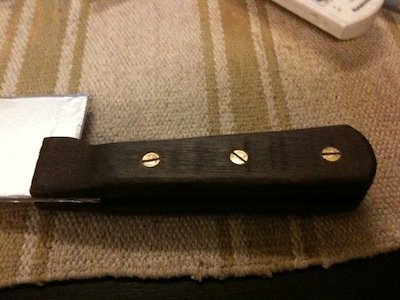
E6. The result of the completed knife – completed handle, appropriately stained with brass slot screw inserts!
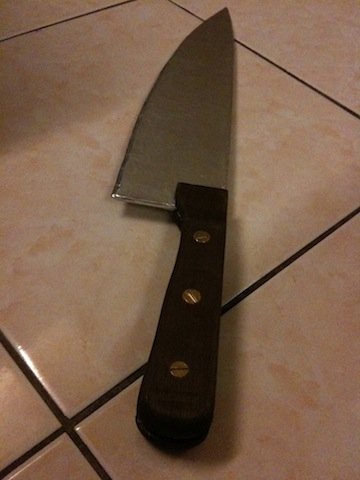
E7. The view of the completed knife from one angle…

E8. …and another view from the top!
In the Hands of Pseudo Psycho Norman Bates…

The knife plays its role as Norman Bates’ grisly tool for murder! Shower cubicle sold separately.
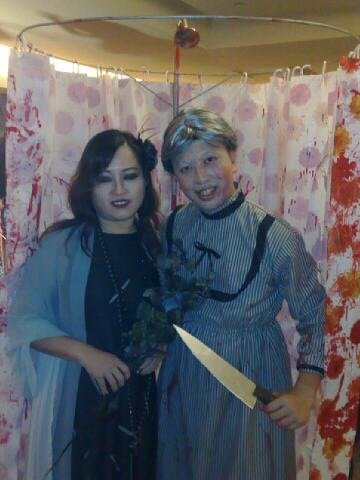
An unsuspecting victim, but the knife ain’t gonna draw blood tonight darlin’!
And that, is how to make a theatrical knife! In hindsight, I felt I should have used chrome or silver spray paint for the blade, as the aluminium foil did show some crease lines from normal handling after some time. We’ll keep that in mind for the next version!
UPDATE: We brought this knife out for a different Halloween party the following year and the knife was subjected to close scrutiny by security at the door of the club before we were allowed entry. We got good comments about the knife, and they were quite impressed with it.
SEE ALSO:
THEATRICAL KNIVES AND COSTUMES
READY-MADE PROP KNIVES FOR THEATRE AND HALLOWEEN