Many people have asked me why I do not use straps with my cameras, and especially on all my Leica cameras. My reason is simple.
“If I can handle a 250-year-old violin reliably in my hand without dropping it, I should be able to do the same with my camera…”
If for any reason the camera should fall to the ground, it should be because I had dropped it, and not because of the failure of the strap or strap lugs on the camera body, or any other points of failure in between.
It may sound silly, but there’s a bit of logic to that. The former is within my control, the latter is beyond my control. Also from experience, I’ve had bags fall to the ground because of a broken strap buckle. I don’t recall ever having dropped anything precious out of my hands. Fingers crossed!
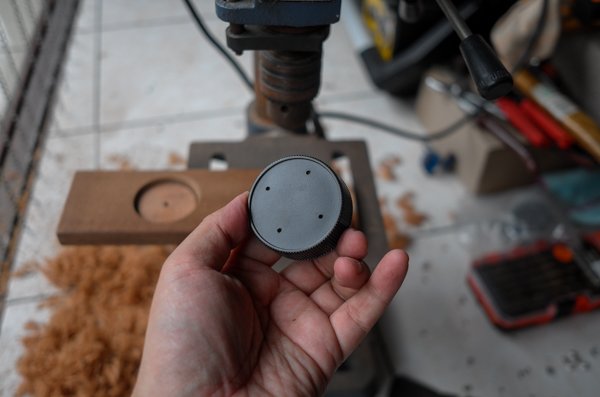
All the brass in the Leica M Typ 240 (with a chrome silver version Summilux-M 50mm attached) makes for a seriously hefty load, which adds to another worry about straps and any part in between giving way.
Then again, maybe my concerns are unfounded. I mean, how many people have actually dropped their cameras from a worn or broken strap? If you’re one of them, do let us know about your experience in the Comment section at the end of this article.
“…it now becomes possible for lens swapping to be accomplished with only one free hand.”
Well, the article today is not about straps and heavy cameras, but the little intro above is mainly the reason why I have designed a custom lens holder to use in my bag.
With one hand already holding the camera (instead of hanging around the neck leaving both hands free), I needed a “system” that would enable me to change lenses on the go (read: walking or standing up and not seated somewhere and placing the camera down).
With a block of wood mounted with a couple of rear lens caps to hold your lenses in your bag, it now becomes possible for lens swapping to be accomplished with only one free hand.
Below are the steps for making my own lens holder, something which I have found to be very useful when shooting concerts and events.
Preparation and Raw Materials
Before we begin, there are a few materials and tools we will need to gather. These materials are necessary to make the lens holder as I have designed it.
If you have a different design but something that runs along a similar principle, you may add or subtract from the items listed below. For my lens holder, these were needed:
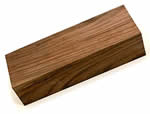 Block of wood
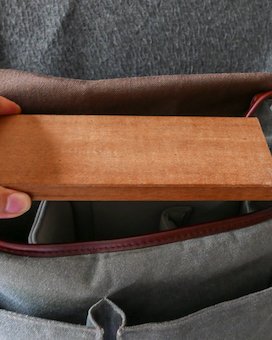
This will be the foundation of the lens caps and lenses, so you would want something firm but as lightweight as possible. Leica M lenses are already heavy as they are, and we wouldn’t want to introduce any extra weight into our camera bags. As this will be sitting quite securely inside the bag, the block of wood doesn’t really need to be robust. However, with this part being the most variable, you will need to select one depending on how elegant you want your final lens holder to look. The one I will be using isn’t exactly lightweight, but it has been sitting in my home waiting to serve some purpose, plus it is of roughly the right size for my bags.
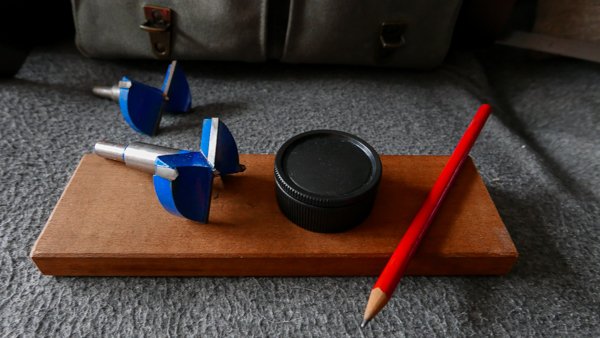
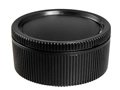 Rear lens caps
You will need to source for a few of these online, because you’d want to avoid using your original Leica rear lens caps for this. I bought a set of 5 on eBay, and it really doesn’t matter where they come from or where they are made, as long as they work. Buy the best quality you can find. Buy the original Leica ones if you want. I realise it is better to have more of these, than just enough. Try and get sets which include the screw-on covers for these rear lens caps as well, instead of just the rear lens cap itself. I will explain why later.
 Small wafer-type (flat-top) screws
You will need at least 3 to 4 wafer-type screws per lens cap for this. So if you’re going to make a lens holder for 3 lenses, you will need 12 screws. The dimensions of the screw will very much depend on the thickness of your block of wood, and any Gauge number between #2 and #6 (2 to 3mm shank diameter) should do fine. The screws must be wafer heads and not pan heads (flat-bottom rounded top).
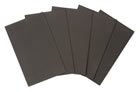 Foam sheet
This is optional, but recommended as I will also explain in the steps below. I opted for a black foam sheet (which like the block of wood, was lying around at home waiting to serve a purpose), but any stable material that is non-moisture absorbing and doesn’t crumble over time is suitable. The foam will need to be cut out to 43mm diameter, so any other similar material you can find (e.g. cork or felt padding for under chairs and tables) should be ok.
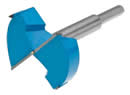 Tools
Tools
You will need some tools to shape and put all the items above together. In my work below, I used a drill press with a 50mm-Forstner bit, my Milwaukee M12 Fuel Hackzall Recip Saw to saw the wood block to size, the Milwaukee Rotary Tool and some sandpaper to finish the wood surface, and the Milwaukee Drill Driver with a 2mm drill bit and countersink bit for the holes on the lens cap. Hot glue gun and double-sided tape are optional, which I could have used in this little project as well, but I had opted not to. You will also need a Phillips screwdriver, an awl, a pencil and a pair of scissors.
Once the plan for the design and materials have been acquired, we may start with the crafting.
Leica Summilux Lenses on eBay
A. Measurements and Woodwork
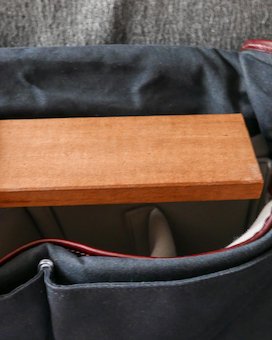
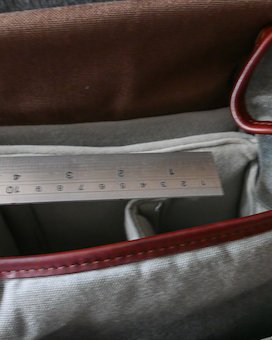
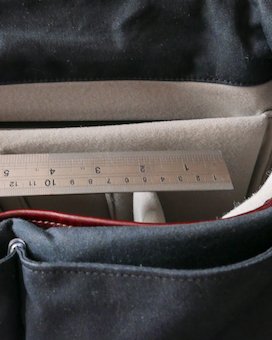
A1. Before starting, check that the wood block is of suitable dimensions and that it will fit your bag snugly without moving around too much inside. You may want to check this with a few of your camera bags, as the lens holder may find itself in more than just one bag. Here I check it against the insides of my ONA Prince Street and ONA Brixton.
A2. Next, measure the centre-to-centre dimensions in between your compartments. Also, the centre point for the lens closer to the edge should be sufficiently spaced and not sit too far from the interior side of the bag, so as not to waste too much space or have too much space between lens body and bag interior side.
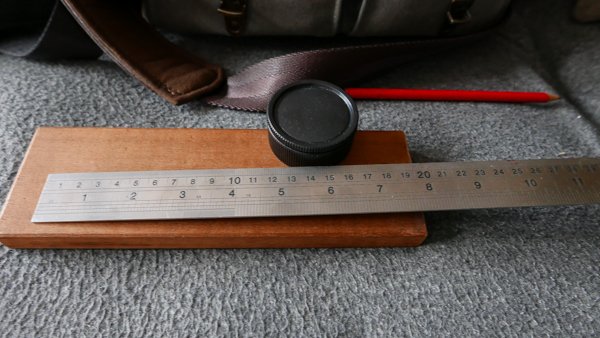
A3. Mark these two points on the wood block with a pencil or awl. Check that these points also sit in the centre on the wood block between the interior front and rear of the bag.
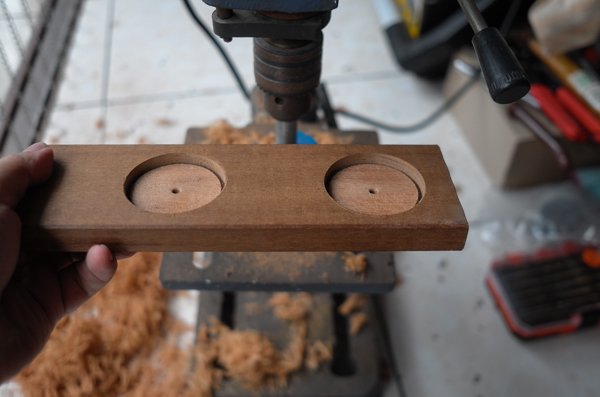
A4. To make the crater in which the rear lens caps would sit on, a Forstner bit of 50mm diameter is required. What Forstner bits do is they carve out a hole with a flat bottom in wood, removing all wood material within its circumference. In comparison, a circular hole saw will not work, as it will only cut the circumference without removing material within. Forstner bits may be hard to come by in certain countries and folks who don’t work regularly with wood may not own these. You can find links to purchase this at the end of this article, or you could omit the crater in the following steps altogether. However, I feel that the crater is quite crucial to keep the lens cap stable, especially if you’re mounting on a large and heavy lens. It also adds a nice aesthetic touch to the overall construction, so it’s both form and function. The steps further below should make this clearer.
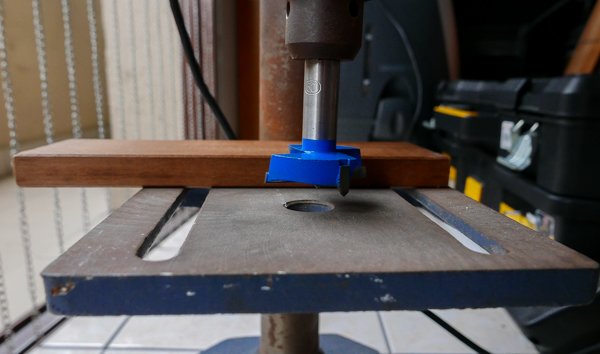
A5. Attach the Forstner bit to the drill press and adjust the platform level with the wood block on it to ensure that the Forstner bit drilling depth will not exceed the wood block’s thickness…in order words, so that the Forstner bit does not drill all the way through the wood block and leave you with a see-through hole.
A6. If you have only marked the centre points with a pencil in Step A3 above, now is the time to do it with an awl. This will serve as a pilot hole for the Forstner bit during the start of the drilling.
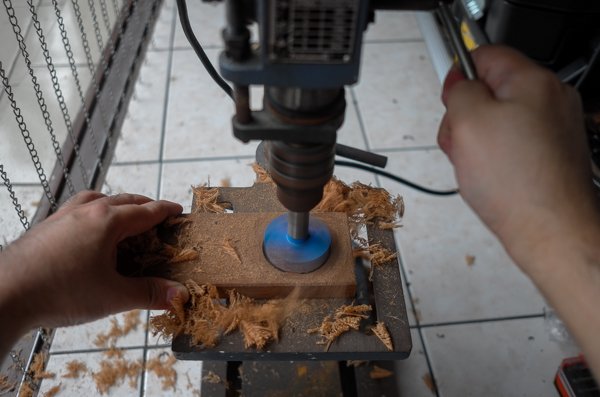
A7. Drill into the wood block with the Forstner bit using the pilot hole as a guide.
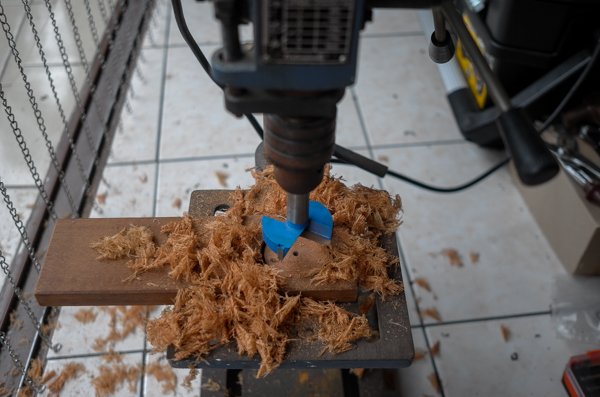
A8. Stop intermittently to clear off wood shavings and allow the Forstner bit to cool down. The Forstner bit will get quite hot after a while, so be careful not to touch it.
A9. You may also want to take this opportunity to check that the rear lens cap sits in nicely within the crater and that all is going well so far.
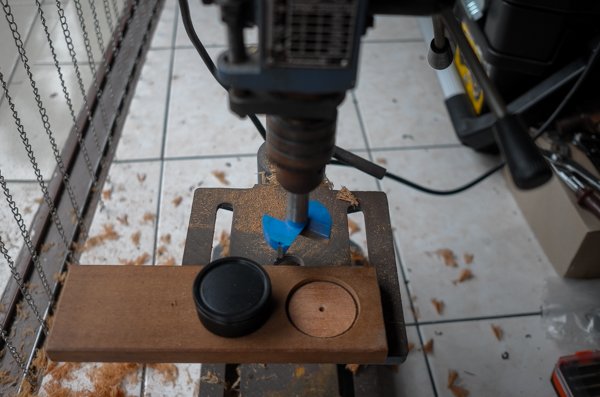
A10. Continue to drill all the way down to the preset depth.
A11. After the first crater is done, proceed with the second crater, and on with as many as you plan for the lens holder. I’ve decided to go with a 2-lens holder here, but most messenger bags will take 3 and even 4 lenses if the camera body is kept in another bag. I plan to make another one that holds 3 lenses soon.
A12. With both craters deeply carved in and completed, we can now start our work on the rear lens caps.
B. Preparing and Mounting the Rear Lens Caps
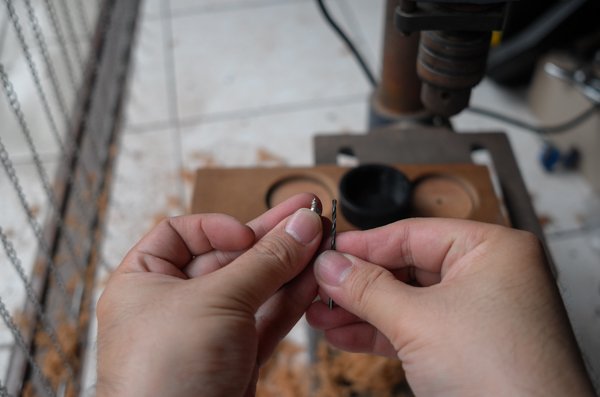
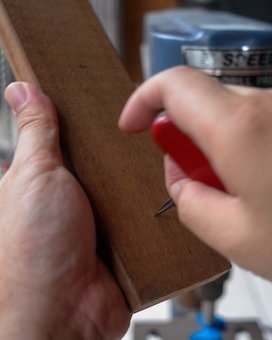
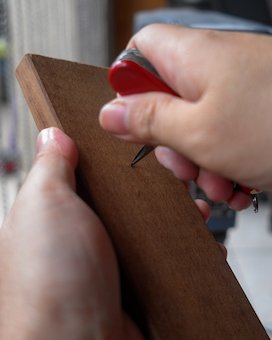
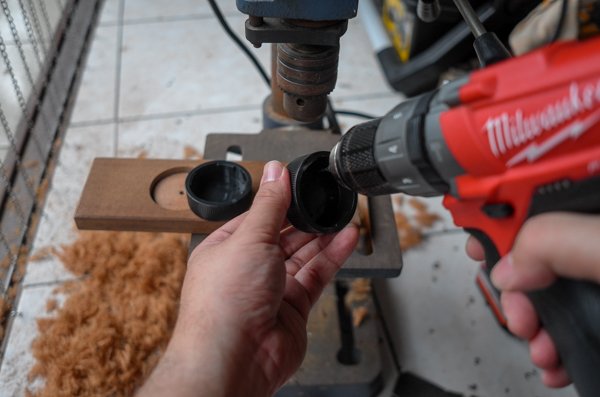
B1. We will now proceed to drill some very small holes on the rear lens caps to allow them to be mounted on the wood block.
Depending on the screw size you will be using, select a suitable drill bit. I used one for a bore size of about 2.0mm.
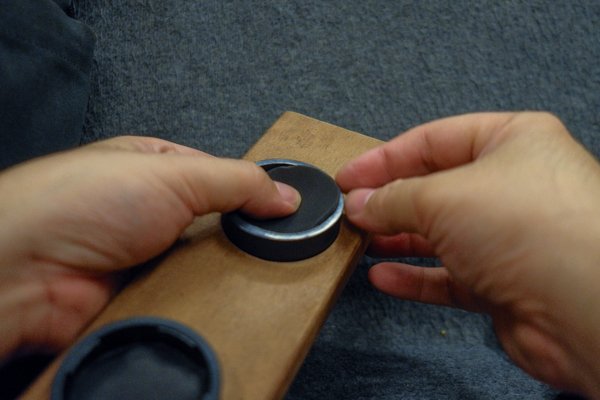
B2. Drill 4 holes on the rear lens cap, as close to the circumference as possible, but with sufficient space for the screw heads to sit. once they are fully screwed in. The screw positions are placed further from the lens cap centre for stability, especially for heavier lenses mounted on later.
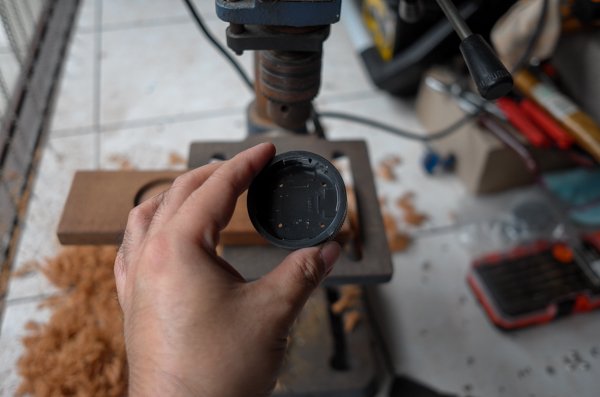
B3a. The finished holes should look something like this on the inside…
B3b. …and like this on the underside of the lens cap.
B4. Do the same for the other rear lens cap.
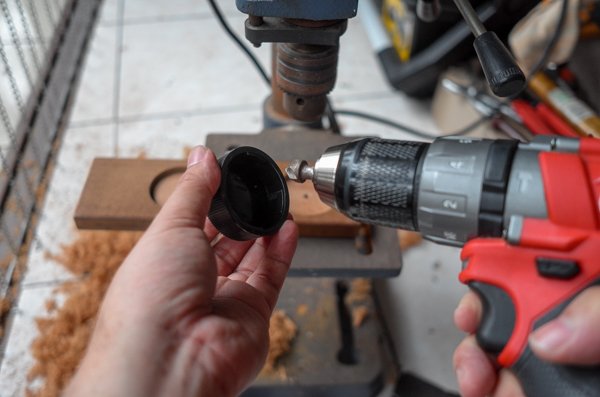
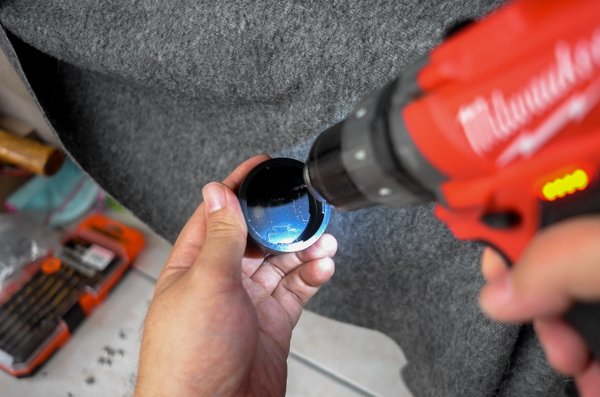
B5. Use a countersink bit to widen the hole on the inside of the lens cap so that the screws will sit as flush as possible to the inside surface once it is fully screwed in. If the screws are not mounted flush, they may come in contact with your lens flange.
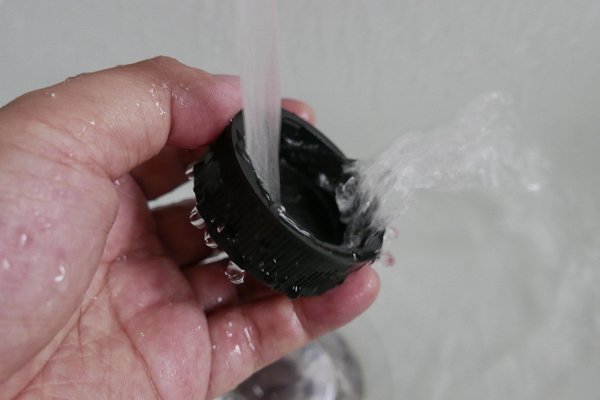
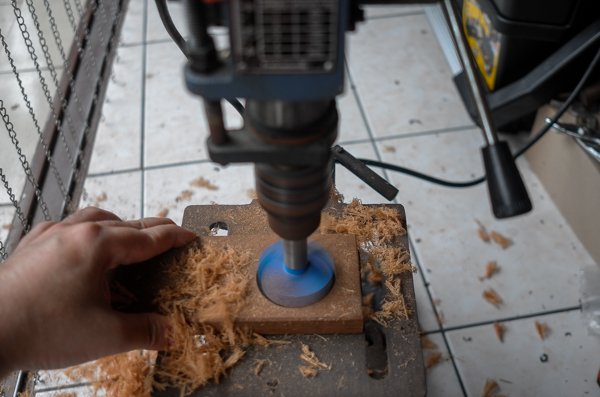
B6. Rinse the rear lens caps thoroughly under running tap water to clear off all saw dust and debris, and then wipe completely dry.
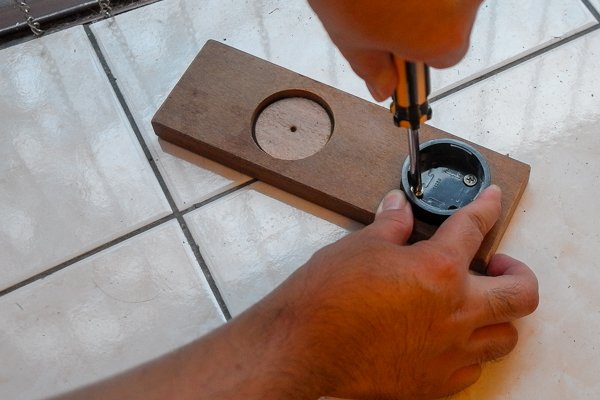
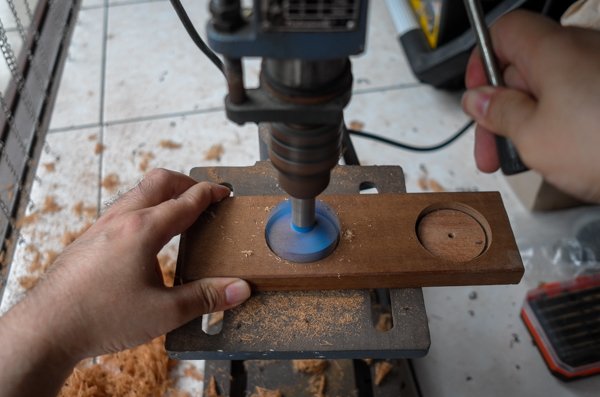
B7. Once the holes are finished properly, screw them onto the wood block. As an option, you may also use hot glue to fill any gap between the rear lens caps and the wood block, but I have not found this to be necessary. The screws alone hold the lens caps down just fine, provided the crater has sufficient depth and has been done neatly. We will now proceed to finish up some details on the lens caps.
C. Finishing Works on the Lens Caps
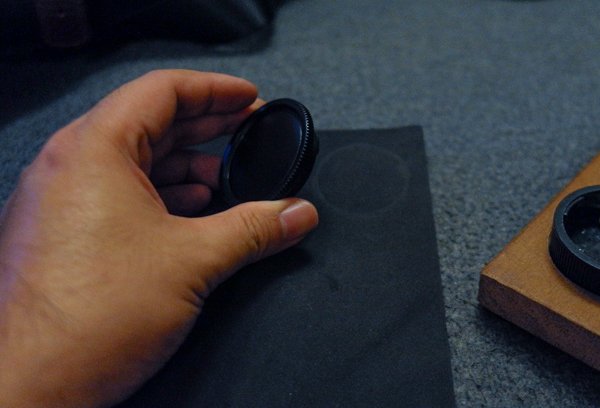
C1. With the rear lens cap cover, mark a circle on the foam sheet. I found that I was able to get the circle by pressing the cover on the foam sheet. If your foam sheet cannot be imprinted in this manner or if you do not have the cover, you can scribe out a circle of about 43mm in diameter with a pencil.
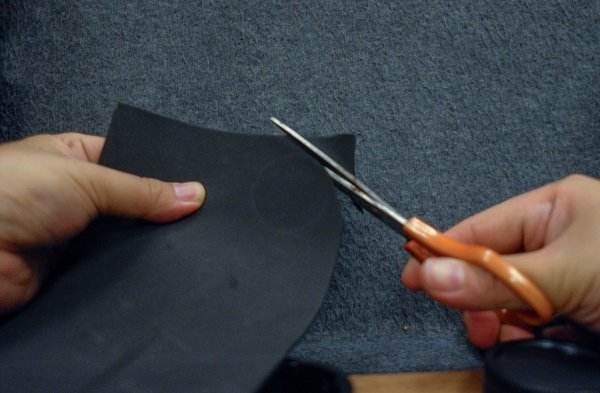
C2. Cut out the circle on the foam sheet with a pair of scissors.
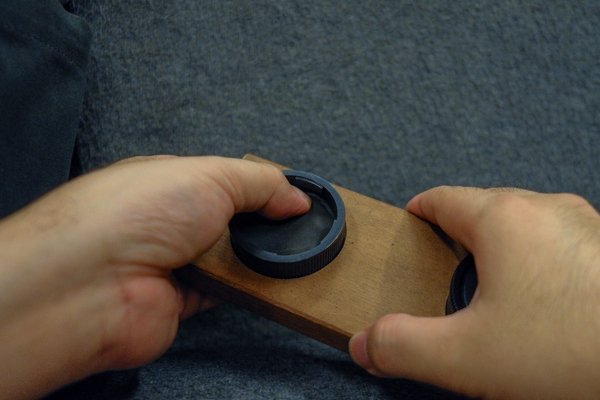
C3. Place the circular foam sheet on the inside of the rear lens cap. If your cut-out is accurate, the foam sheet should be able to stay firmly in place without moving around or falling out of the lens cap. I would advise against using any adhesive here as any residual VOC could cause harm to internal lens coatings. If this is not a concern for you, be certain to use VOC-free adhesives.
C4. Repeat the steps above for the other lens cap.
D. Completion of the Leica M Lens Holder
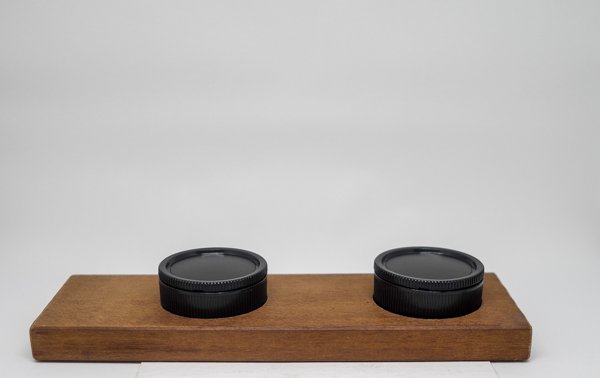
D1. This is the completed Leica M Lens Holder. The covers are kept on when not in use to keep dust from entering the rear lens caps. One side of the wood block was intentionally designed to be longer, to sit below the camera body compartment in my bags. This would help to keep the wood block more stable when it is placed in my bags. See photos further below.
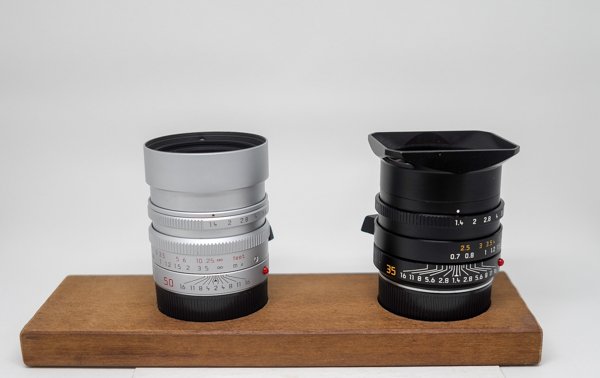
D2. It works with new 6-bit coded M lenses…
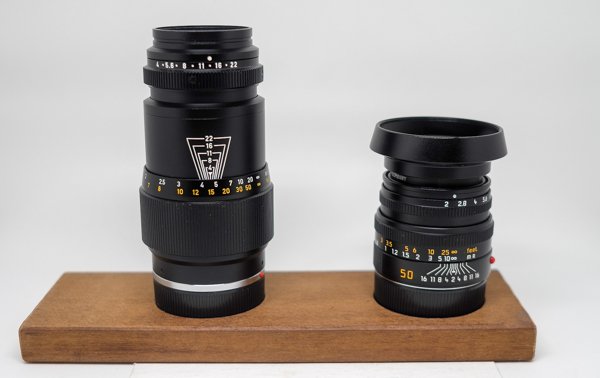
D3. …older non-6-bit coded M lenses and
recently 6-bit coded ones…
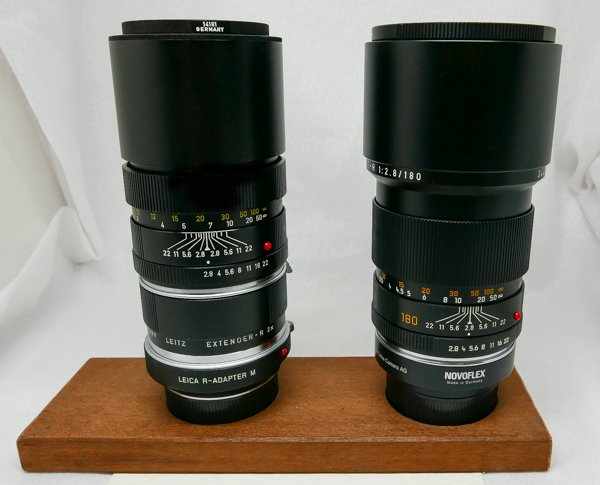
D4. …as well as R lenses mounted on either the Leica R-Adapter M or the similar Novoflex version, naturally.
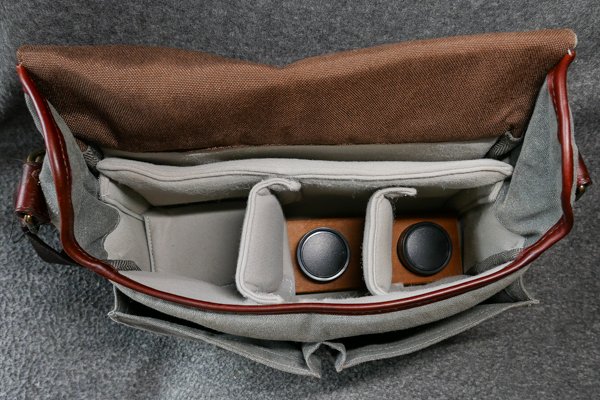
D5. The completed Leica M Lens holder sits snugly at the base of the ONA Prince Street bag. The extended part of the wood block base goes below the compartment for the camera body on the left side.

D6. The Leica M Typ 240 in its place, with the Summilux-M 50mm f/1.4 ASPH and Summarit-M 90mm f/2.5.
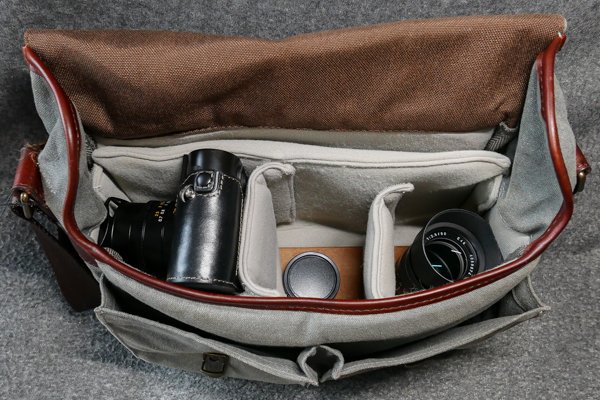
D7. I will usually leave one holder empty – a vacant spot for the lens currently attached to the camera body, before I unscrew the other lens and mount it on the M 240. This is all done with the bag strapped over my shoulder when I am standing or walking.
Conclusion…Will There Be A Version II?
“…all the brass in the Leica M Typ 240 and chrome silver version Summilux-M 50mm f/1.4 makes for a seriously hefty load, which adds to another worry about straps giving way.”
I have used the above Leica M Lens Holder in a number of gigs and have found it to be very useful for quick swapping of lens on my Leica M Typ 240.
As mentioned earlier, this is in part more necessary for me than for others as I do not use straps with my cameras and thus have one less free hand to work with on the go.
Nevertheless, this may also be a solution for those who use straps on their cameras, and prefer this quick method of lens replacement.
The lens holder solution is not only for Leica, and may be applicable for other brands of interchangeable lens camera. You will just need to get the appropriate rear lens caps for your lenses, and the correct diameter for the Forstner bit.
I will be making another one soon to hold three M lenses that will fit into my wider ONA Brixton bag, and maybe another version in the future to hold R lenses without their adapters.
Meanwhile, keep shooting and churning out beautiful images with your fabulous lenses!
SEE ALSO:
LEICA SUMMICRON LENSES on EBAY
LEICA CAMERAS on EBAY
FORSTNER BIT 50MM
LEICA M REAR LENS CAP
LEICA M LENSES