How to Open a Sony Xperia

As waterproof as these phones are rated, there are times when it could be due to human error when water finds its way into these mobile phones, and sometimes it could be due to that tiny cluster of dust sitting on the edge of a port cover that doesn’t allow it to close watertight.

This happened to my Sony Xperia Z Ultra during a shower session on a fateful day in Singapore. Don’t ask why I take my phone to the showers with me.

I knew when I spotted moisture on the inside of my camera lens, and suspected that the water had indeed seeped into the phone via the USB port. The best thing to do in a situation such as this would be to:

  1. Turn off the phone immediately.
  2. Disconnect the battery if you can. Not in my case as the battery is not removable.
  3. Try drying the phone through a few methods, like placing it in a purpose-built drying bag or silica gel – the best method being putting it in bag of dry rice grains.
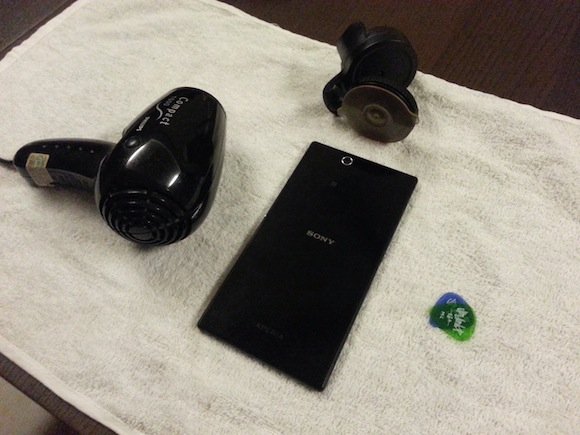
TOOLS NEEDED FOR THIS TASK:

  • a hair dryer
  • suction cup
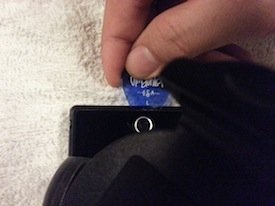
  • a pick (guitar plectrum)
  • precision screwdriver set (optional)

TIME REQUIRED:

  • 5 to 7 minutes

DIFFICULTY LEVEL:

  • 2/5

As I was in a foreign country with a great dependence on this mobile device to get me around and connected, I did none of the above! What happened in the hours following the water ingress was the phone battery started depleting at a very fast rate, almost faster than you can charge it. It went from 100% to zero in about four hours, with very light GPS and internet usage.

I have since replaced my Sony Xperia Z Ultra with the HTC One Max.

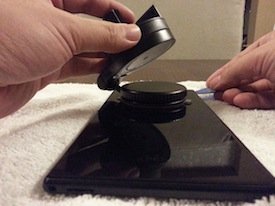
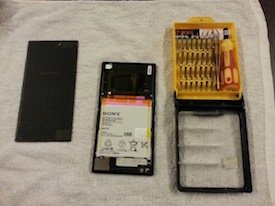
Today, I’ll just show how the back glass cover of this phone, as well as most other phones under the Sony Xperia series and other similarly constructed phone, can be removed, without much difficulty.

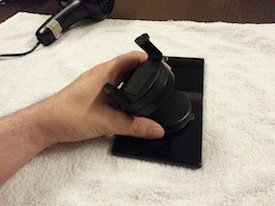
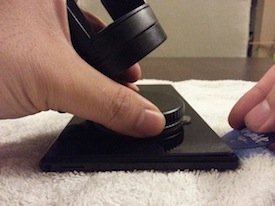
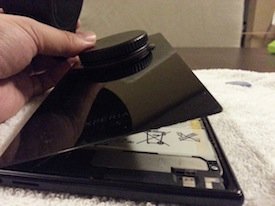
The only tools you will need are a hair dryer, a suction cup, and a pick. My wife uses a hairdryer, and I play the guitar, so I happened to have both right at my home!

Advertisement

car-windscreen-mobile-phone-mount

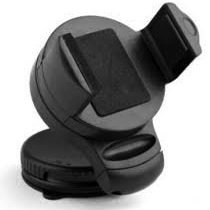
For the suction cup, I used the one attached to a car windscreen mobile phone mount or holder. The suction cups found on these are usually too big for the job as the suction cup used must be smaller than the phone panel size, but the Sony Xperia Z Ultra is a large phone approaching the size of a small tablet, and this suction cup works just fine – ideal in fact!

If you do not have this, you may find one in your car, bathroom or kitchen – often in places where there are glass and tiles, normally attached to devices designed to stick temporarily on wall tiles and glass windows. If you’re working on a smaller phone, you will need to find a suction cup of an appropriate size – smaller in diameter than the width of the phone back glass panel.

how to open a sony xperia
Gather upfront the tools we will need to work with (clockwise from left): a hair dryer, a suction cup smaller than the phone back glass panel, and a couple of guitar picks (you only need one stiff yet thin enough to fit the crevice between the glass panel and the phone frame). The Sony Xperia Z Ultra is a large phone, and the suction cups found on most car windscreen mobile phone mounts actually fit just nicely, despite the usually large diameter!

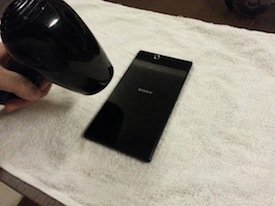
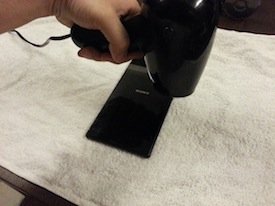
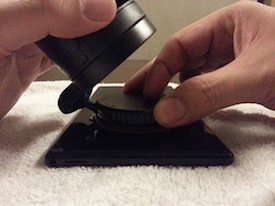
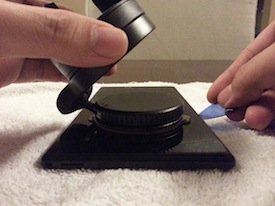
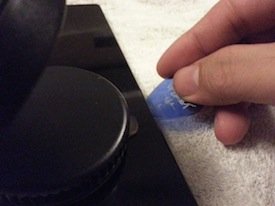
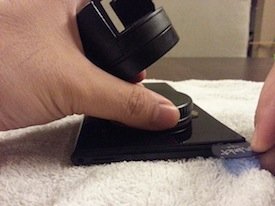
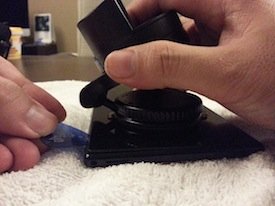
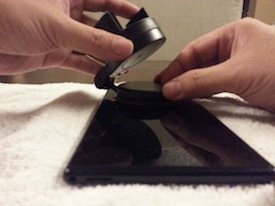
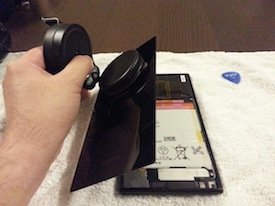
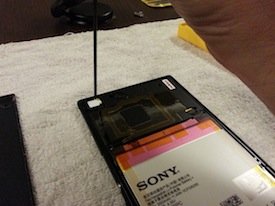
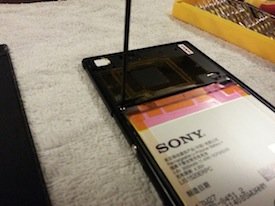
The Back Glass Cover Removal Process

open a smartphone
1. Start the hair dryer on low, and aim it at one side of the back panel perimeter. Start from one side…
how to open a sony xperia
2. …and move the hair dryer around the perimeter, be careful not to stay in one spot for too long. Hair dryer run on low for about 2 minutes should be warm enough to soften the adhesive on the back panel.
open a phone
3. Turn off and put aside the hair dryer, and proceed to place the suction cup on the lower half of the back glass panel of the phone.
how to open a sony xperia
4. With conventional suction cups, you normally simply push down. This one requires pressing it down and rotating the lock that secures the cup against the glass surface.
how to open a sony xperia
5. Push a thin guitar pick through the crevice between the back glass panel and the side frame, somewhere along the lower half of the phone.
dismantle a smartphone
6. With the adhesive already soften by the heat from the hair dryer, the pick should be able to find its way through quite easily. It would help to lift the glass slightly by tugging on the suction cup.
how to open a sony xperia
7. Work your way with the guitar pick along the crevice with a cutting action, separating the adhesive tape on the underside of the back glass panel from the phone frame, moving down along the sides…
how to open a sony xperia
8. …and around the corner, at the same time applying a lifting pressure with the suction cup. Do not force the cutting action as we do not want to damage the fragile adhesive tape.
how to open a sony xperia
9. Run the pick through to the lower half of the opposite side till about midway of that side whilst applying lifting pressure with the suction cup. Then remove the suction cup.
how to open a sony xperia
10. Place the suction cup on the upper half of the phone and secure the lock.
how to open a sony xperia
11. As done before, push the guitar pick into the crevice on the upper half and work its way along the side and around the corners. Apply the same lifting pressure with the suction cup.
how to open a sony xperia
12. Pay attention as you approach the camera lens. Be careful not to press the pick into the camera. You may even see the pick passing by through the transparent glass lens.
how to open a sony xperia
13. With the pick worked around the entire perimeter of the phone and the adhesive separated from the frame, the back glass cover can now be removed completely.
how to open a sony xperia
14. Looking at the underside of the back glass cover, you will notice that an adhesive strip runs along the perimeter near the edge of the panel.
Get It on eBay

The purpose of this article is only to show how the back glass panel of the Sony Xperia Z Ultra mobile phone is opened, as outlined above. The following steps are simple experimental, at least for me. You should know what you want or need to do before you proceed!

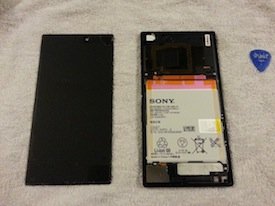
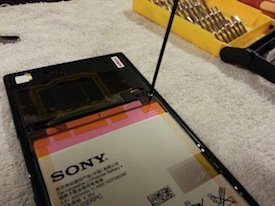
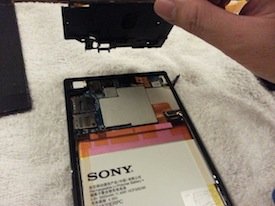
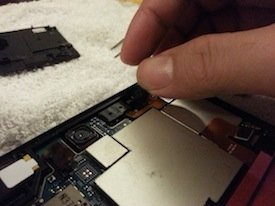
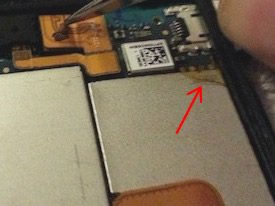
Access to the Logic Board

“With six months to go, some would say it’s foolish to perform surgery on the phone and thus voiding its warranty. But in the name of tinkering, here I come…”

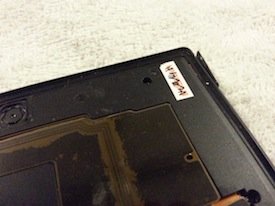
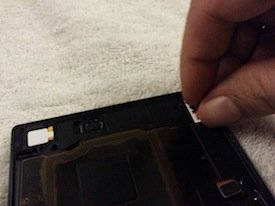
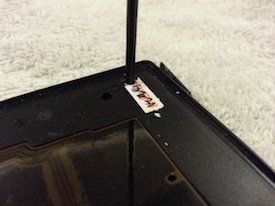
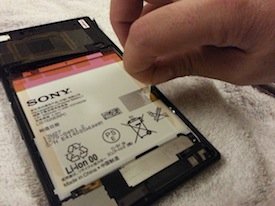
While the battery is clearly visible once the back cover is open, the logic board isn’t. It is shielded by a black plastic cover with the NFC chip mounted on it, located on the upper half of the phone just above the battery. Taking off the cover requires removing a number of screws, one of which is covered by a tamper-proof sticker for warranty purpose.

how to open a sony xperia

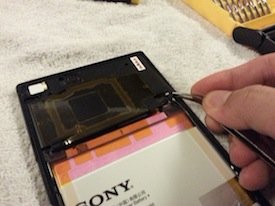
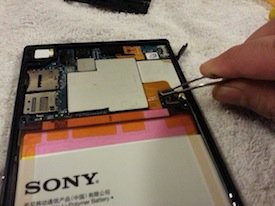
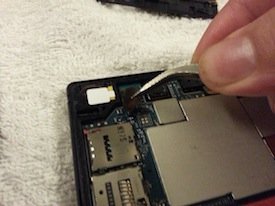
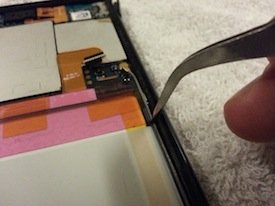
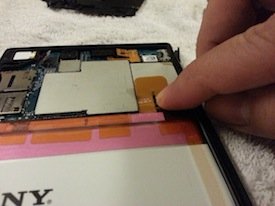
That whole black region above the battery is where the logic board and other circuits reside. To remove the black cover with the NFC chip, we will need to use a Philips precision screwdriver. Somehow, the comprehensive set shown in the photo at left didn’t have one with the correct size. I used another which is not shown. Remember to keep yourself electrostatically-grounded when working with circuit boards.

how to open a sony xperia
1. First screw to be removed is located just next to the camera lens. I cannot remember if this screw really needed to be removed, but I did anyhow.
how to open a sony xperia
2. Working in a counter-clockwise direction, the next screw to be removed is located just above the top left of the battery.
how to open a sony xperia
3. And then the third screw just above the top right of the battery. Easy enough.
how to open a sony xperia
4. The last screw is hidden below this tamper-proof warranty sticker, next to the microUSB port. Breach it? Tough call for me, as the phone is still under warranty with 6 months to go…
how to open a sony xperia
5. Ahh what the heck…wasn’t going to turn back now.
how to open a sony xperia
6. Remove the last screw, after peeling off the sticker. Note that you may find the sticker above one of the other three screws.
how to open a sony xperia
7. The black plastic shield can now be lifted and removed. Use a pair of forceps if necessary.
how to open a sony xperia
8. Say hello to the logic board! Well, not quite too, as the logic board is further protected by metallic shields.

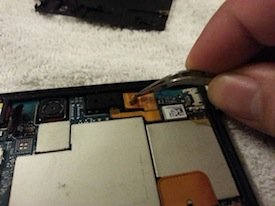
Other Procedures of Interest

how to open a sony xperia
Disconnecting the power supply from the battery to the logic board, before doing anything else.
how to open a sony xperia
The LED indicator that appears on the frpont of the phone is located below where the forceps is pointing. Seen here are also the microSIM card and microSD card slots, which are attached to the logic board.
how to open a sony xperia
This is the ribbon cable that connects the logic board to the phone’s front camera…
how to open a sony xperia
The front camera can be accessed by simply flipping it up from its snug position. A little hard to see in the shadows above.
how to open a sony xperia
The phone antennae is located to the right of the battery, hidden just next to the side frame. On some other phones, the antennae is found on both sides of the battery.
how to open a sony xperia
A tape holding the battery in its place must first be peeled before the battery can be lifted out from its position.
how to open a sony xperia
A sign that water has entered through the microUSB port, causing the extensive battery drain. The USB cable was plugged in without charge just to show where the microUSB port is above. Never charge the phone when you’re working on the innards of the phone.
how to open a sony xperia
A closer view of the stain left by water ingress via the microUSB port.

Sealing and Replacing the Back Glass Cover

how to open a sony xperia
Before sealing and closing the back glass panel, ensure that all screws have been replaced, and all ribbon cables plugged back to their respective ports, including the battery cable and port as shown above.
how to open a sony xperia
Simply replace the back glass panel by placing it back into its position and pushing it down in place. It may be easier to position it by holding the suction cup rather than by the edges of the glass panel. Push it back firmly in place.

This article is only a guide to remove the back glass cover so that repairs can be carried out on the Sony Xperia Z Ultra.

The reader is advised to check online resources for detailed instructions on component replacement work and other tasks. It should also be noted that once the back glass cover or panel is removed and replaced, the device’s waterproofness cannot be guaranteed, and hence should not be subjected to further showers (in my case) or quick dips in the pool.


SONY XPERIA SMARTPHONES

SONY SMARTPHONES


Subscribe
Notify of
guest

This site uses Akismet to reduce spam. Learn how your comment data is processed.

2 Comments
Oldest
Newest Most Voted
Inline Feedbacks
View all comments
devonbuy.com