Recently I have had to replace the ceiling fan in my living room due to a faulty motor. With the very low prices of ceiling fans these days, it makes more sense to replace it outright, rather than to have its components repaired, without knowing how long the appliance will last.
I took the opportunity to purchase and install a ceiling fan with light, with the intention of using very low wattage bulbs for ambience-setting purpose and for non-reading activities. The existing lights in my living room are fluorescent tubes in light trough, and compact fluorescent lamps (CFL) in downlights – bright enough for all other purposes.
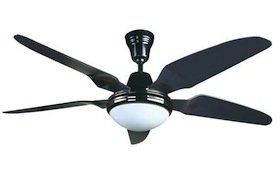
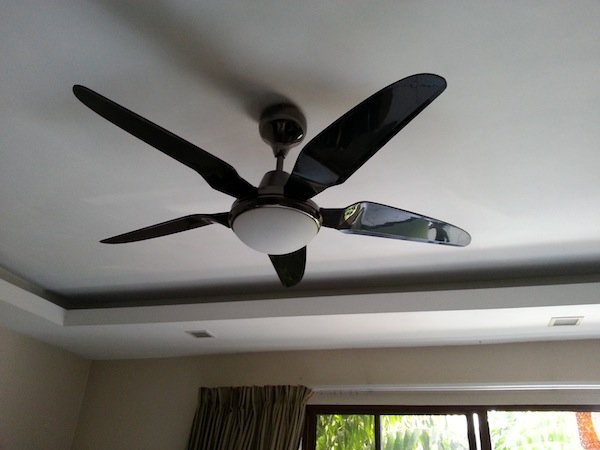
The simplistic Fanco S6 GM ceiling fan with light
I managed to get one branded Fanco for a fairly reasonable price at RM370 (USD120). There were many other cheaper models available, but I thought this model from the Singapore-based company was quite well-designed – the fan blades looked interesting, and the light was simple but yet elegant without too much embellishments that would detract the features of a ceiling fan. In other words, I wanted a ceiling fan with built-in lighting, not a fancy lamp with built-in fan.
There were other fan models with longer blades, reversible rotation, intricate lamp shades, LED lighting, and other features which made these fans more useful or appealing, but I finally settled with this particular one for simplicity. I liked it for its rather minimalist design.
Let’s look at how to install ceiling fan with light.
Advertisement
Install Ceiling Fan with Light – A Challenge
Having installed a number of ceiling fans in the past, mostly of the Panasonic and National brand types, I was quite confident on installing this one on my own.
Upon opening the box, I discovered that there were a lot more parts with this fan with light type, and there was additional wiring to be done to hook up the remote control receiver on the fan for both fan and light operation. And what’s worse was…the instruction manual included was for a totally different model with none of the features on this fan. Fanco, if you’re reading this, please ensure the right instructions go into the packaging box for the correct fan model.
I wasn’t going to call Singapore or the shop I bought it from for help or instructions, and a search online for an installation manual for this model yielded zilch. So I did the next best thing – figured out the installation and wiring on my own.
If you’re a DIY-geek, it shouldn’t be too difficult, but it was challenging nonetheless – took me about an hour to figure out and complete the installation. A normal fan would have been done in less than half that time.
Bladeless Fans on eBay
I documented the process down to help others in similar situation, so if you find yourself with a Fanco or similarly-designed ceiling fan with built-in light operated by remote control, see my step-by-step guide with photo as outlined below. Here we go!
A. Unpacking and Preparing the Components
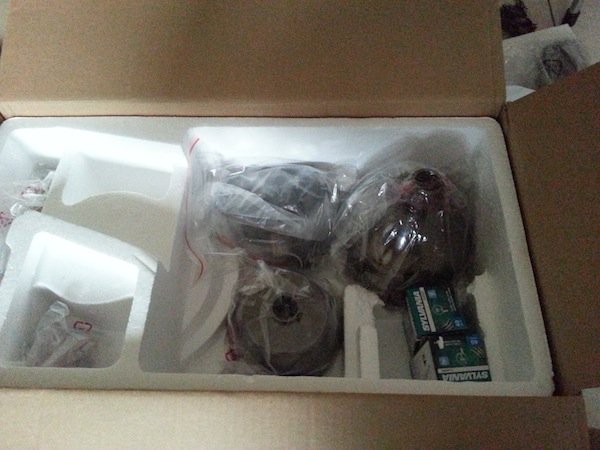
A1. Upon unpacking removing the 5 fan blades packed at the top of the box, you will find the other components of the Fanco ceiling fan. Included are 2 incandescent bulbs which we will later replace with energy-saving compact fluorescent lamps (CFLs).
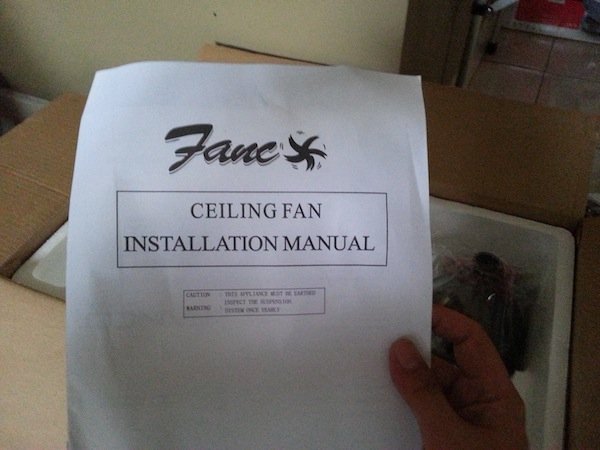
A2. As mentioned earlier, the installation manual that came with the fan was for a totally different model. Seems we will have to figure out the following installation without the help of diagrams and texts!
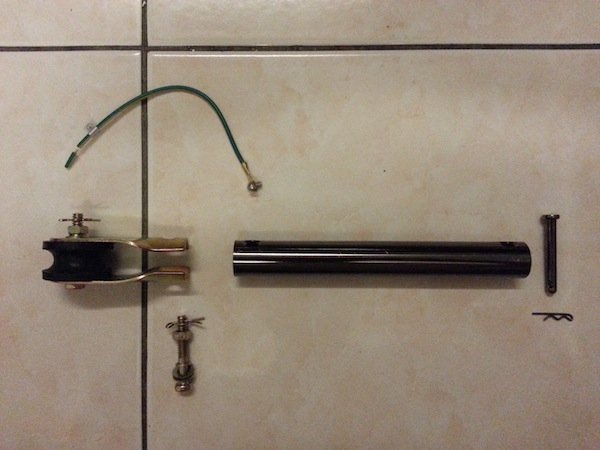
A3. First, disassemble the ceiling rod, removing the earthing wire, rubber spool anchor, and all attached bolts and nuts. Before dismantling these components, note the end of the ceiling rod attached to the rubber spool anchor, and the end to the bolt and pin.
B. Assembling the Fan Motor, Ceiling Rod and Components
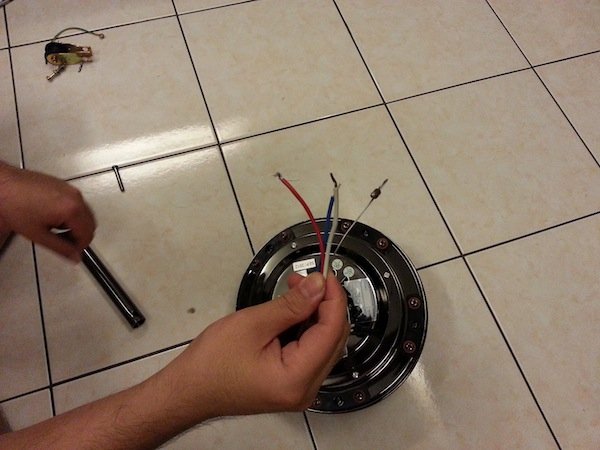
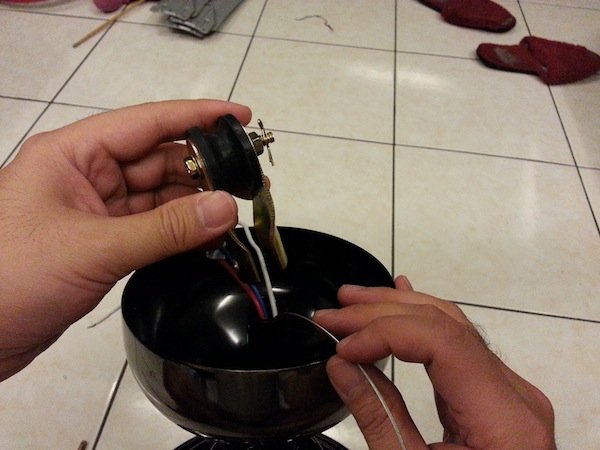
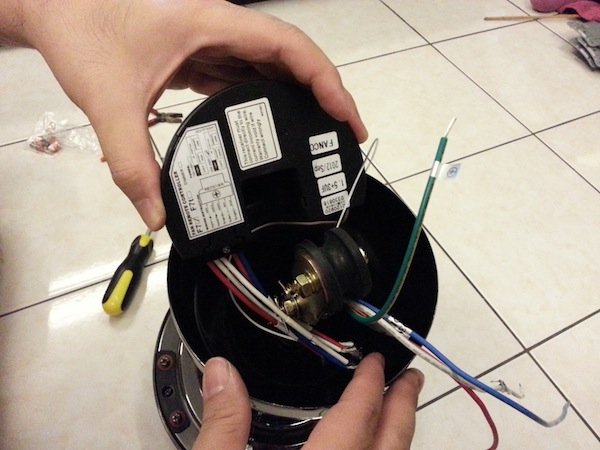
B1. Gather all the electrical wire and safety cable on the motor assembly together…
B2.. …and run them through the ceiling rod disassembled earlier. The rubber spool anchor (dismantled earlier) end of the rod should be the end where these wires emerge from, as shown.
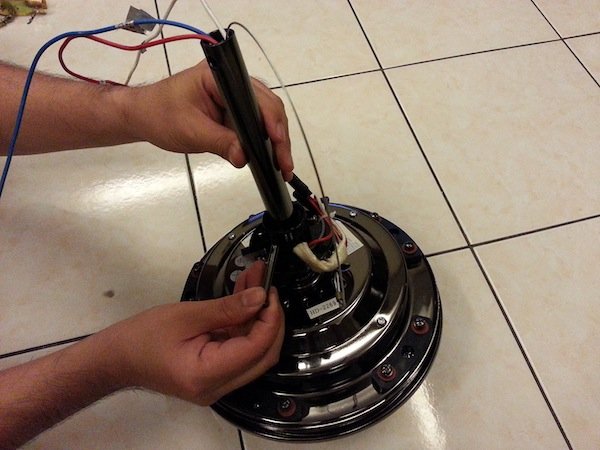
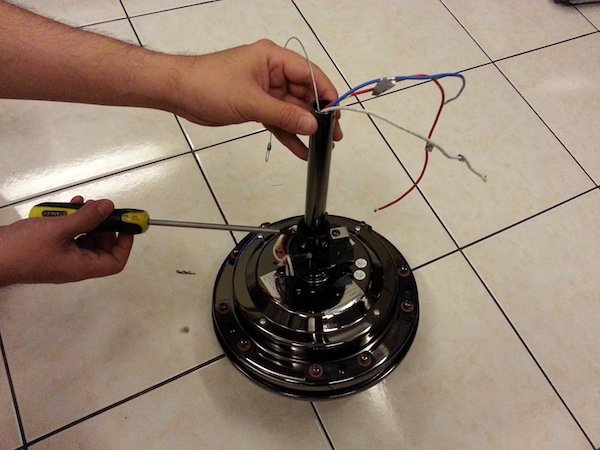
B3. Install the ceiling rod into the top of the motor assembly and push the bolt through the holes to secure the connection of the rod to the motor assembly. Once the bolt is all the way through…
B4. …push the lock pin through the tiny hole on the screw-threaded end of the bolt, so as to ensure that the bolt will not come off the entire assembly.
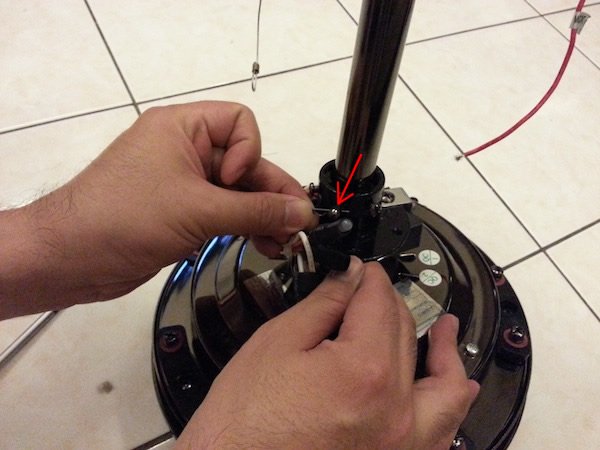
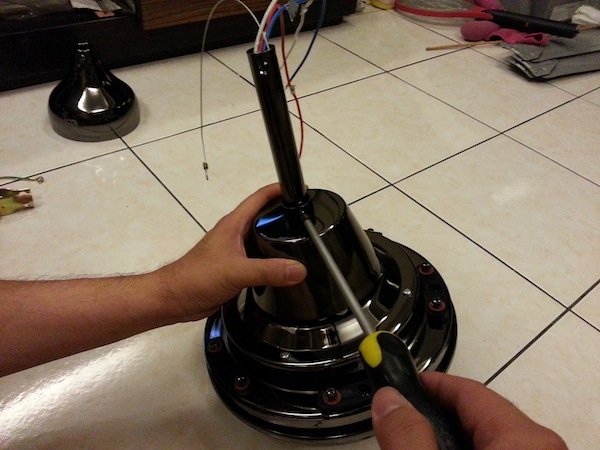
B5. Proceed to screw in both screws which push the rubber pieces to hold the ceiling rod firmly in place. This is the first screw…
B6. …and this is the second. Make sure these 2 screws and the bolt earlier are tightened firmly.
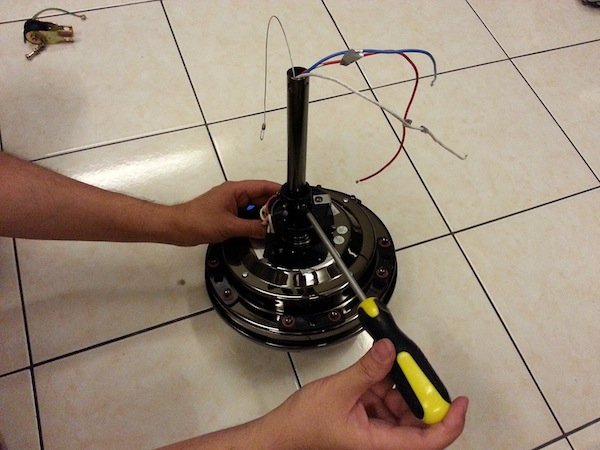
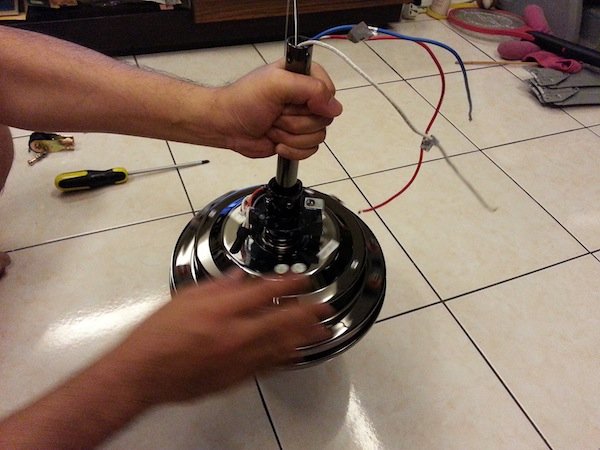
B7. At this point, grasp the ceiling rod with one hand and rotate the motor assembly edge with the other hand, to make sure that everything is firmly attached without any wobble.
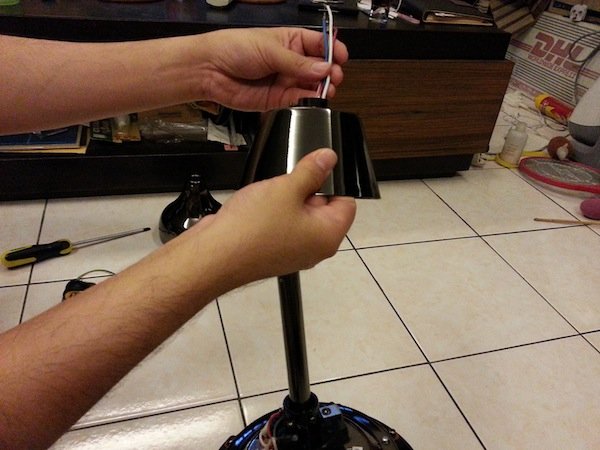
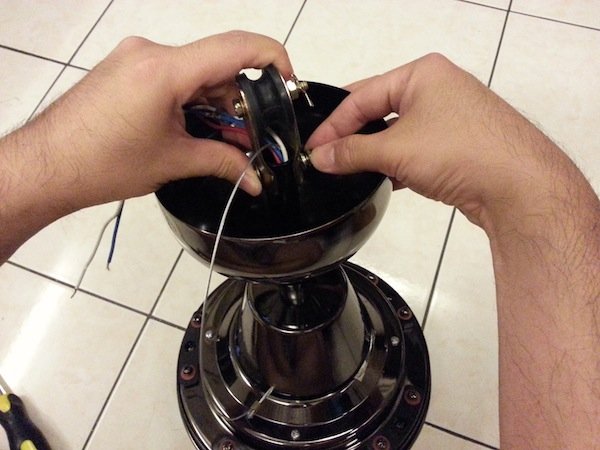
B8. Next, install the cap by first running through the wires and ceiling rod through its hole…
B9. …bringing it all the way down through the ceiling rod BUT just almost touching the motor assembly. The cap must not be in contact with the motor assembly as the motor assembly must be allowed to rotate freely. Allow about a about 6-mm between the cap and motor assembly…
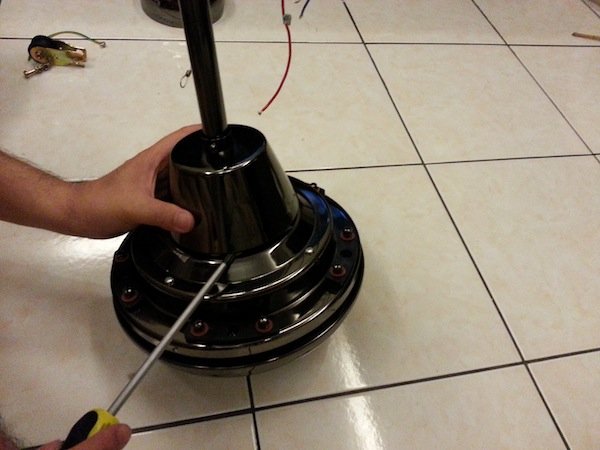
B10. …and tighten the screw at the top of the cap to secure its position on the ceiling rod.
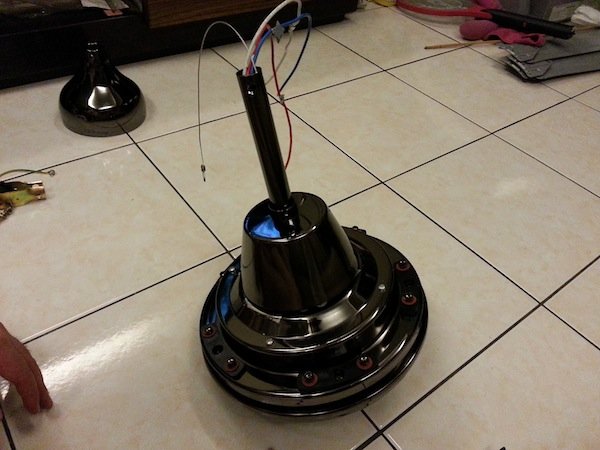
B11. This is the completed setup so far. We are far from done.
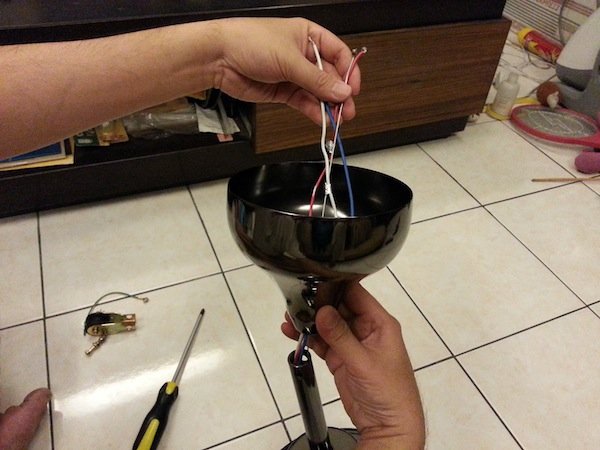
B12. Next, we will install the ceiling cap. Run all the wires from the ceiling rod end through the cap as shown.
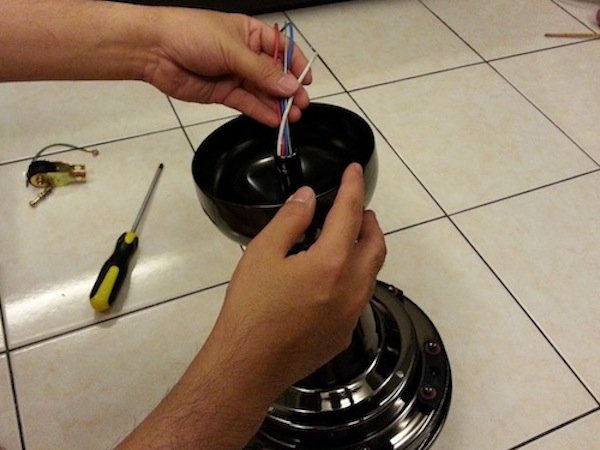
B13. Slide the ceiling cap down the ceiling rod. The wires and safety cable remain above the cap as shown.
B14. Install the rubber spool anchor to the ceiling rod. Allow the three electrical wires to emerge from one side, and the safety cable to emerge from the other side. This is not critical, but I did this for better cable organisation.
NOTE: The Electrical Wires should emerge on the side of the Ceiling Rod with a hole near the top, where the Earthing Wire will be attached to later. This is so that all the Electrical Wires, including the Earthing Wire, will be on the same side. To get an idea of this hole, scroll down to Step B20 below.
B15. This is how the wire and cables are arranged – safety cable on one side (fore) and electrical wires on the other (rear). At this point, the rubber spool anchor is sitting loosely in position on the ceiling rod…
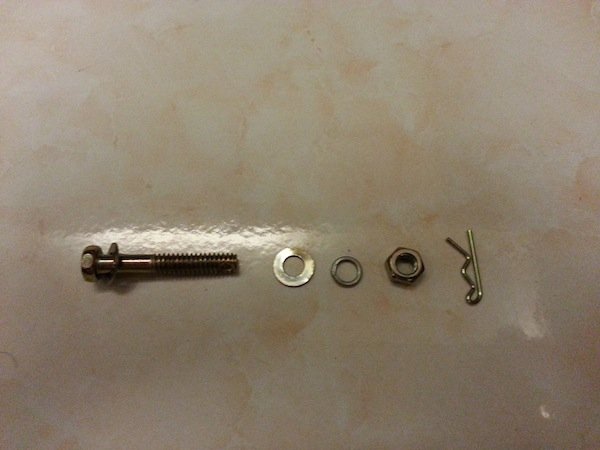
B16. …so we will have to bolt it down in place. Insert the bolt through and screw on the washers and nut.
B17. For reference, the order is shown above. After inserting the bolt through the hole, the other end is first fitted with the flat-ring washer, the broken-ring washer, the nut, and finally the locking pin through the tiny hole on the screw-thread.
B18. For the final tightening, a Phillips screwdriver and a pair of pliers or spanner should be used.
B19. After tightening the nut, complete the bolt work by inserting the locking pin through the tiny hole on the screw-thread. The rubber spool anchor should now be attached firmly in place to the ceiling rod.
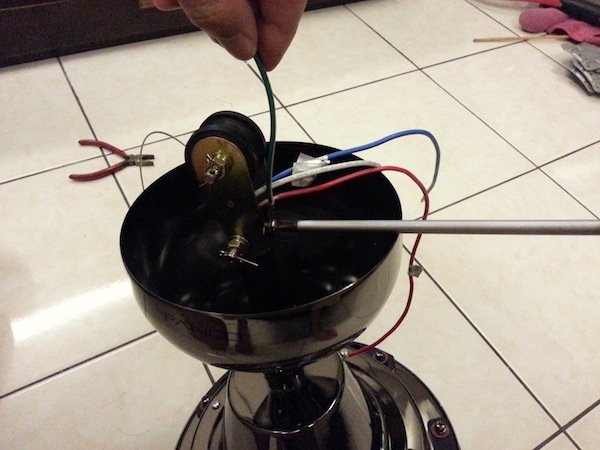
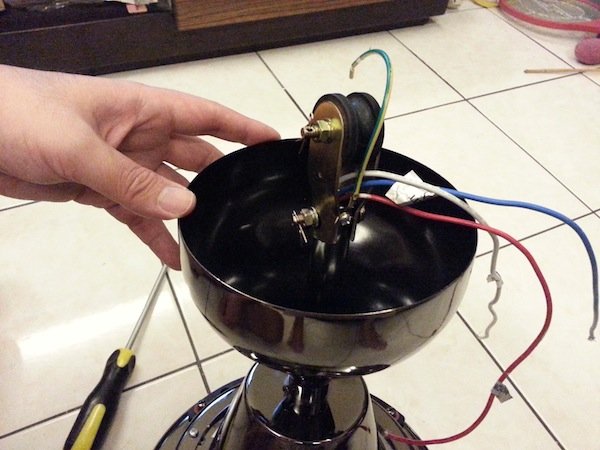
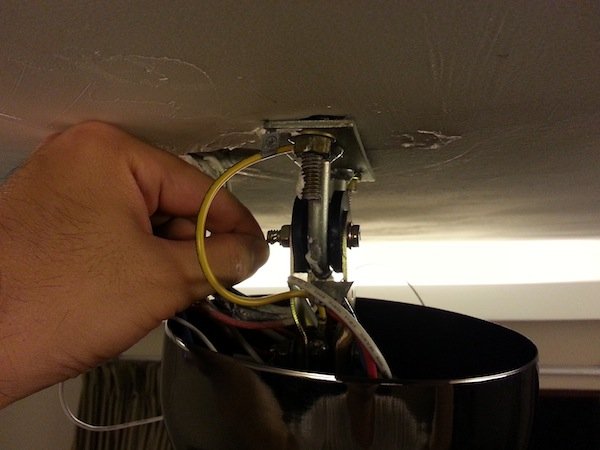
B20. Next, install the yellow-green earthing wire (dismantled earlier) to the ceiling rod by screw through the hole near the top of the ceiling rod. Note that now all the electrical wires (and earthing wire) are on the same (right) side. Safety cable is on the other (left) side.
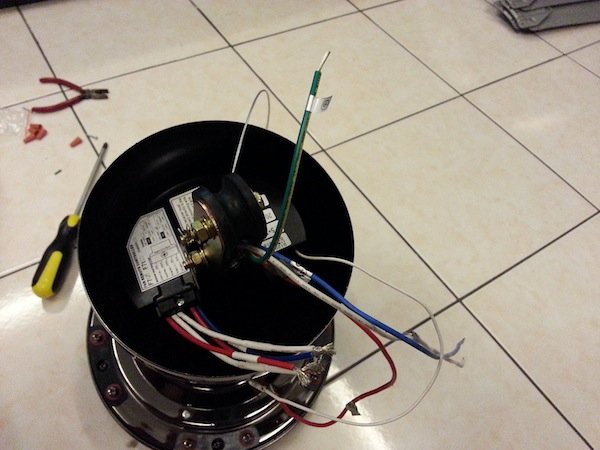
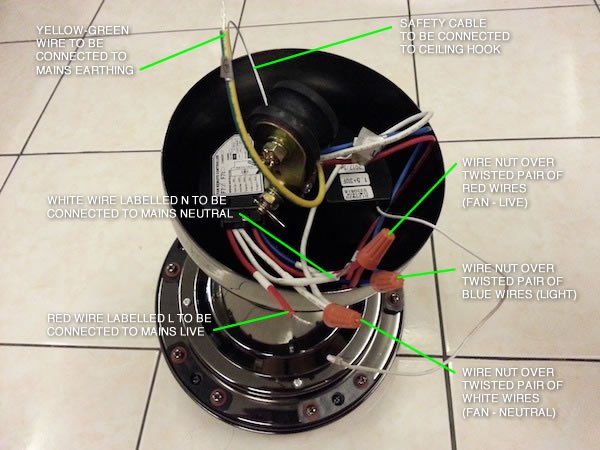
B21. This is how it looks so far. Just to explain a little, the electrical wires consist of red (live), white (neutral), yellow-green (earth) for the fan, and blue (power control) for the lighting.
C. Connecting the Wires on the Remote Controller Unit
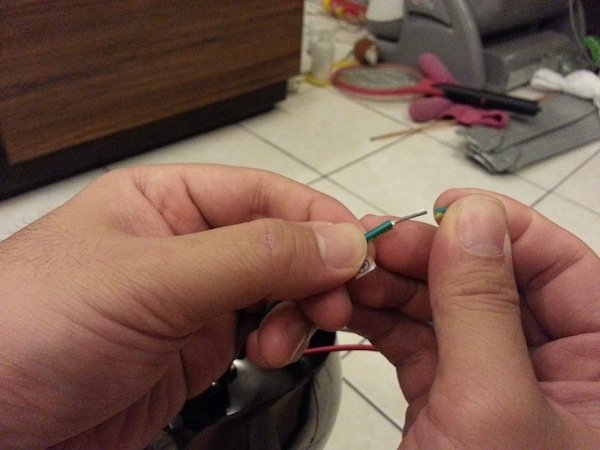
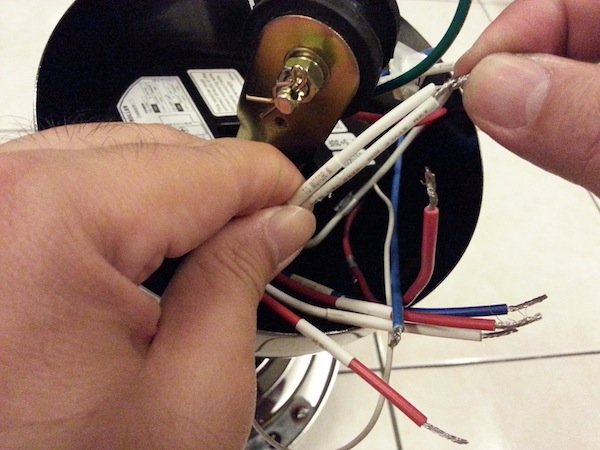
C1. At this point, if your itchy fingers have not gone ahead of themselves, it’s time to remove the insulation at the end of each of the four wires. They have been cut for easy removal by the manufacturer, but in case they are not, just use a wire stripper to do so.
C2. Take the fan remote controller unit and remove the insulation at the end of each wire attached to it. Twist the loose internal conductor wires on each exposed end to tighten them together. Study the fan remote controller unit and try and understand the connections shown on the diagram attached to it.
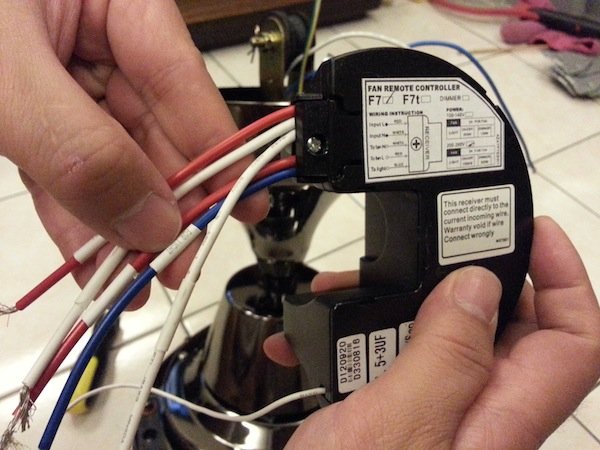
NOTE: It is easy to be intimidated by the abundance of wired to be connected. The little disclaimer on the label which reads something like “This Receiver must be connected directly to the current incoming wire. Warranty void if wire connected wrongly.” certainly doesn’t help to ease the situation. Well, don’t be! It is difficult, but it isn’t that difficult. Just follow the connections on the diagram accurately, and you can’t go wrong by adhering to the colour code and label on each wire. Each wire on the Fan and Remote Controller Unit (RCU) is labelled with its designation, e.g. AC IN L, AC IN N, FAN L, FAN N, LIGHT etc. as shown in the photo above. L for Live, N for Neutral.
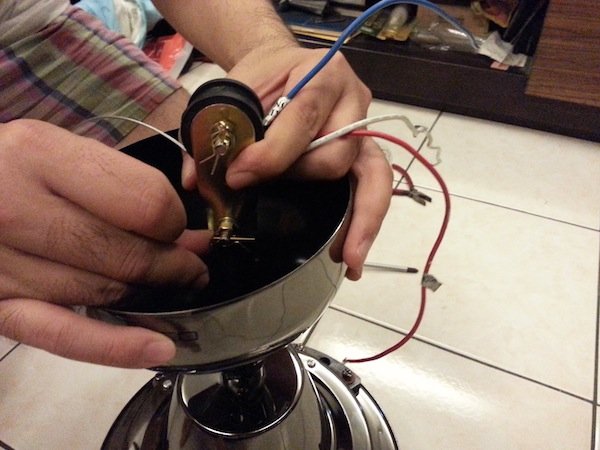
C3. Slip the controller unit into the ceiling cup, sitting it snugly within, with the rod fitted into its channel. Looking on the contours of the controller unit and the design of the ceiling cup, the position of the unit should be with the connection diagram facing up. See the next photo for the complete seating position.
C4. This is how the fan remote controller unit is seated in position within the ceiling cup in relation to the ceiling rod.
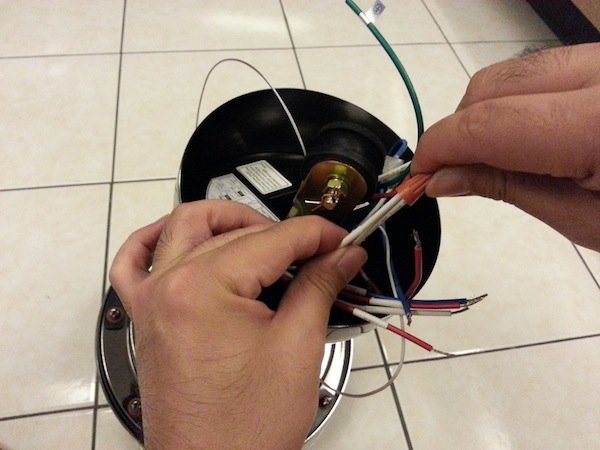
C5. Now, twist the wire ends of similar wires together, based on the colour of the wires from the fan motor, and label on the wires from the fan remote controller unit, to follow the connections shown on the diagram on this controller unit. Also, take heed of the following CONNECTIONS.
CONNECTIONS: The wire-to-wire connections between the Fan Motor Assembly (FMA) and the Remote Controller Unit (RCU) should be twisted as shown in previous photo in Step C5 to the following connections:
RED WIRE (from FMA) to RED WIRE labelled FAN L (from RCU)
WHITE WIRE (from FMA) to WHITE WIRE labelled FAN N (from RCU)
BLUE WIRE (from FMA) to BLUE WIRE labelled LIGHT (from RCU)
NB. Leave the two remaining RED WIRES labelled AC IN L and WHITE WIRES labelled AC IN N on the RCU for the connection to the mains power wire from the ceiling, described in the later steps below.
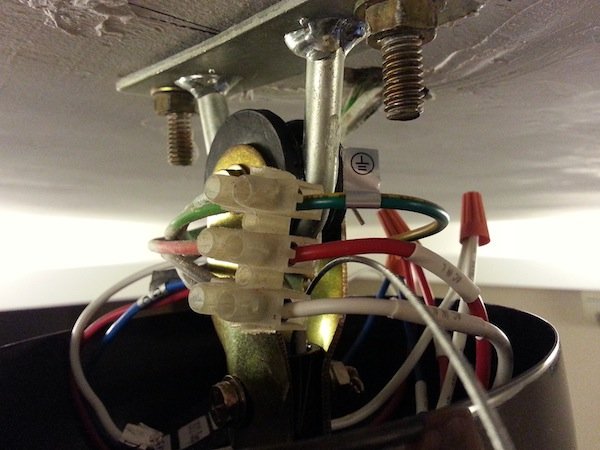
C6. Secure the wire connections with the included wire nuts, twisting them in place over each twisted connected pair of wires.
C7. The photo above shows the required connections so far. Only three pairs of twisted wires shall be secured with wire nuts as shown. Note the other cable and wires without wire nuts left to be connected.
D. Installing the Fan Assembly to the Ceiling
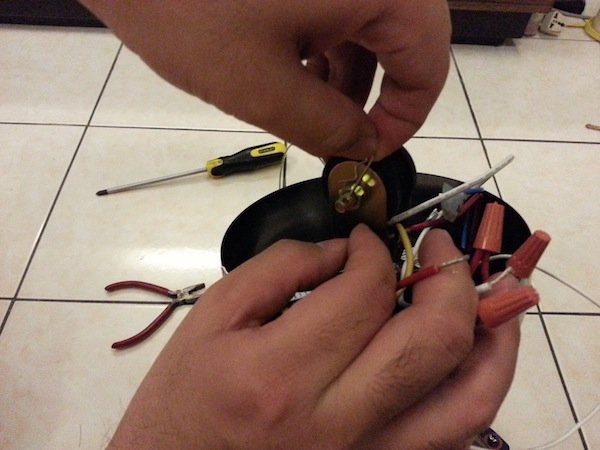
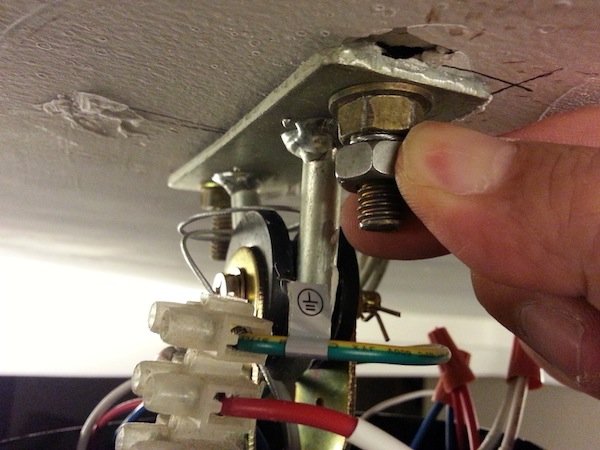
D1. Remove the locking pin from the bolt holding the rubber spool in place…
D2. …and remove the bolt with a screwdriver and a pair of pliers or spanner. This is to remove the rubber spool from the bracket where it is held.
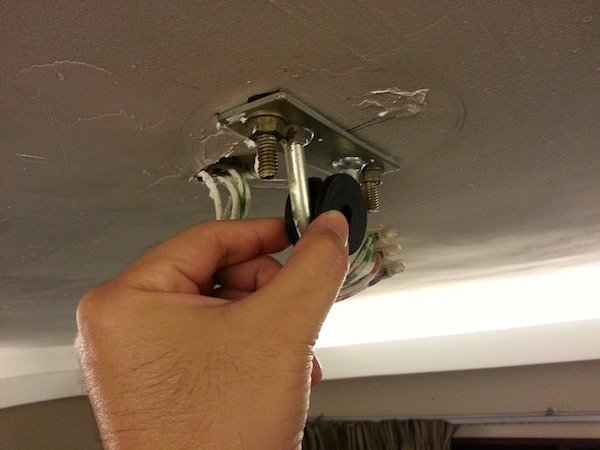
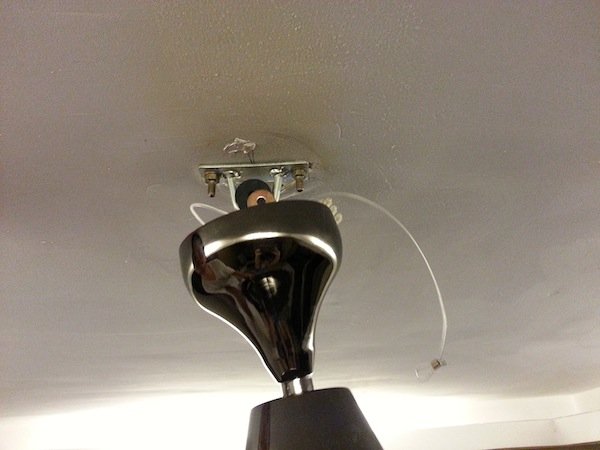
D3. …and place that rubber spool into the ceiling hook.
D4. Lift the entire fan set assembled so far to the ceiling hook…
D5. …and align the rubber spool to the bracket on the rod and fan set where it was previously held. You will need a very strong arm to hold the entire fan set in place while you perform the next step!
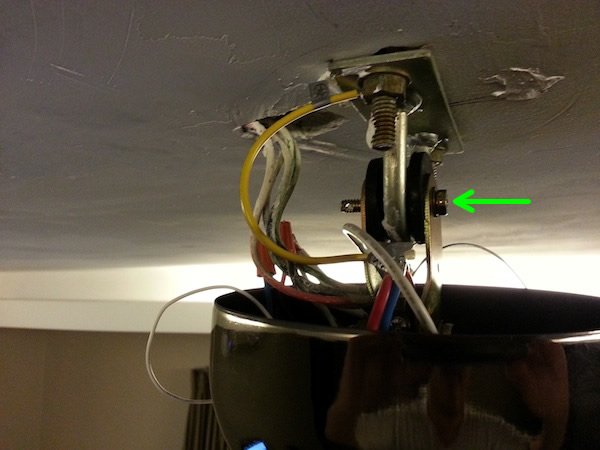
D6. Quickly push the bolt (removed earlier) through the bracket and rubber spool, in the direction as shown by the green arrow in the photo above.
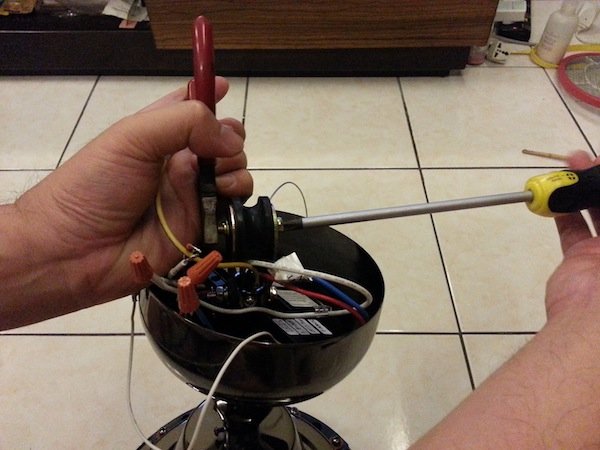
D7. Install the washer and nut and tighten the bolt with a screwdriver and a pair of pliers or spanner, and insert the locking pin to secure the fastening.
E. Connecting to the Main Power Supply
E1. Connect the remaining wires on the fan to the electrical mains power wires from the ceiling using a connector block (as shown) or with wire nuts (provided with the fan). Here I used the connector block, which I prefer of the two methods. Note the following connections:
CONNECTIONS: The connections from fan to electrical mains at this point should be:
RED WIRE labelled AC IN L (from fan) to RED or BROWN WIRE (live from electrical mains)
WHITE WIRE labelled AC IN N (from fan) to BLACK or BLUE WIRE (neutral from electrical mains)
YELLOW-GREEN WIRE with EARTH SYMBOL label (from fan) to YELLOW-GREEN or GREEN WIRE (earthing from electrical mains)
F. Securing the Safety Cable to the Ceiling Hook
F1. Once the electrical connections have been done, tie the safety cable to a dead knot around the ceiling hook. Here as shown in the above photo, I have modified slightly – after tying a few loops around the ceiling hook, I place the loop at the end of the safety cable onto the ceiling hook bolt as shown.
F2. I then screw on a suitable nut (I keep nuts and bolts of various sizes handy in a box) over the safety cable and onto the bolt. This secures the safety cable and its purpose further.
G. Concealing the Ceiling Rod and Remote Controller Unit
G1. As I did not have any installation manual with me, I could only guess that the white tip wire from the remote controller unit was the IR receiver which needed to be exposed slightly to register button presses on the handheld remote control. If my guess is right, this will need to be exposed as shown above.
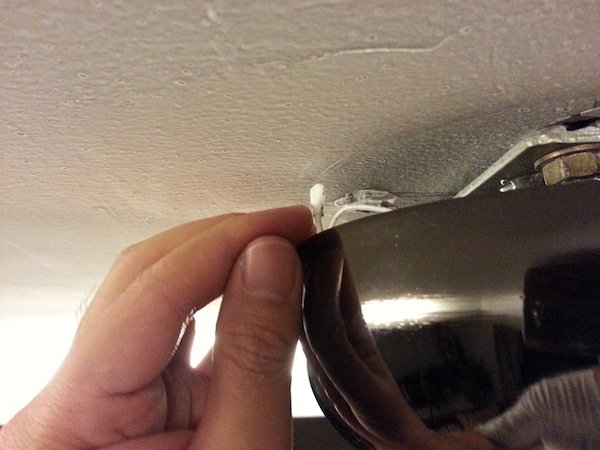
G2. With everything tucked in and the IR receiver exposed slightly in the previous step, proceed to push the ceiling cup up and fasten it in place with the screw near the bottom of the cup, as shown. Note that there should be a slight gap of about one finger between the cup and the ceiling.
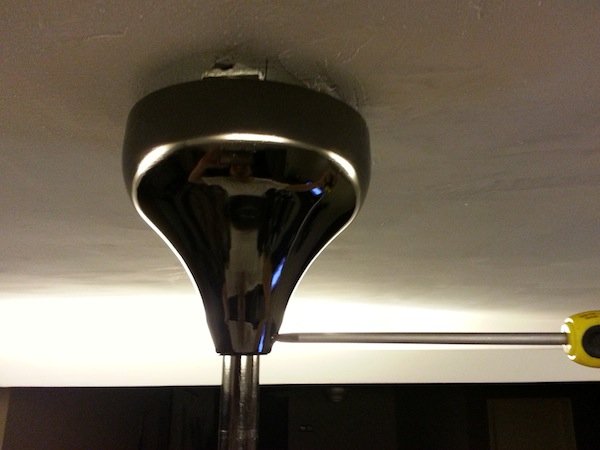
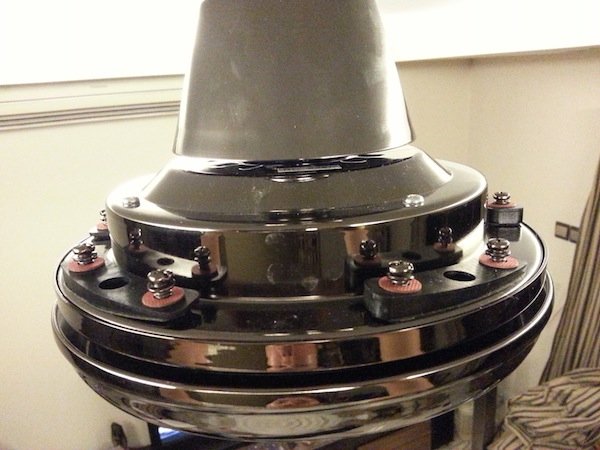
G3. This is how the fan installation look so far. The only items left to assemble are the lighting and fan blades. Let’s start with the lights.
H. Installing the Lighting
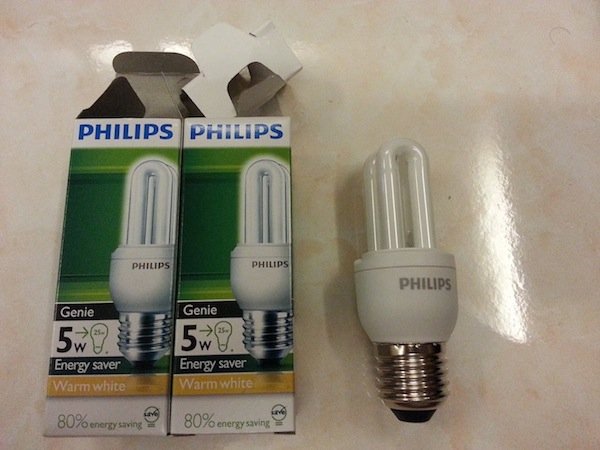
H1. Prepare the compact fluorescent lamps (CFLs) to be installed. I bought 2 nos. of E27 5W warm white CFLs – 5W is the lowest wattage for these bulb types and the reason I chose the lowest wattage is because these are supplementary lighting for those dim moments. For brighter lights, I would use the main lights currently installed at my ceiling. I also chose warm white for its slightly yellowish hue for ambience lighting.
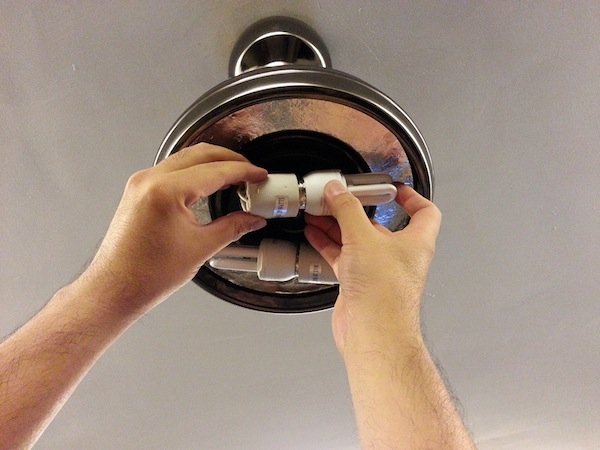
H2. Screw in the E27 CFLs into the bulb holders on the fan. Note that the bulb thread size is E27 – do not buy the wrong size. Check the bulb holder size on your fan to be sure.
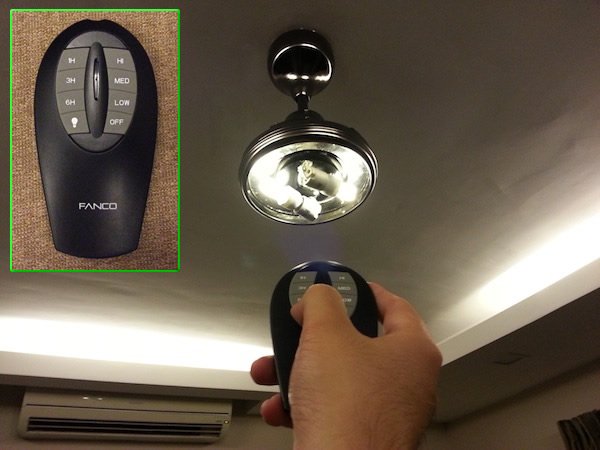
I. Testing the Remote Control Functions
I1. Point the handheld remote control at the fan and press the button with the light bulb symbol. The light should come on. This is the reason I installed the bulbs before the fan blades, so that I can test the remote controller unit and wires have been connected correctly. You may also press the button printed Low at this point, to ensure that the motor is functioning. If there are any errors in the connection of wires, I can still remove the ceiling cup and make adjustments. Now that we know everything is working fine so far, it’s time to fit the fan blades on.
J. Installing the Fan Blades
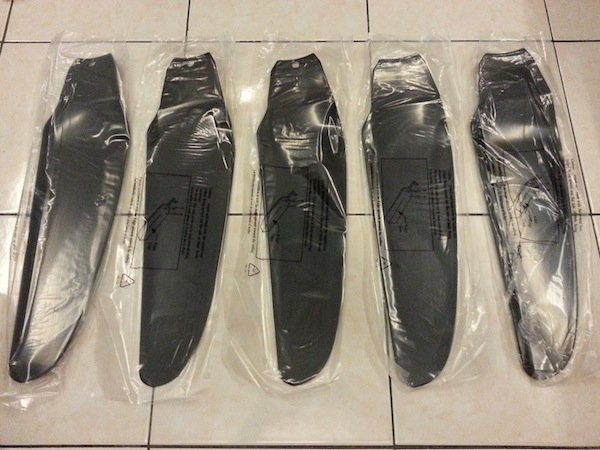
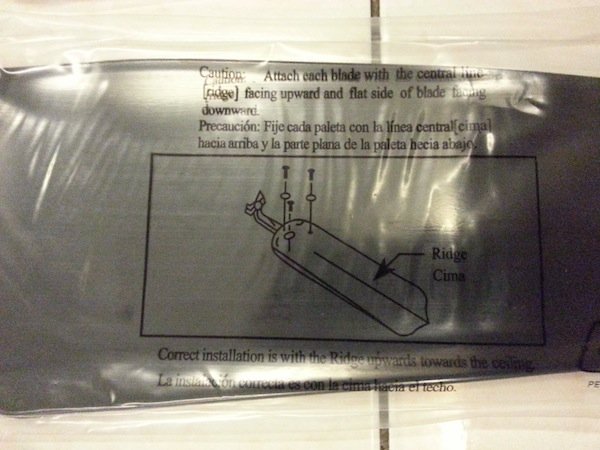
J1. Prepare the 5 fan blades, which are individually wrapped in plastic.
J2. Look at the plastic wrapper and you will notice a diagram showing which side of the fan is up – that is, the ridge side. Ignore the part showing 3 screws, as there are only 2 screws holding each of these blades on the fan. So where are the screws?
J3.. Well, here they are! Remove each set of screws as you’re installing each fan blade to the fan motor.
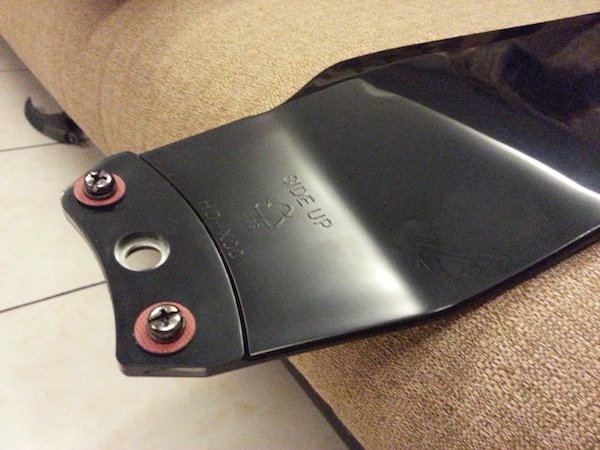
J4. Place the screw and washer as shown. Notice that the words SIDE UP is also embossed on the top surface of the fan blade.
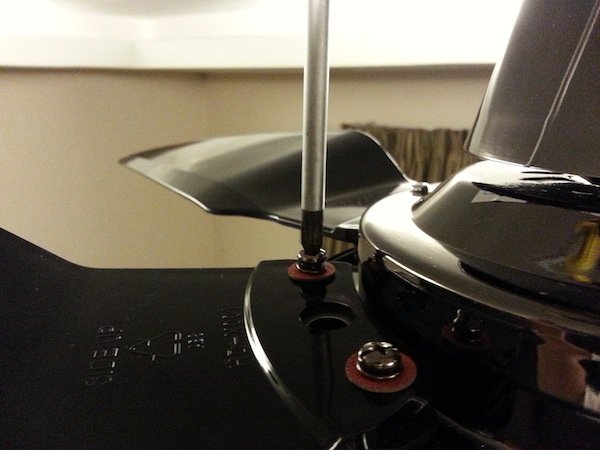
J5. Screw the fan blades on in the cross-star order. I do this to keep the entire fan in equilibrium and in balance as much as possible and so, had installed the blades in the order 1, 3, 5, 2 and 4. This may not be necessary as the fan blades are each weighed on electronic scales for perfect balance.
K. Completing the Overall Ceiling Fan Installation
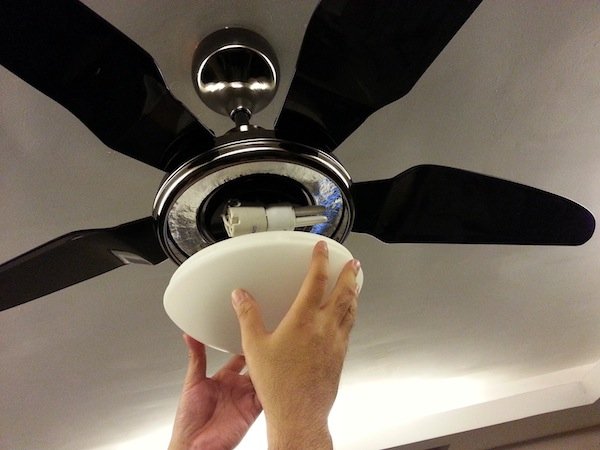
K1. Once all the fan blades are fitted, install the lighting cover by pushing it into the bottom of the fan…
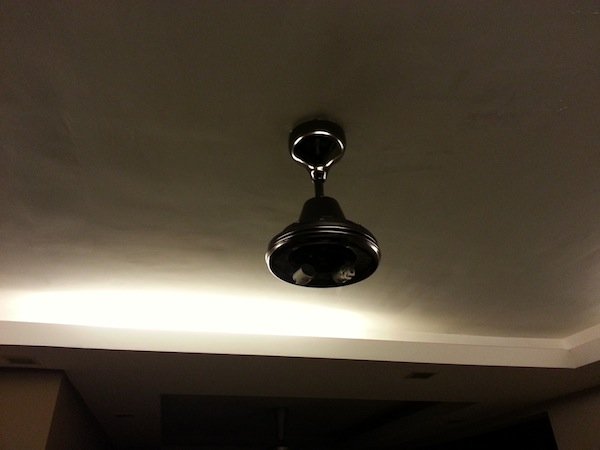
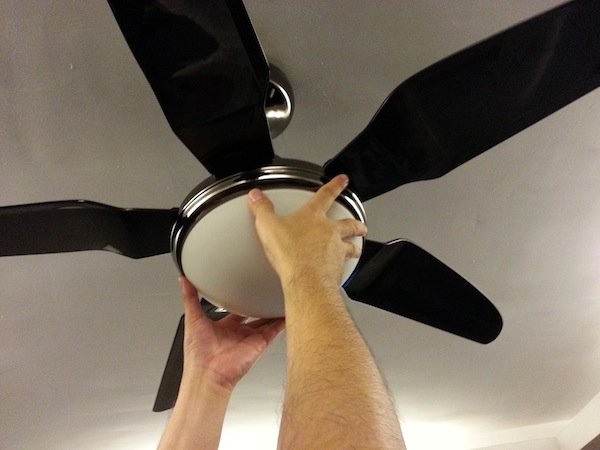
K2. …and twisting it into place. That’s it – we’re done!
K3. That’s it – we’re done! Oh, there’s one more thing that needs to be done…
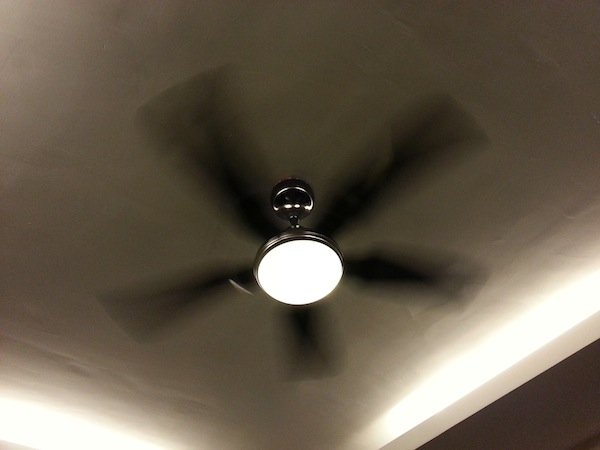
K4. Turn on the fan and make sure it is not wobbling. I’m glad to say the fan did not wobble on the first attempt. If you notice any wobbling, just swap adjacent blades and retest. Keep swapping until the fan stops wobbling. Usually one or two swaps should do the trick!
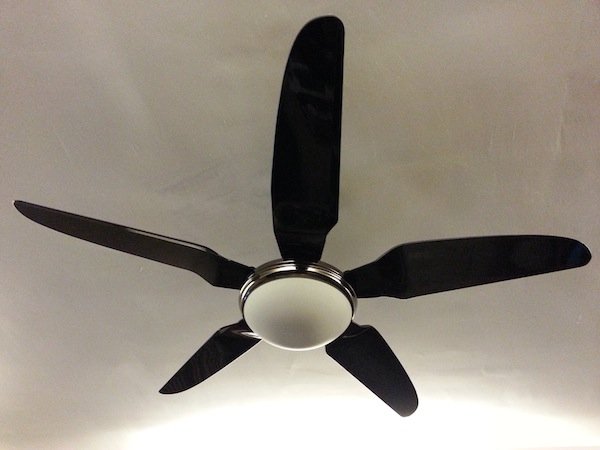
K5. And, this is how the fan looks during the day!
UPDATES:
Mr Chandra Arthur of Del Mar Fans & Lighting was very kind to write to me, to offer readers here with further references on ceiling fan troubleshooting.
Seems like my previous answer replied some while ago had been deleted. To answer your question, yes. With 2 CFLs of at least 15W each, it should be sufficient to light up a room to an acceptable level of brightness.


Is this fan bright enough on its own to light up a room with two CFL light?
Seems like my previous answer replied some while ago had been deleted. To answer your question, yes. With 2 CFLs of at least 15W each, it should be sufficient to light up a room to an acceptable level of brightness.