
Front-loading washing machines are generally considered better than their top-loading counterparts amongst housewives and home owners, for reasons which we will not debate over in this article.
While features such as better efficiency, lower water usage, and less wear and tear on the laundry all make for very good reasons, the main reason I went ahead with a front-loader is because of space constraints.
With a front-loader, I could stack a dryer directly on top of it. This arrangement is ideal for condominium spaces – the minimal areas exposed to sunlight makes a dryer very necessary, and the tight space at the yard makes stacking the dryer on top of the washer sensible in terms of space management – something you can’t do with a top-load washer!
And then of course, there’s the washer dryer combo to consider, but I decided against it.
A Dislocated Drum
“You are advised to consult a serviceman or technician to get this problem sorted, but if you’re interested to give this a go on your own, by all means.”
There is a higher chance of a dislocated drum with front-loading washer than a top-loading one, given the way the asymmetrical forces and weight of the wet clothes are in relation to the centrifugal forces of the drum.
This had happened to me once – no surprises there! So today we going to take a look at how this drum can be properly reattached back to the washer.
You are advised to consult a serviceman or technician to get this problem sorted, but if you’re interested to give this a go on your own, by all means. Let’s get on with it.
Get It On eBay
Fixing a Washing Machine Drum
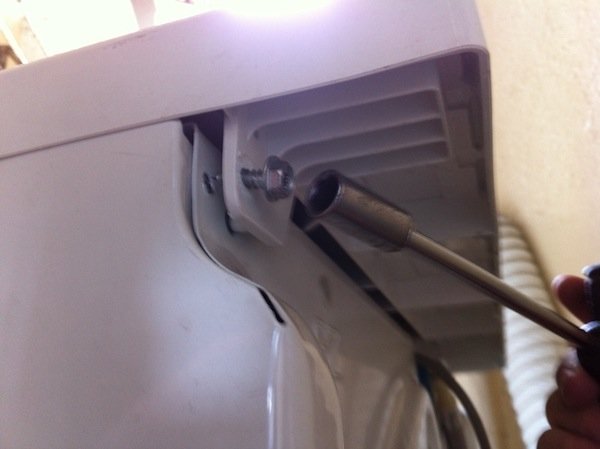
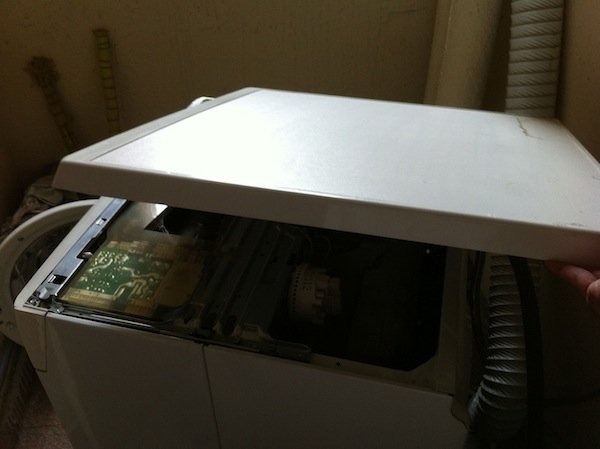
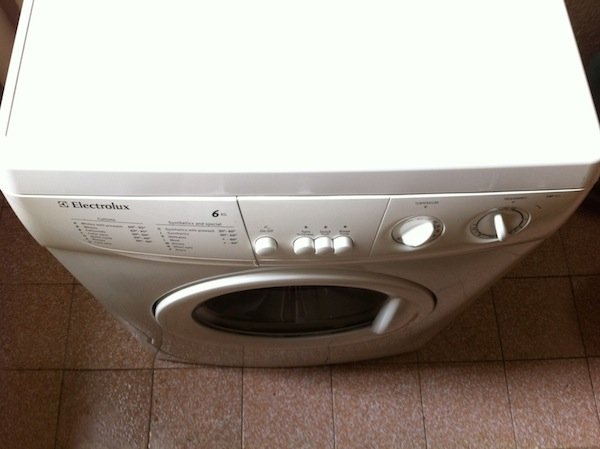
1. Mine is an Electrolux washer. If your washer is like mine, the screws holding the top in place are located behind the washer as shown. In my case, I could not get enough of grip from a screwdriver on the screw, and so had to rely on a socket wrench. Both screws on the left and right ends were removed.
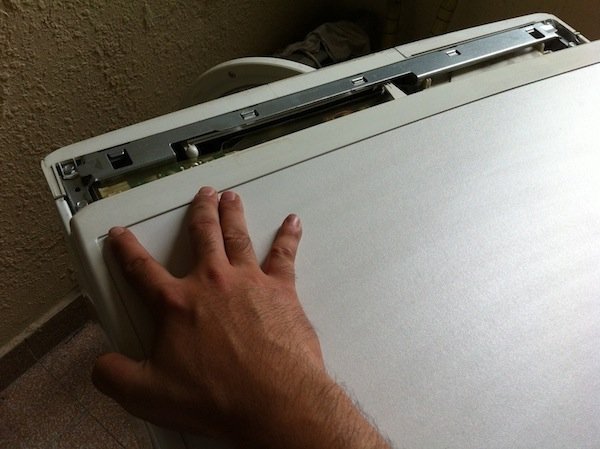
2. With all screws removed (check your model), slide the top off to the rear and lift up to remove the panel.
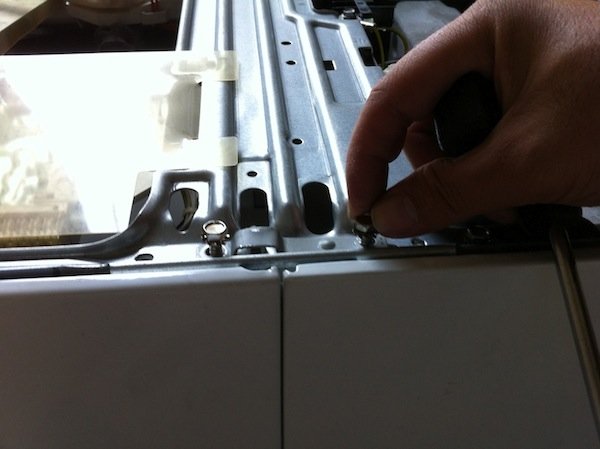
3. The first thing noted was the metal bar securing the hook on the casing has bent from the violent forces of the hook. Unscrew the two bolts holding the metal bar down on the casing by using a socket wrench or spanner, and…
4. …remove the metal bar. I noticed that the drum had already been dislodged from the spring hook inside, but I’ll leave that alone for now.
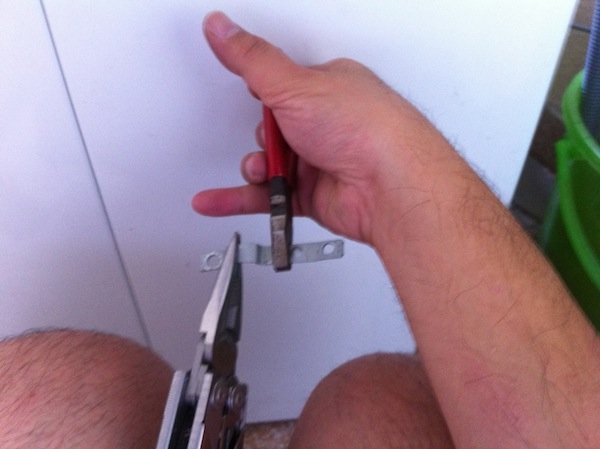
5. Use two pairs of pliers to work the metal piece back to its original shape. It is not difficult to figure out the actual shape. If the metal piece on the other side is not damaged or bent, you could use that as reference.
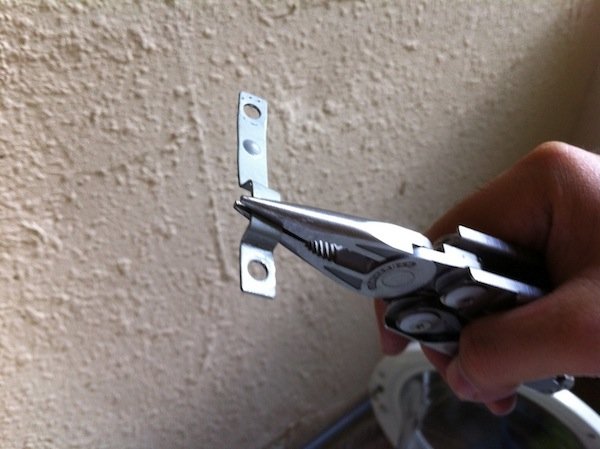
6. A reshaped and corrected metal piece ready to be reinstalled back to its place. However, we’ll put this aside for now and work on the drum first.
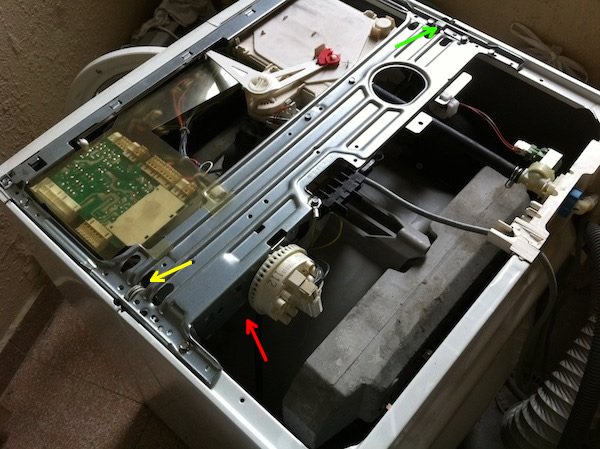
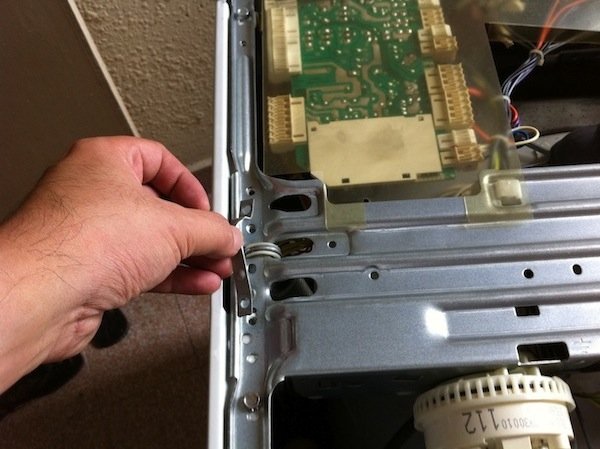
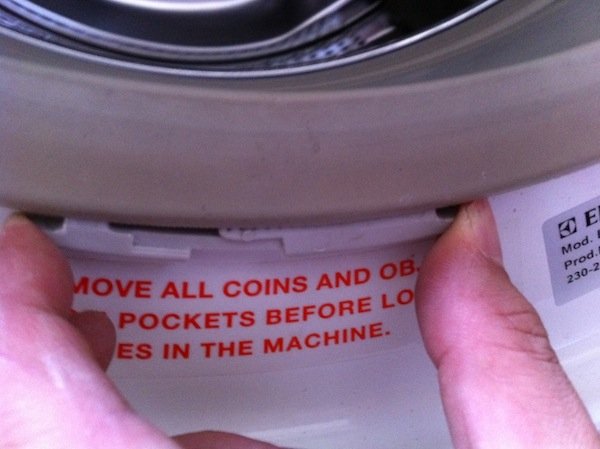
7. The drum in my washer is suspended by two spring hooks on the left (green arrow) and right (yellow arrow) sides. Not that the washer front is the side not facing us – hence the opposite left and right. The drum had been detached from the spring hook at the drum end (red arrow) inside.
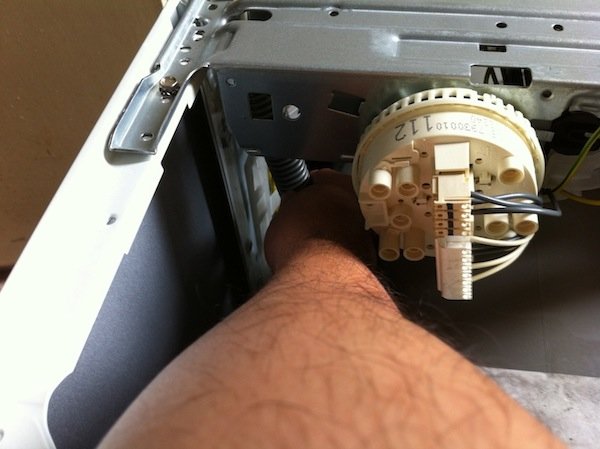
8. Apologise for the lack of photo showing this in close-up, but it was a simple matter of reaching in and reattaching the hook onto the drum. Again, if the other side is not disconnected, you could use that as reference. Move the drum about to ensure that its movement is free and not obstructed.
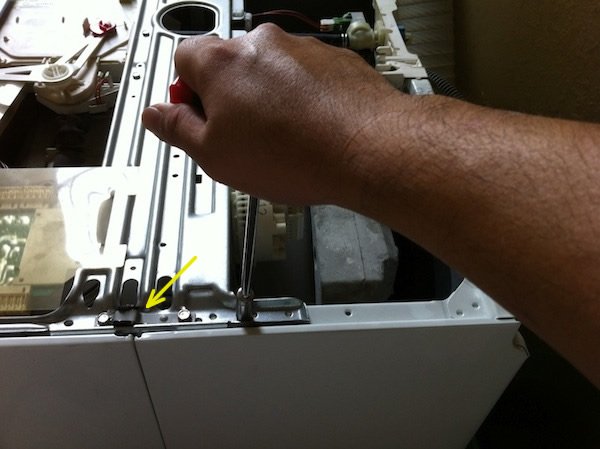
9. Replace the metal bar and screw down the two bolts with a socket wrench, securing it in place.
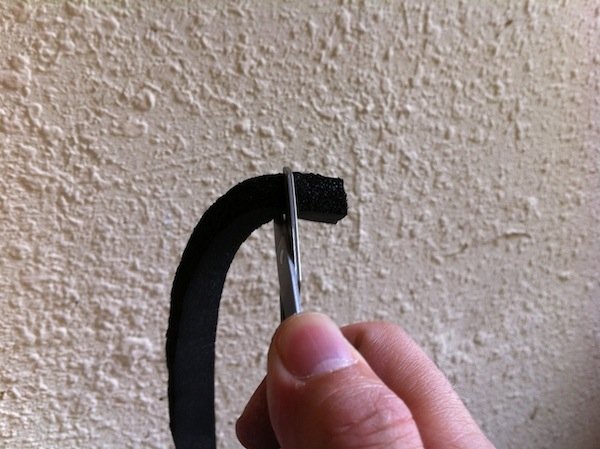
10. This is an alternative option. What I did was cut a small section of PU foam which I had lying around…
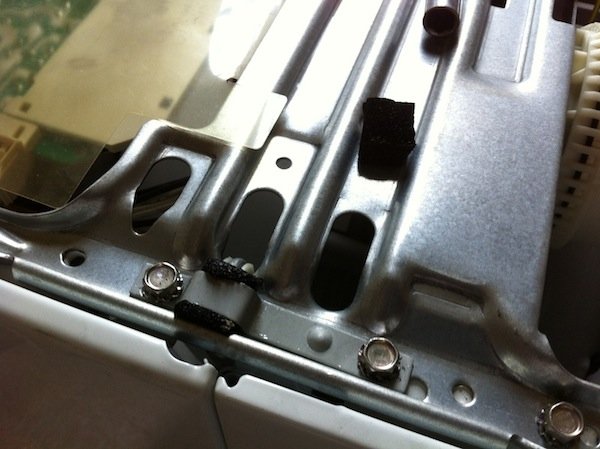
11. …and stuff it in between the metal piece and the hook, to serve as a vibration damper against future shock. There is no need to do this actually. I just happened to have some PU foam around which beckoned to be used. Do not close the top panel just yet.
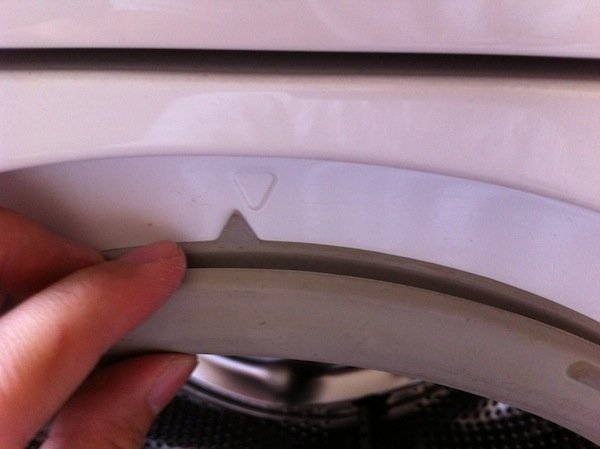
12. Next, check that the arrow on the rubber seal at the front opening is aligned to the arrow on the casing. If the drum had been dislodged on one side like in this case, it would have been unbalanced and could have moved about violently inside, causing the seal to be offset from its original position. Not a problem – we will fix that!
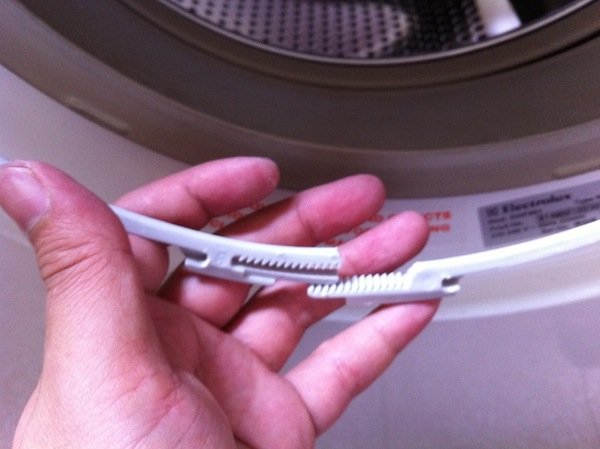
13. Remove the plastic ring clamp which secures the rubber seal in place. Dislodge the ring clamp joint at the jagged edges below.
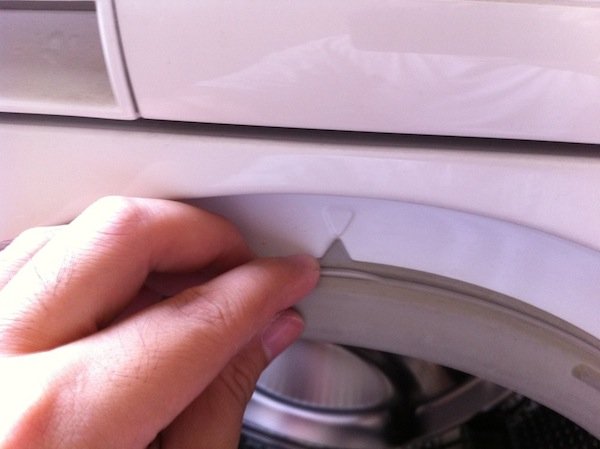
14. Readjust and rotate the rubber seal until both triangle arrows are aligned as shown.
15. Secure back the ring clamp by putting the open ends together. Push or squeeze the jagged edges together until the fit of the clamp on the rubber seal is snug and tight. The jagged edges hold the ends together and keep the ring clamp from opening.
16. Replace the top panel and slide it into place.

17. Drive in the two screw bolts at the rear…
18. …and you should now have a working washing machine in proper order!
SEE ALSO:
DYSON VACUUM CLEANER AND FANS
SUGGESTED WASHER MODELS
SUGGESTED ELECTRIC AND GAS DRYER MODELS
SUGGESTED WASHER DRYER COMBO MODELS