The following article is a preview (and not a review) of the Ryobi P320 AirStrike Brad Nailer as it has not been personally used, and is intended to be an info page with some description, photographs and technical specifications as provided by the manufacturer.
Long before I had any need for a brad nailer or nail gun, I saw the Ryobi 18V One+ P320 AirStrike Brad Nailer and thought it was, to put it mildly, “a damn nice power tool”.
I did not buy it right away; even though it was at quite a reasonable price of about US$170 (or at least I thought it was reasonable), it was still expensive considering I have no need for it. I had thought that a cordless nail gun that doesn’t run on a compressor as most conventional ones do, was quite a novelty.
I began my search at shops for a nail gun and found a Skil one for less than a quarter of the price, a small-powered nail gun which required a compressor to operate. Not willing to settle for second (or third) best, I decided that the Ryobi P320 AirStrike Brad Nailer was the way to go. The only way for me. I bought this online from eBay in the US in the first quarter of 2015 for US$165, excluding shipping. It was a manufacturer refurbished unit.
 |
 |
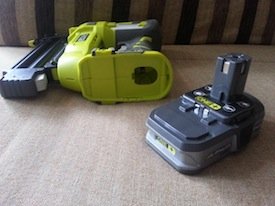
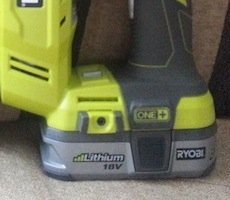
There were a few options of battery packs available, and I finally went with the set that came with a pair of original Ryobi P103 lithium-ion batteries. Oh, and I opted for a set which didn’t come with a battery charger, because any charger that came with this set would have been one which operated at the usual US input voltage of 110V.
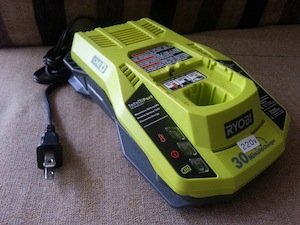
I scoured the net and finally found a modified Ryobi One+ P117 18V IntelliPort Dual Chemistry Charger which works on my local 220V for US$75.00 with shipping. Things were starting to look expensive by now.
 |
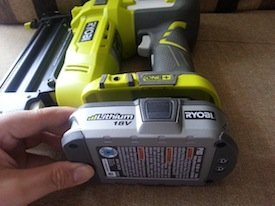 |
It is interesting to note that the Ryobi P320 doesn’t feature a battery charge gauge level on the tool. This is also not found on the P103 lithium-ion battery, but is found on Ryobi’s higher capacity batteries such as the P108 (see links at the end of this article).
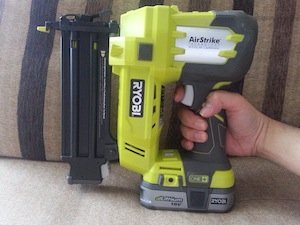
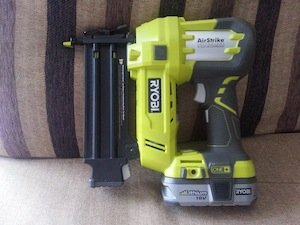
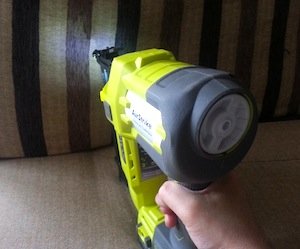
When the Ryobi P320 AirStrike Brad Nailer arrived, I was quite surprised by its burly dimensions. With batteries on, especially with lightweight lithium-ion ones like the P103, the weight of the overall power tool is quite manageable.
I haven’t used the tool for any projects to-date, so I won’t be able to comment on its usage, but I suspect for a continuous 15 to 30 minutes, the hands won’t feel too lethargic even with overhead work.
I chose the P103 specifically for this reason – they seem to pack a good balance between weight and ampere-hours. I didn’t want to be bogged down by the weight of the Ryobi P320, as well as for the other future Ryobi 18V One+ series of power tools that I would eventually buy.
I also plan to buy a higher capacity battery to keep and use as an option when a situation or project calls for high drain usage.
AirStrikeTM Technology
First off, the most impressive and unique feature of the Ryobi P320 Brad Nailer is its AirStrikeTM Technology, which allows the power tool to be operated without the need for bulky and noisy air compressor and unwieldy pneumatic hose.
Instead, pneumatic power is derived from a compressor within which is powered by electric current generated from a battery pack. The Ryobi P320 runs on lightweight lithium-ion batteries, which is also safe when using in wet areas like bathrooms and the outdoors.
 |
 |
Multiple Settings and Controls for Fine Tune Adjustments

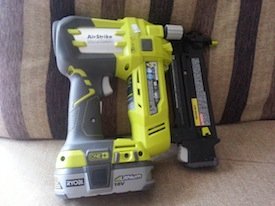
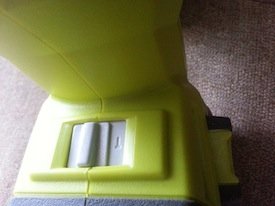
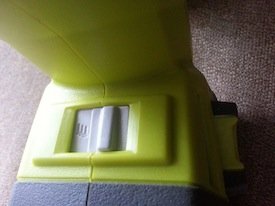
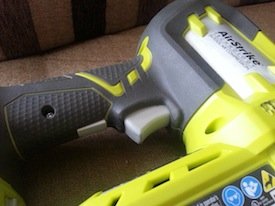
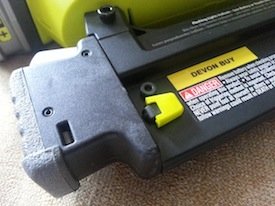
There are a number of controls on the Ryobi P320 that enable the user to adjust settings to suit the job and workpiece. The Ryobi P320 runs on two modes – single sequential mode (T) and contact actuation mode (TTT). This is set on the slide switch near the battery compartment in front and below the trigger switch.
The single sequential mode provides the most accurate nail placement and requires the green workpiece contact at the nose to be depressed against the job surface for nails to be delivered, one at a time. The contact actuation mode on the other hand allows fast repetitive nail placement, and only requires the trigger switch to be continuously depressed, with each nail delivered into the job piece with every manual push of the green workpiece contact.
For safety reasons, to prevent the errant nail from discharging haphazardly, a full depress of the workpiece contact is still required for every nail shot.
 |
 |
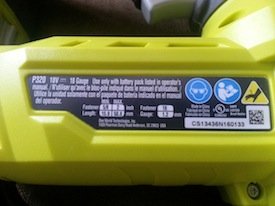
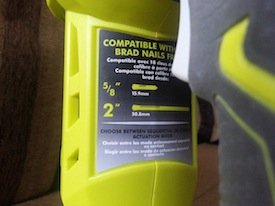
The Ryobi P320 Brad Nailer takes a variety of 18-gauge brad nails, from lengths of 5/8 to 2 inches.
The power tool provides a setting dial on the rear side to control air pressure, the amount of which required is dependent on the size of the brad nails and hardness of the workpiece material.
The setting dial is manually rotated clockwise and counterclockwise to increase and decrease the air pressure delivery. This will ultimately determine the depth of the nail drive into the workpiece. It may be required to drive some nails on a test workpiece to arrive at the appropriate air pressure setting initially, but one should be able to gauge the correct setting with experience and use of the power tool over time.
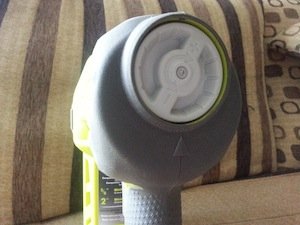
While air pressure setting alone may be sufficient for adjusting the depth of nail drive, for finer adjustments, the depth of drive setting on the tool may be depended on.
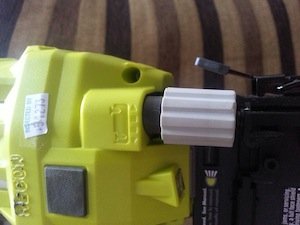
The depth of drive adjustment knob is located near the nose of the tool, and can be employed once the correct air pressure delivery above has been set.
The knob is turned to increase and decrease the drive force – harder materials and longer nails will require a greater force to the correct embedded depth.
It is recommended that the shallowest depth be set, and that batteries should always be removed during any settings to prevent accidental firing.
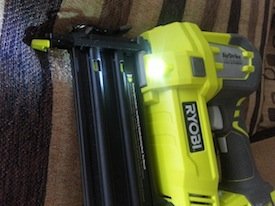
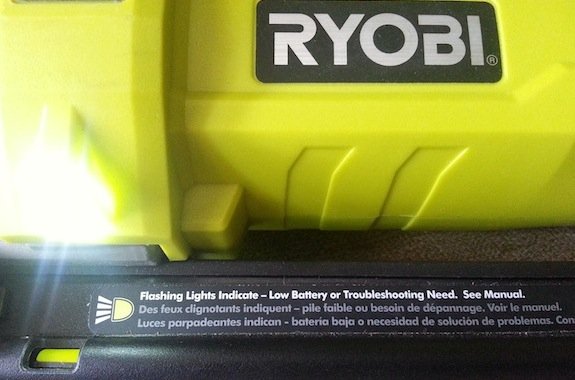
Ryobi P320 On-board Illumination
The Ryobi P320 is fitted with a pair of bright white LEDs which sit on the flanks of the tool tip, thus reducing shadow on the workpiece as much as possible.
The lighting is activated via a grip switch on the handle, which is inadvertently turned on whenever a user grabs the power tool in hand for a nail shot.
There is no setting to turn this feature off, and the LEDs consume very little power for their operation. As I’ve come to learn over the years, some illumination on the workpiece or the lack of it can make the difference between an accurate and inaccurate job result.
 |
 |
 |
|
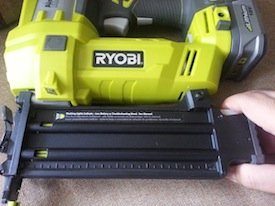
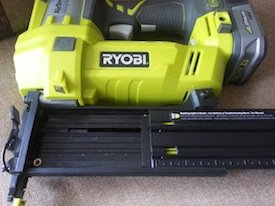
Ryobi P320 Magazine Cartridge and Accessories
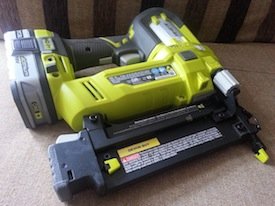
The magazine cartridge has a capacity to store 105 nails at one go, and at the maximum nailer speed of 60 shots per minute, a continuous drive will end in under 2 minutes.
The magazine features a dry-fire lockout feature, which ceases the firing operation when the magazine is left with zero to 5 nails.
 |
 |
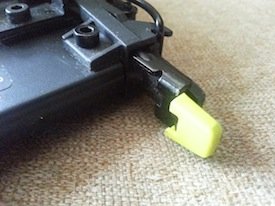
A spare workpiece contact is also found near the bottom of the magazine cartridge, for easy replacement of the one at the nose if it is worn from extended use over time.
If you own a number of Ryobi power tools in the One+ series, you’d hardly be surprised by this sort of ingenuity from this manufacturer. They always seem to find a neat way to keep tools and accessories on-board the power tool.
 |
 |
A belt clip near the base of the Ryobi P320 is removable and can be attached on either side of the tool for left- or right-hand carry. It only requires a standard phillips screwdriver for this adjustment.
As light as it may be, I’m not sure if hooking the power tool on the waist belt may prove uncomfortable, but for short breaks like climbing up and down the ladder, it may be helpful to have the hands kept free. Anyway, I often find belt clips to be in the way and usually just remove these from all my power tools.
Nailer Safety Warnings
Here are some nailer safety warnings extracted from the operation manual, as a note and reminder for users of brad nailers, and myself:
- Always assume that the tool contains nails. Careless handling of the nailer can result in unexpected firing of nails and personal injury.
- Do not point the tool towards yourself or anyone nearby. Unexpected triggering will discharge the nail causing an injury.
- Do not actuate the tool unless the tool is placed firmly against the workpiece. If the tool is not in contact with the workpiece, the nail may be deflected away from your target.
- Disconnect the tool from the power source when the fastener jams in the tool. While removing a jammed fastener, the tacker may be accidentally activated if it is plugged in.
- Use caution while removing a jammed nail. The mechanism may be under compression and the nail may be forcefully discharged while attempting to free a jammed condition.
- Do not use this nailer for fastening electrical cables. It is not designed for electric cable installation and may damage the insulation of electric cables thereby causing electric shock or fire hazards.
- Hold power tool by insulated gripping surfaces, when performing an operation where the nail may contact hidden wiring. Nails contacting a “live” wire may make exposed metal parts of the power tool “live” and could give the operator an electric shock.
- Know your power tool. Read operator’s manual carefully. Learn its applications and limitations, as well as the specific potential hazards related to this power tool. Following this rule will reduce the risk of electric shock, fire, or serious injury.
- Always wear eye protection with side shields marked to comply with ANSI Z87.1. Everyday glasses have only impact resistant lenses. They are not safety glasses. Fol- lowing this rule will reduce the risk of serious personal injury.
- Eye protection which conforms to ANSI specifications and provides protection against flying particles both from the FRONT and SIDE should ALWAYS be worn by the operator and others in the work area when loading, operating or servicing this tool. Eye protection is required to guard against flying fasteners and debris, which could cause severe eye injury.
- Do not drive nails near edge of material. The workpiece may split causing the nail to ricochet, injuring you or a co-worker. Be aware that the nail may follow the grain of the wood, causing it to protrude unexpectedly from the side of the work material or deflect, possibly causing injury.
- Keep hands and body parts clear of immediate work area. Hold workpiece with clamps when necessary to keep hands and body out of potential harm. Be sure the workpiece is properly secured before pressing the fastener against the material. The workpiece contact may cause the work material to shift unexpectedly.
- Keep face and body parts away from back of the tool cap when working in restricted areas. Sudden recoil can result in impact to the body, especially when nailing into hard or dense material.
- Do not attempt to prevent the recoil by holding the nailer against the work. Restriction to the recoil can result in a second fastener being driven from the nailer. During normal use the tool will recoil immediately after driving a fastener. This is a normal function of the tool. Grip the handle firmly, let the tool do the work and do not place second hand on top of tool or near exhaust at any time. Failure to heed this warning can result in serious personal injury.
- Do not drive fasteners on top of other fasteners or with the tool at an overly steep angle as this may cause deflection of fasteners which could cause injury.
- Never place a hand or any part of body in fastener discharge area of tool.
- Never point tool at anyone, even if the safety workpiece contact is not depressed.
- Do not pull the trigger or depress the workpiece contact as accidental actuation may occur, possibly causing injury.
It helps to refer to these warnings and instructions frequently, and to get people who loan your brad nailer to refer to them as well. I don’t have to worry about the second part, as I don’t loan power tools out to anyone. But just in case you do.
Manufacturer’s Specifications
| Specifications | Technical Data |
|---|---|
| Battery voltage | 18V lithium-ion |
| Magazine capacity | 105 nails |
| Nailer speed | up to 60 shots per minute |
| Nail gauge | 18-gauge brad nail |
| Nail length | 5/8 – 2 inches |
| Fastener collation | Glue strip |
| Nails per charge | 800 shots using P108 battery |
| Tool weight: | 2.3 kg (5.0 lbs) |
Conclusion
The Ryobi P320 Brad Nailer supposedly works on wood but doesn’t work on concrete material.
I did some research before buying this and thought it is OK, since I don’t think I will ever need to nail anything onto a concrete wall (always preferring to use a hammer drill and screw instead for better holding power), and most nail guns in the market that run on air compressor don’t either, except for some higher end models that require very large horsepower compressors.
I wasn’t going to get those anyway, so there’s no need or reason to expect the Ryobi P320 to do the same. For all it has to offer, I believe the Ryobi 18V One+ P320 AirStrike Brad Nailer with its cordless convenience is already a full-featured power tool and a great performer.

SEE ALSO:
- Ryobi P506 18V One+ Circular Saw with Laser Guide
- Ryobi P514 18V One+ Reciprocating Saw
- Ryobi P421 18V One+ Angle Grinder